
Hosting NFT metadata on BTFS
Upload your NFT image and metadata JSON to BTFS — TRON's decentralized file network — and use the resulting URIs as your tokenURI.
Prerequisites
BitTorrent File System (BTFS) is a decentralized file-sharing protocol built on the TRON network and the BitTorrent ecosystem. NFT metadata — JSON files describing each token's name, image, and attributes — is stored off-chain and referenced by URI from the contract's tokenURI function. BTFS provides one option for hosting that metadata in a way that does not depend on a single web host staying online.
This guide walks you through uploading both an image and a metadata JSON to BTFS, getting the URIs you can plug into your TRC-721 contract.
Where to host metadata: BTFS vs alternatives
| Option | Cost | Persistence | Decentralization |
|---|---|---|---|
| BTFS | Current client and storage-service pricing | Depends on the storage contract, renewal, and replica availability | Decentralized over BTFS network |
| IPFS + pinning service (e.g., Pinata) | Subscription or pay-per-pin | As long as pinned | Decentralized over IPFS network |
| Arweave | One-time payment for permanent storage | Permanent | Decentralized |
| Self-hosted CDN | Hosting fee | As long as you maintain the host | Centralized |
BTFS is a natural choice within the TRON ecosystem.
Step 1 — Install and initialize BTFS
Install from the official go-btfs repository, then download the latest stable build for your operating system and architecture from Releases and verify the SHA-256 digest shown on the release page.
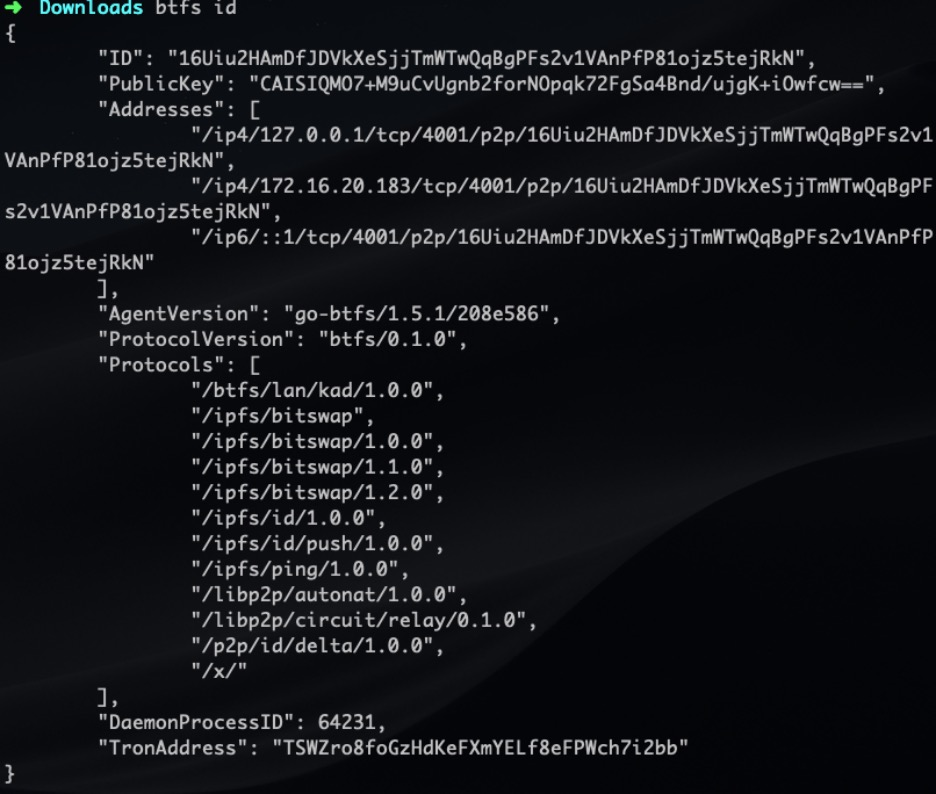
When btfs init initializes the local node, it generates a node key from which both TRON-format and BTTC-format addresses can be derived. After initialization, apply the storage-renter profile to enable purchasing storage from the BTFS network:
btfs config profile apply storage-clientAfter the node starts, run btfs id to inspect its addresses. The gas and storage-payment flow in this guide uses the BTTC-format BttcAddress (0x...); do not confuse it with the TRON Base58-format address (T...).
Step 2 — Start the node and prepare storage funding
Run btfs daemon. On first startup, the node displays its newly generated BTTC address. If it reports an insufficient gas balance, leave the daemon running, verify the address and required balance printed by your local node, and send enough BTT over the BTTC network from a wallet you control to bring that address up to the amount required by this client run. BTT pays BTTC gas; it does not pay storage fees. After detecting the balance, the node continues deploying the vault. When deployment finishes, run btfs id and confirm that BttcAddress matches the address you funded and that VaultAddress is also present.
An uploader is a BTFS storage renter and pays storage providers in WBTT. Obtain WBTT through the installed BTFS Dashboard's current Swap flow or a BTTC wallet you control, then transfer it to this node's BttcAddress. Use the local node to deposit that WBTT into its own vault:
# Show the vault's WBTT balance; output uses 10^18 base units
btfs vault balance

# Example: move 1 WBTT (10^18 base units) from this node's BttcAddress to its VaultAddress
WBTT_AMOUNT_WEI=1000000000000000000
btfs vault deposit "$WBTT_AMOUNT_WEI"
After the deposit transaction confirms, run btfs vault balance again and confirm that the balance increased. Then upload a small file first to validate the complete flow. Dashboard layouts can change between releases, so check the installed version's release notes, btfs vault --help, and on-screen prompts before moving funds.
The legacybtfs wallet depositflow does not apply to current BTFS releases. Never send funds to an address copied from a screenshot, sample output, or third-party guide. Use only the addresses generated by your local node and verified withbtfs id.
Step 3 — Upload the image
Step 3.1 — Add the image to your local node
Prepare an image file (this guide uses coral.jpeg). For upload to BTFS storage providers, add it with Reed-Solomon erasure coding enabled:
btfs add --chunker=reed-solomon coral.jpeg
printf 'Paste the image CID returned by the previous command: '
read -r FILE_CID
The first command returns a CID. Paste that value at the following prompt; subsequent commands reuse it through FILE_CID. Different chunking strategies produce different CIDs for the same file, so do not substitute a CID from an older guide or screenshot.
A plainbtfs addwithout--chunker=reed-solomonadds the file locally using the default chunker. In BTFS 4.1,storage uploadhandles such a CID through thecopy=0compatibility path, which creates only one stored copy. Auto-renewal extends that storage contract; it does not add copies or erasure-code redundancy. Use the plain mode for local or temporary checks, not as the default for long-lived NFT metadata.
Step 3.2 — Upload to the BTFS network
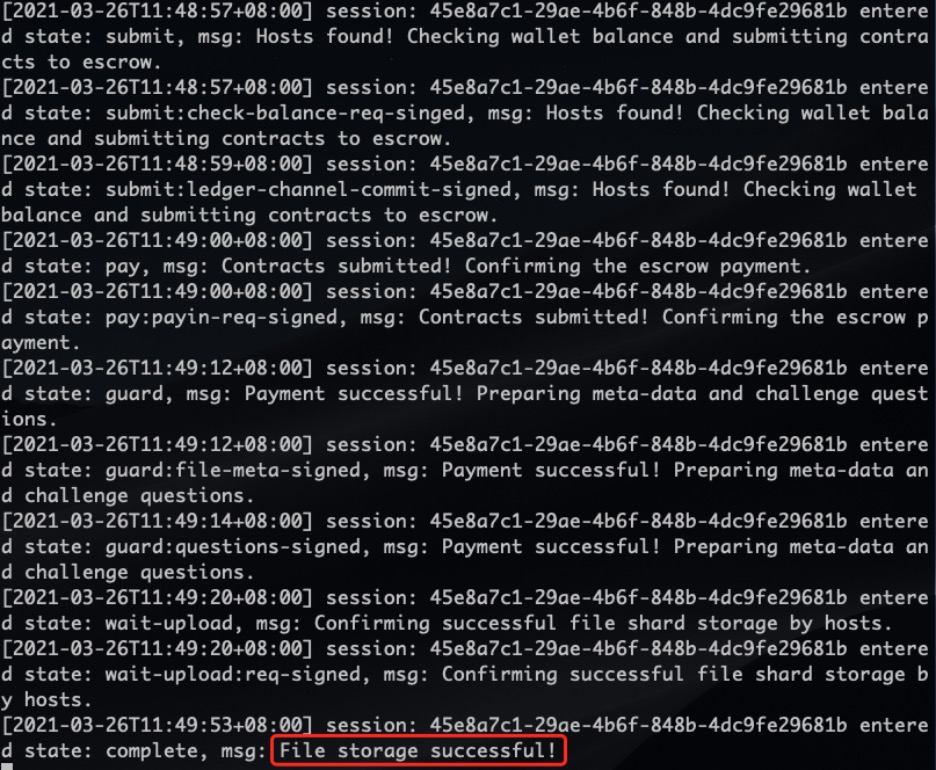
Upload the Reed-Solomon CID returned in Step 3.1; BTFS distributes its data and parity shards to storage providers. For NFT metadata that requires long-term hosting, enable auto-renewal with BTFS 4.1 or later. For a fixed term instead, replace --autorenew with an explicit duration such as --storage-length=30. Auto-renewal still requires sufficient funds in the vault; monitor its balance and renewal status rather than treating a content-addressed URI itself as a guarantee of permanent storage.
The complete example below uses jq to extract the session ID from this upload's response, query its status, and confirm auto-renewal. If jq is unavailable, the script prints a prerequisite message and does not start the upload:
if [ -z "${FILE_CID:-}" ]; then
  printf '%s\n' "Complete Step 3.1 and set FILE_CID in this terminal first" >&2
elif command -v jq >/dev/null 2>&1; then
  UPLOAD_RESULT=$(btfs storage upload "$FILE_CID" --autorenew) &&
    printf '%s\n' "$UPLOAD_RESULT" &&
    SESSION_ID=$(printf '%s\n' "$UPLOAD_RESULT" | jq -er '.ID') &&
    btfs storage upload status "$SESSION_ID" &&
    btfs storage upload renew info "$FILE_CID"
else
  printf '%s\n' "Install jq, then run this block again" >&2
fi
The status command checks only the current state once. Re-run it with the same SESSION_ID until every data and parity shard is complete. You can also run btfs storage upload renew list to see every file with auto-renewal enabled on this node. Auto-renewal only extends the established shard contracts; it does not replace the completion check or add redundancy by itself.
Step 3.3 — Verify the file is retrievable
On a second BTFS node that has never imported this CID, paste the CID from Step 3.1 and retrieve the file to confirm that the node can discover and fetch it over the network:
printf 'Paste the image CID returned in Step 3.1: '
read -r FILE_CID
btfs cat "/btfs/$FILE_CID" > downloaded-coral.jpeg
Calculate SHA-256 digests for the original and downloaded files and confirm that they match:
Linux:
sha256sum coral.jpeg downloaded-coral.jpegmacOS:
shasum -a 256 coral.jpeg downloaded-coral.jpegIf a second node is unavailable, retrieve https://<GATEWAY_HOST>/btfs/<CID> through an independent BTFS gateway and compare the content; do not perform this check through the uploader node's own local gateway. Retrieval proves availability only at the time of the check; it does not by itself prove that independent providers hold the shards or guarantee long-term availability. Combine it with the completed status of every shard, renewal status, and vault balance. A public gateway may also be rate-limited, migrated, or retired.
Step 4 — Construct the metadata JSON
Create a JSON file (this guide uses coral.json) following the TRC-721 metadata schema. Replace REPLACE_WITH_IMAGE_CID with the image CID returned in Step 3.1. The content-addressed btfs://<CID> form keeps the metadata independent of one HTTP gateway:
{
  "name": "Coral #1",
  "description": "A unique TRC-721 collectible.",
  "image": "btfs://REPLACE_WITH_IMAGE_CID",
  "attributes": [
    { "trait_type": "Color", "value": "Pink" },
    { "trait_type": "Rarity", "value": "Rare" }
  ]
}
Step 5 — Upload the metadata JSON
Upload the JSON the same way as the image: run btfs add --chunker=reed-solomon coral.json, save the returned metadata CID, and assign it to the FILE_CID used by Step 3.2. The image and metadata are separate CIDs; confirm that every shard completes for both uploads. When using auto-renewal, also run renew info for each CID and confirm that both are enabled:
btfs add --chunker=reed-solomon coral.json
printf 'Paste the metadata CID returned by the previous command: '
read -r METADATA_CID
FILE_CID=$METADATA_CID
Then upload the metadata file to BTFS Storage by rerunning the command block in Step 3.2 in the current terminal. The assignment above makes that block use the metadata CID.

After the upload completes, paste the CID from Step 5 on the independent node or gateway used in Step 3.3, then validate the returned JSON:
printf 'Paste the metadata CID returned in Step 5: '
read -r METADATA_CID
btfs cat "/btfs/$METADATA_CID"
Step 6 — Use the URI as tokenURI when minting
tokenURI when mintingConstruct btfs://<METADATA_CID> from the metadata CID returned in Step 5 and pass it as the uri argument to safeMint. Before minting, confirm that the target wallet, marketplace, or indexer resolves btfs://. If it accepts only HTTPS, use a gateway conversion layer that you can maintain or replace instead of binding the token to an example gateway domain. See Issuing a TRC-721 token for the full minting flow.
Related resources
- TRC-721 — standard overview
- TRC-721 protocol interfaces — function and event reference for TRC-721
- Issuing a TRC-721 token — deployment and minting walkthrough
Updated 22 days ago