Deploying a Contract
Preparation
Before deploying TRON smart contracts, please ensure the following preparations are complete:
- Login to the TRON wallet account used for deployment via the TronLink extension.
- Select the correct network environment in TronLink (Mainnet / Nile Testnet / Shasta Testnet).
This tutorial will use the Shasta Testnet as an example to demonstrate the contract deployment process.

Note:Claim test coins on the Shasta Testnet here.
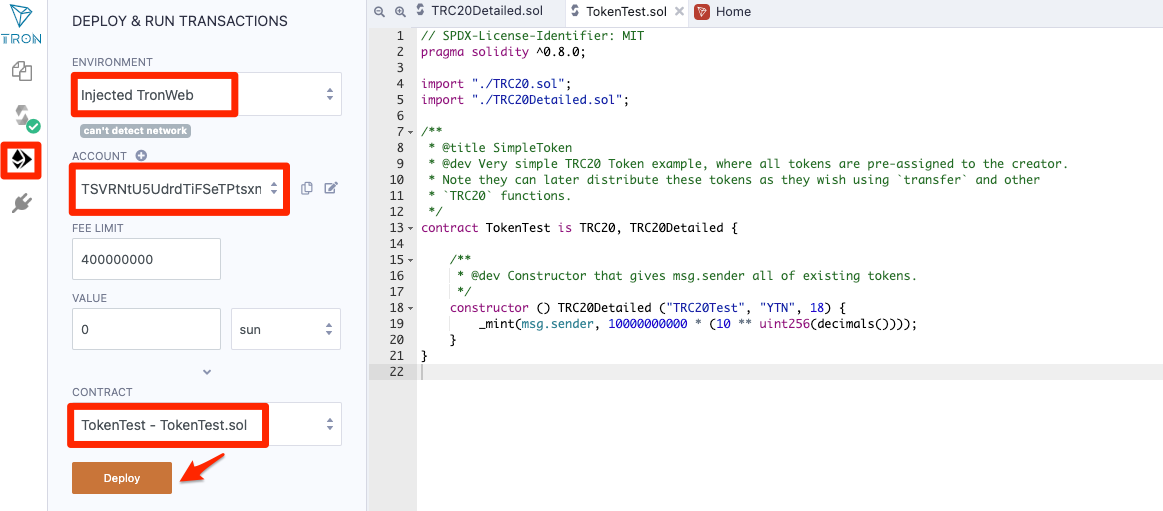
Deploy Contract
Upon successful compilation of the contract, enter the DEPLOY & RUN TRANSACTIONS tab in Tron-IDE and configure deployment parameters as follows:
- ENVIRONMENT: Select
"Injected TronWeb"; - ACCOUNT: Select the wallet address to be used for deploying the contract;
- CONTRACT: Select the main contract to be deployed;
- Fee Limit and TRX amount to be passed into the contract: Fill in according to actual needs.
After confirming all parameters are correct, click the Deploy button to deploy the contract.
Confirm Successful Contract Deployment
After deployment, you can confirm whether the contract has been successfully deployed by querying the transaction status. For specific methods, please refer to Transaction Confirmation Methods. You can also use the following code to query:
curl -X POST https://api.shasta.trongrid.io/walletsolidity/gettransactioninfobyid -d '{"value":"17532357496d30002a9344afa53be0c53187d2c2f531a96c8a4c5e73e0647521"}'Updated 4 months ago