Issuing a TRC-20 Token
Deploying a smart contract on the TRON blockchain can be done in several ways, depending on the tools and platforms you choose. In this guide, we will walk you through the procedure using the TRONSCAN Contract Deployment tool as an example. For other tools, please refer to their official documentation for detailed instructions.
Prerequisites
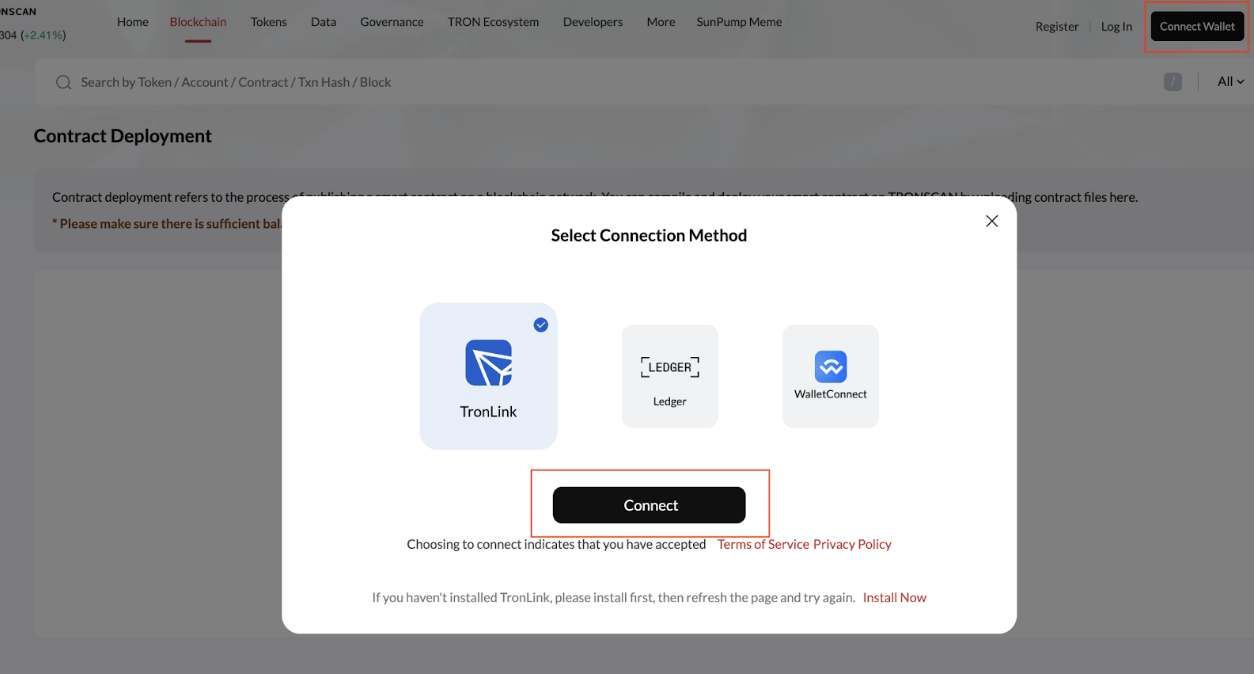
1. Prepare Your TronLink
Make sure you have installed the TronLink extension and are connected to the correct network (Mainnet or Testnet). If you haven’t installed TronLink yet, please visit TronLink to download the latest version.
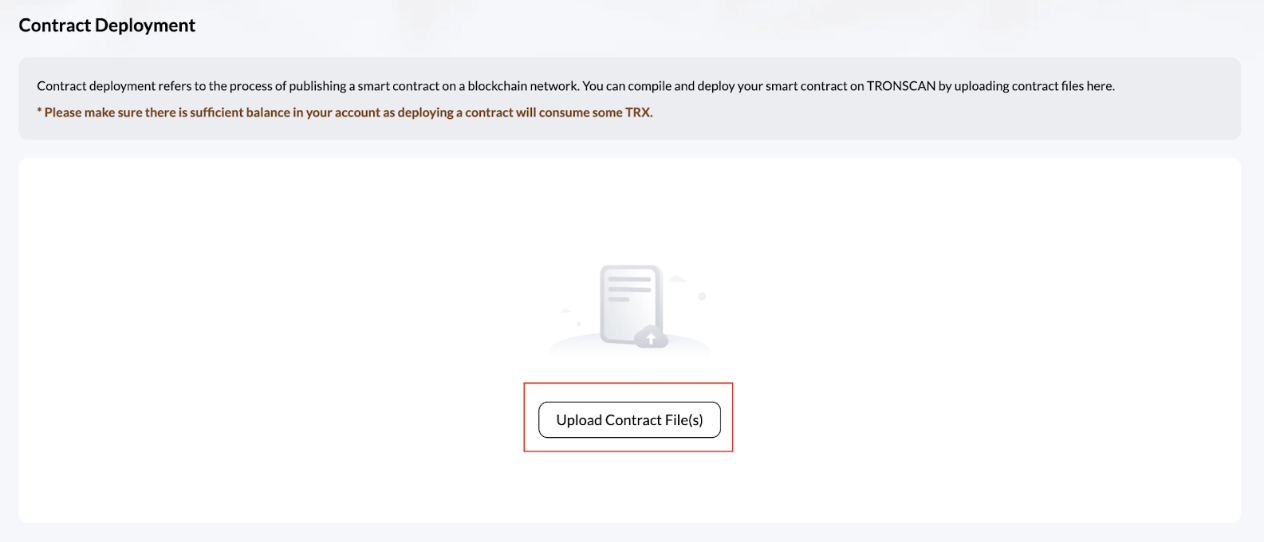
2. Prepare the TRC-20 Contract Code
Before deploying a custom TRC-20 token on the TRON blockchain, make sure you have your contract code finalized. To illustrate the deployment procedure, this guide uses the TRC-20 Contract Template as an example. The template provides a solid foundation and includes these essential files: ITRC20.sol, SafeMath.sol, TRC20.sol, TRC20Detailed.sol, and Token.sol.
Before deployment, adjust the following parameters in the Token.sol file from the template:
- Token Name: Change the name to your desired token name. Example: "TestTokenName";
- Token Symbol: Modify the token symbol to represent your token's symbol (e.g., TTN);
- Decimals: Set the number of decimal places for your token. The most common value is 18, but you can specify the value as needed;
- Total Supply: Define the total supply of your token. In the constructor, the initial supply is multiplied by 10^decimals (e.g., 10000000000) to account for precision. Adjust this number to suit your needs.
// 0.5.1-c8a2
// Enable optimization
pragma solidity ^0.5.0;

import "./TRC20.sol";
import "./TRC20Detailed.sol";

/**
 * @title SimpleToken
 * @dev Very simple TRC20 Token example, where all tokens are pre-assigned to the creator.
 * Note they can later distribute these tokens as they wish using `transfer` and other
 * `TRC20` functions.
 */
contract Token is TRC20, TRC20Detailed {

    /**
     * @dev Constructor that gives msg.sender all of existing tokens.
     */
    constructor () public TRC20Detailed("TestTokenName", "TTN", 18) {
        _mint(msg.sender, 10000000000 * (10 ** uint256(decimals())));
    }
}
3. Deploy the TRC-20 Contract
Deploying a TRC20 contract on the TRON blockchain is a straightforward process when using the TRONSCAN Contract Deployment Tool. Below is a step-by-step guide to help you deploy your TRC-20 contract with ease.
- Connect your wallet and make sure the account holds enough TRX.
- Upload the contract files, which include ITRC20.sol, SafeMath.sol, TRC20.sol, TRC20Detailed.sol, and Token.sol.
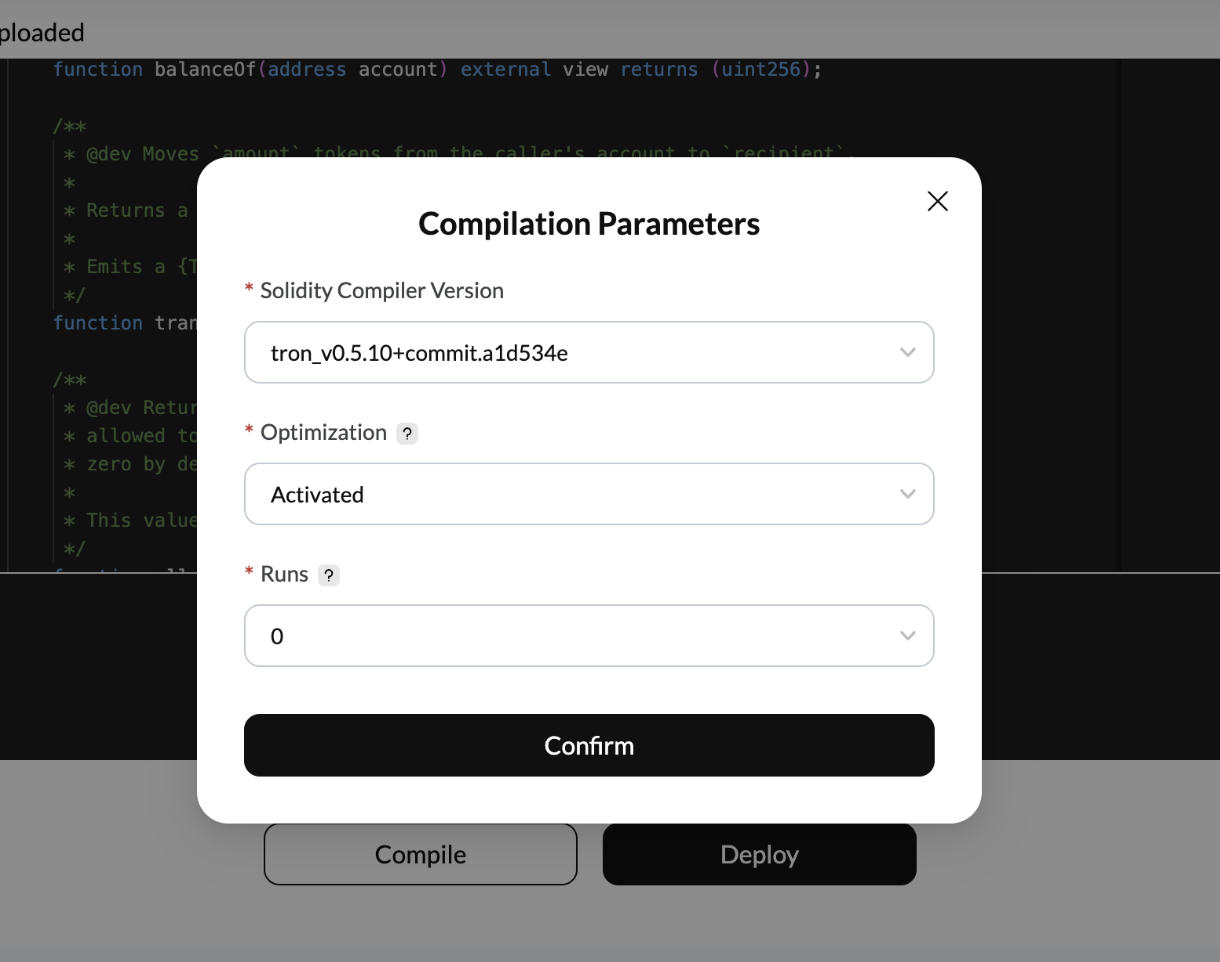
- Compile the contract, and specify the parameters based on your actual needs. Below is an example used for compiling.
- Solidity Compiler Version: Select 0.5.10;
- Optimization: Set to Activated;
- Runs: Use the default value 0.

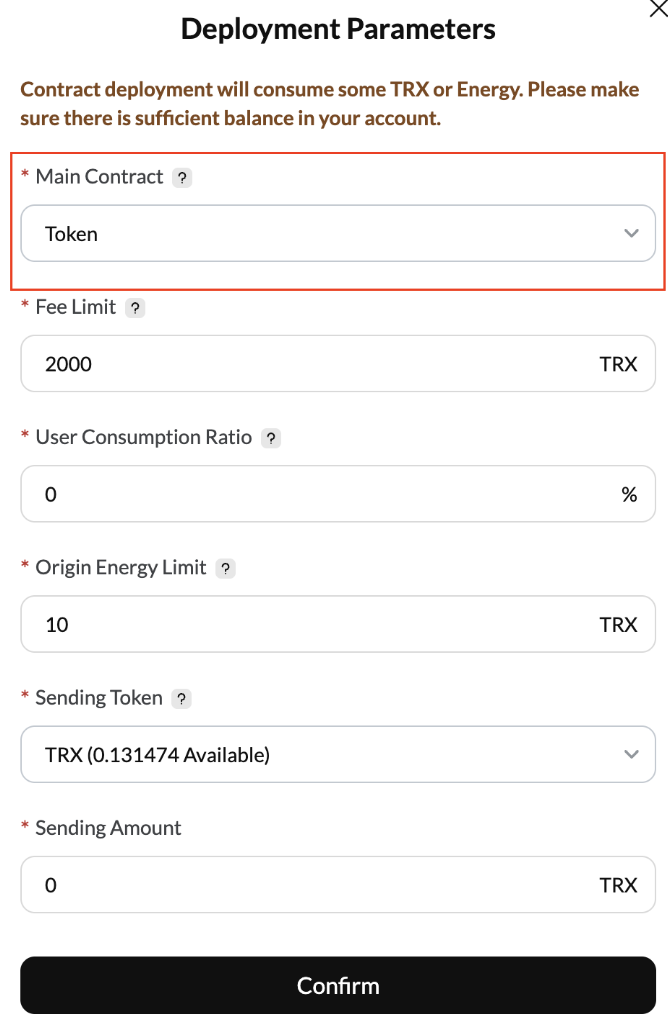
- Deploy the contract, and make sure to choose "Token" as the main contract.

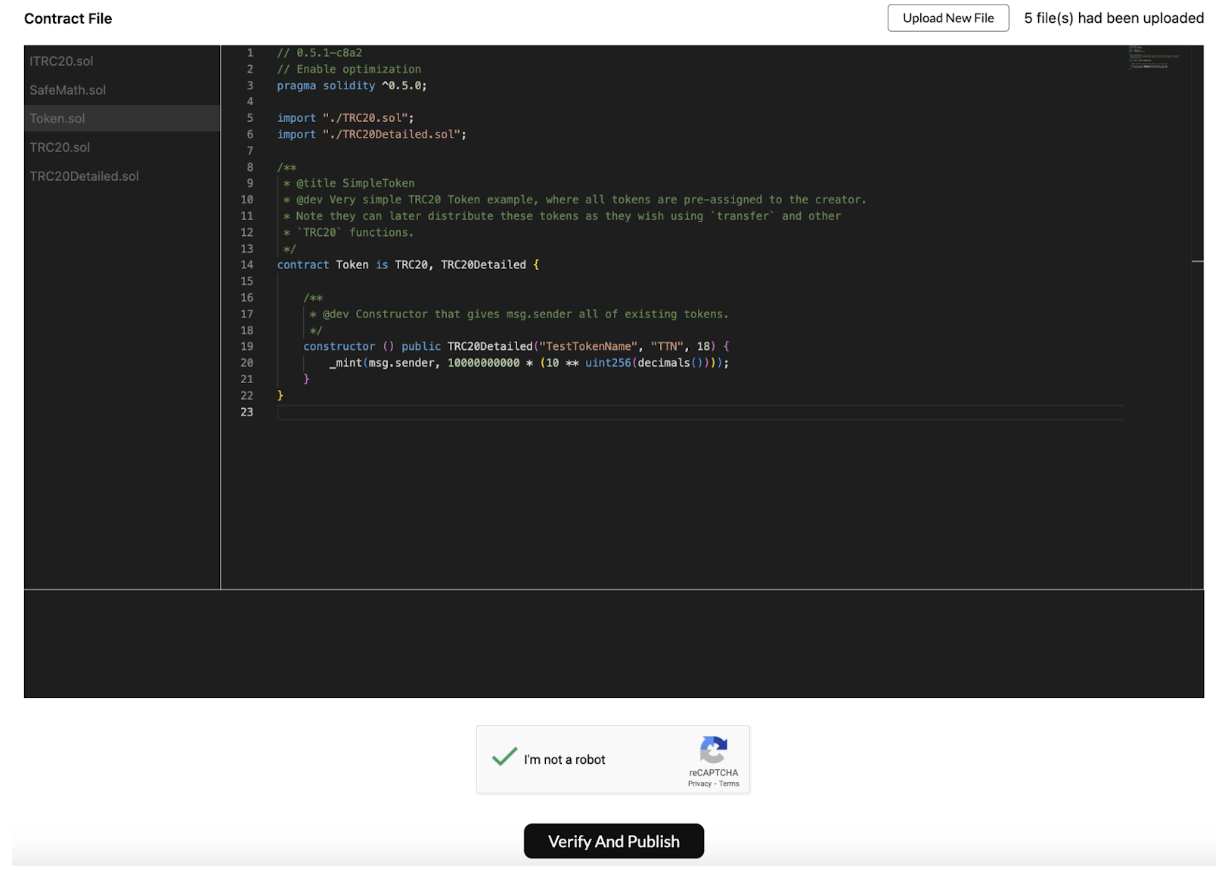
4. Verify the TRC-20 Contract (Optional)
-
To verify your smart contract on TRONSCAN, navigate to the Verification Tool and enter the required contract details. For more details about verifying contracts, please refer to Verifying.
- Contract Address: the address used during deployment;
- Main Contract: usually the main contract name, e.g., "Token";
- Solidity Compiler Version: Select 0.5.10;
- License: Choose "None" if not applicable;
- Optimization and Runs: Set "Optimization" to "Activated" and leave "Runs" as 0 by default.

-
Click the "Upload Contract File(s)" button, select your contract source code files, and then upload them. Please ensure that the uploaded code is exactly consistent with the version deployed on the chain, including all dependent files.
-
Check the "I am not a robot" box to complete the CAPTCHA check.
-
Click the "Verify and Publish" button.
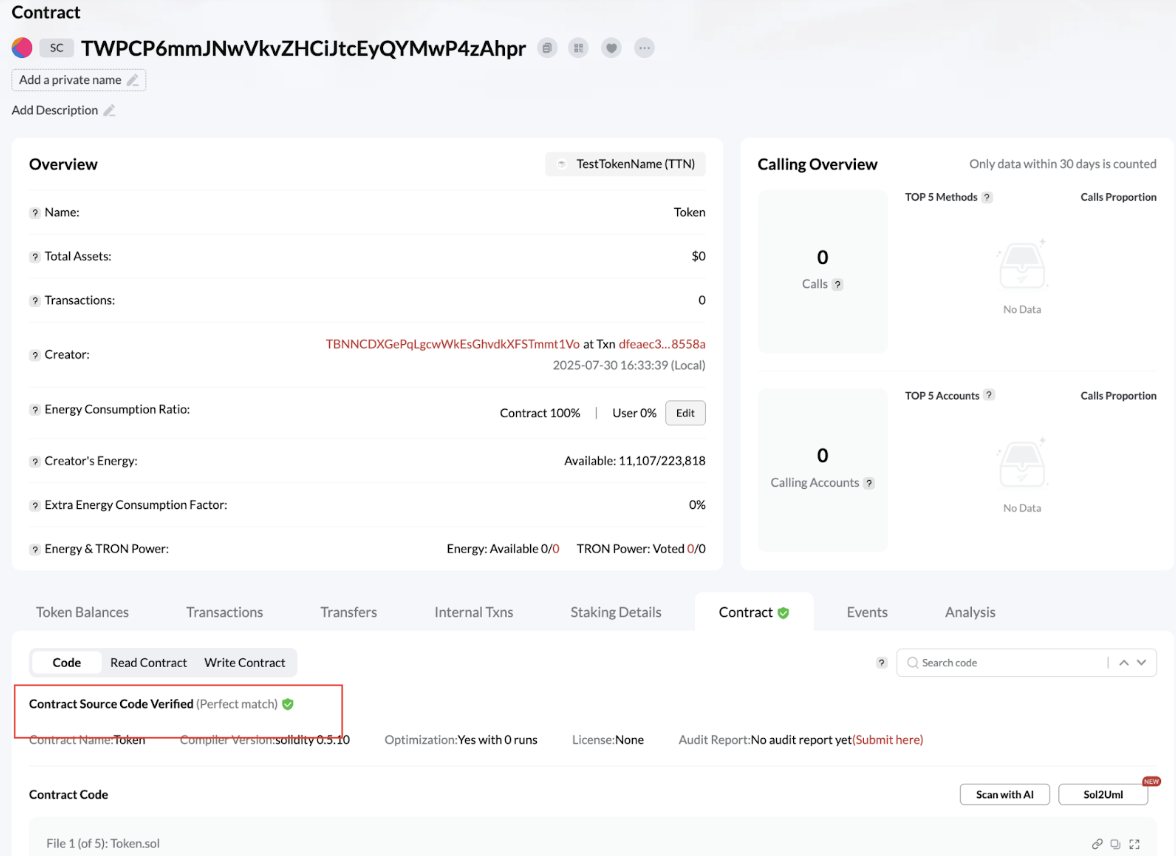
-
Once the contract is verified, you can view the contract details.

- On the TRONSCAN page, you can see that the contract source code was verified successfully.
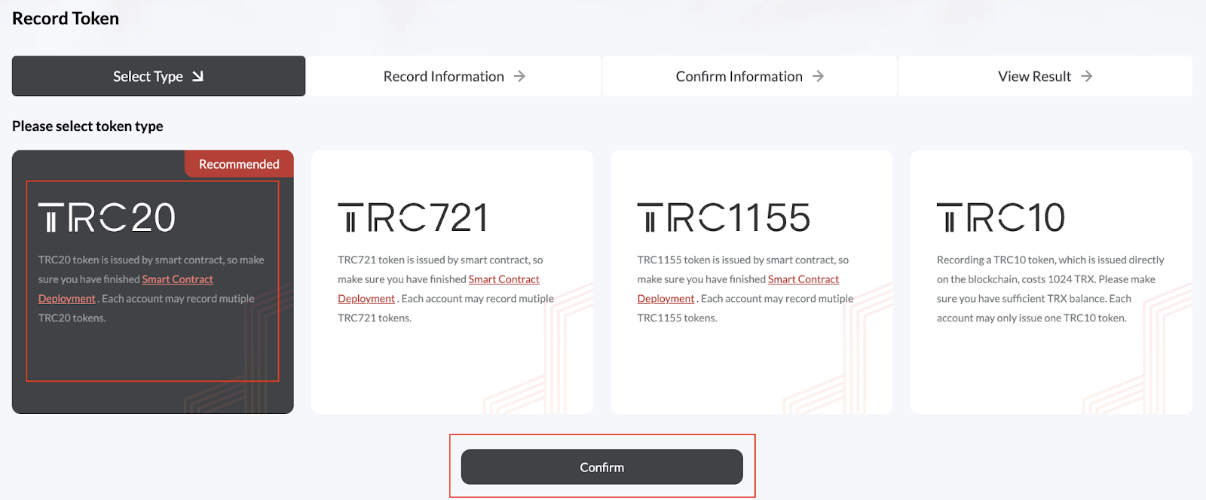
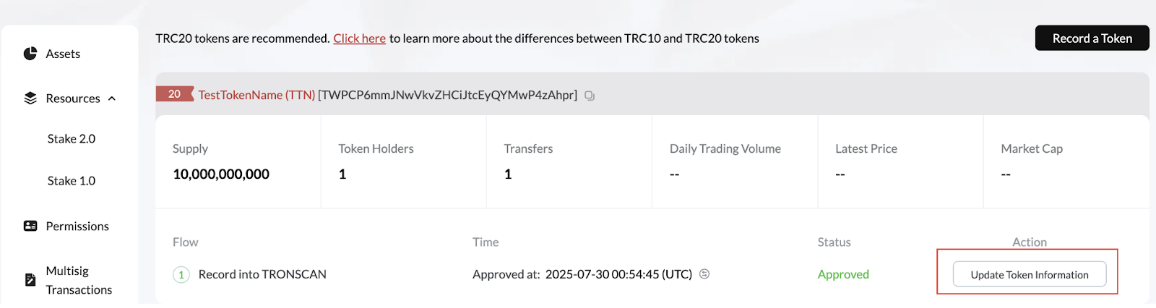
5. Record the TRC-20 Token
The Record Tool allows token creators to record their TRC-20 token information on TRONSCAN. By using this tool, you can officially record your token’s basic information, contract information, and social media profiles.
- For the token type, choose TRC20 and click "Confirm" to proceed.
- Fill in details of the TRC-20 token - enter the basic information, contract information, and social media profiles of your token.
Important: Ensure that the details you enter match exactly with the information in your deployed TRC-20 contract.

- Double-check the information you’ve entered and sign. Once the process is complete, you will see a confirmation that your token has been successfully recorded on the TRON network.
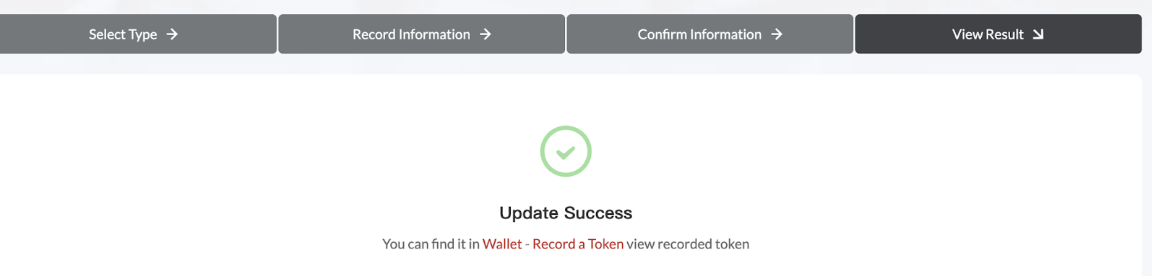
- To further update the token information, please go to the wallet details page and click Record a Token. Then, update the token information here.
6. Add the Token to TronLink
- To add your token to TronLink, click the ‘+’ button on the homepage of your TronLink wallet. Search the contract address of your TRC-20 token. The corresponding token details will automatically appear. Click the ‘+’ button on the right side to add the token to your asset list. After that, you can view the token on your wallet homepage and proceed with transfers and other operations.
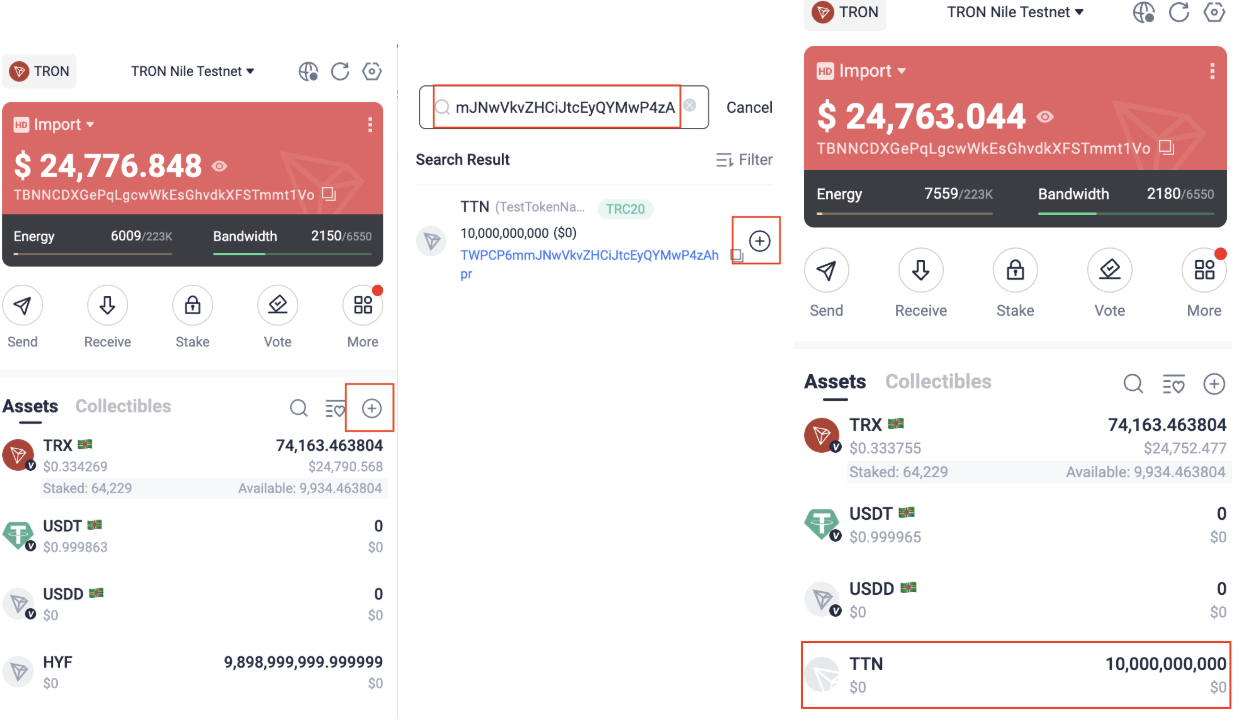
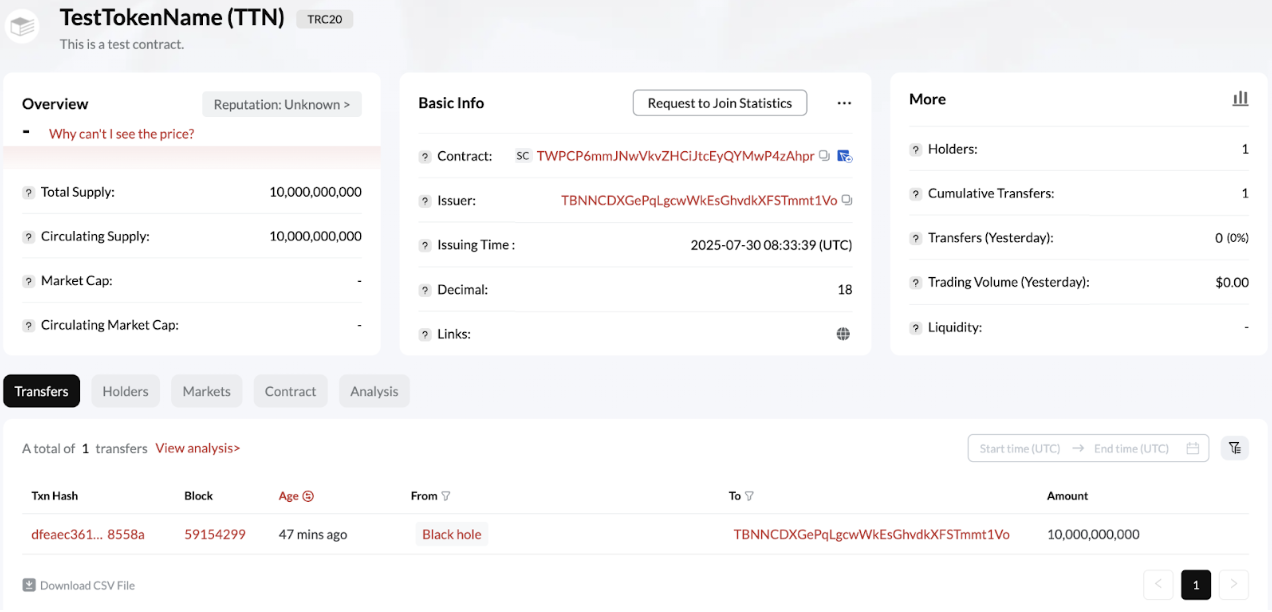
- To get more information about the token, you can also search the contract on TRONSCAN.
Note: The TronLink extension currently allows users to add tokens to their wallet homepage on the Mainnet, Nile testnet, and Shasta testnet. However, please note that the target token must have been recorded on TRONSCAN and leave 15 minutes for data synchronization before it can be searched and added in TronLink.
Updated 5 months ago