TronLink Integration
Introduction
TronLink, similar to MetaMask, is a bridge for allowing TRON DApps to run in the browser without having to deploy a TRON Full Node. If a user has TronLink already installed in the Chrome extension, then TronLink injects a version of TronWeb into every browser page. This allows for the web DApp to interact with the TRON network. Let's learn it with a simple example:
<!DOCTYPE html>
<html lang="en">
    <head>
    <meta charset="UTF-8">
    <meta name="viewport" content="width=device-width, initial-scale=1.0">
    <meta http-equiv="X-UA-Compatible" content="ie=edge">
    <title>Document</title>
    </head>
    <body>
    <button onclick="gettronweb()">Can you get tronweb from tronlink?</button>
    <script>
        function gettronweb(){
            if(window.tronWeb && window.tronWeb.defaultAddress.base58){
                document.write("Yes, catch it:",window.tronWeb.defaultAddress.base58)
            }
        }
    </script>
    </body>
</html>
Of course, tronweb has many functions waiting for you to use.
Signature
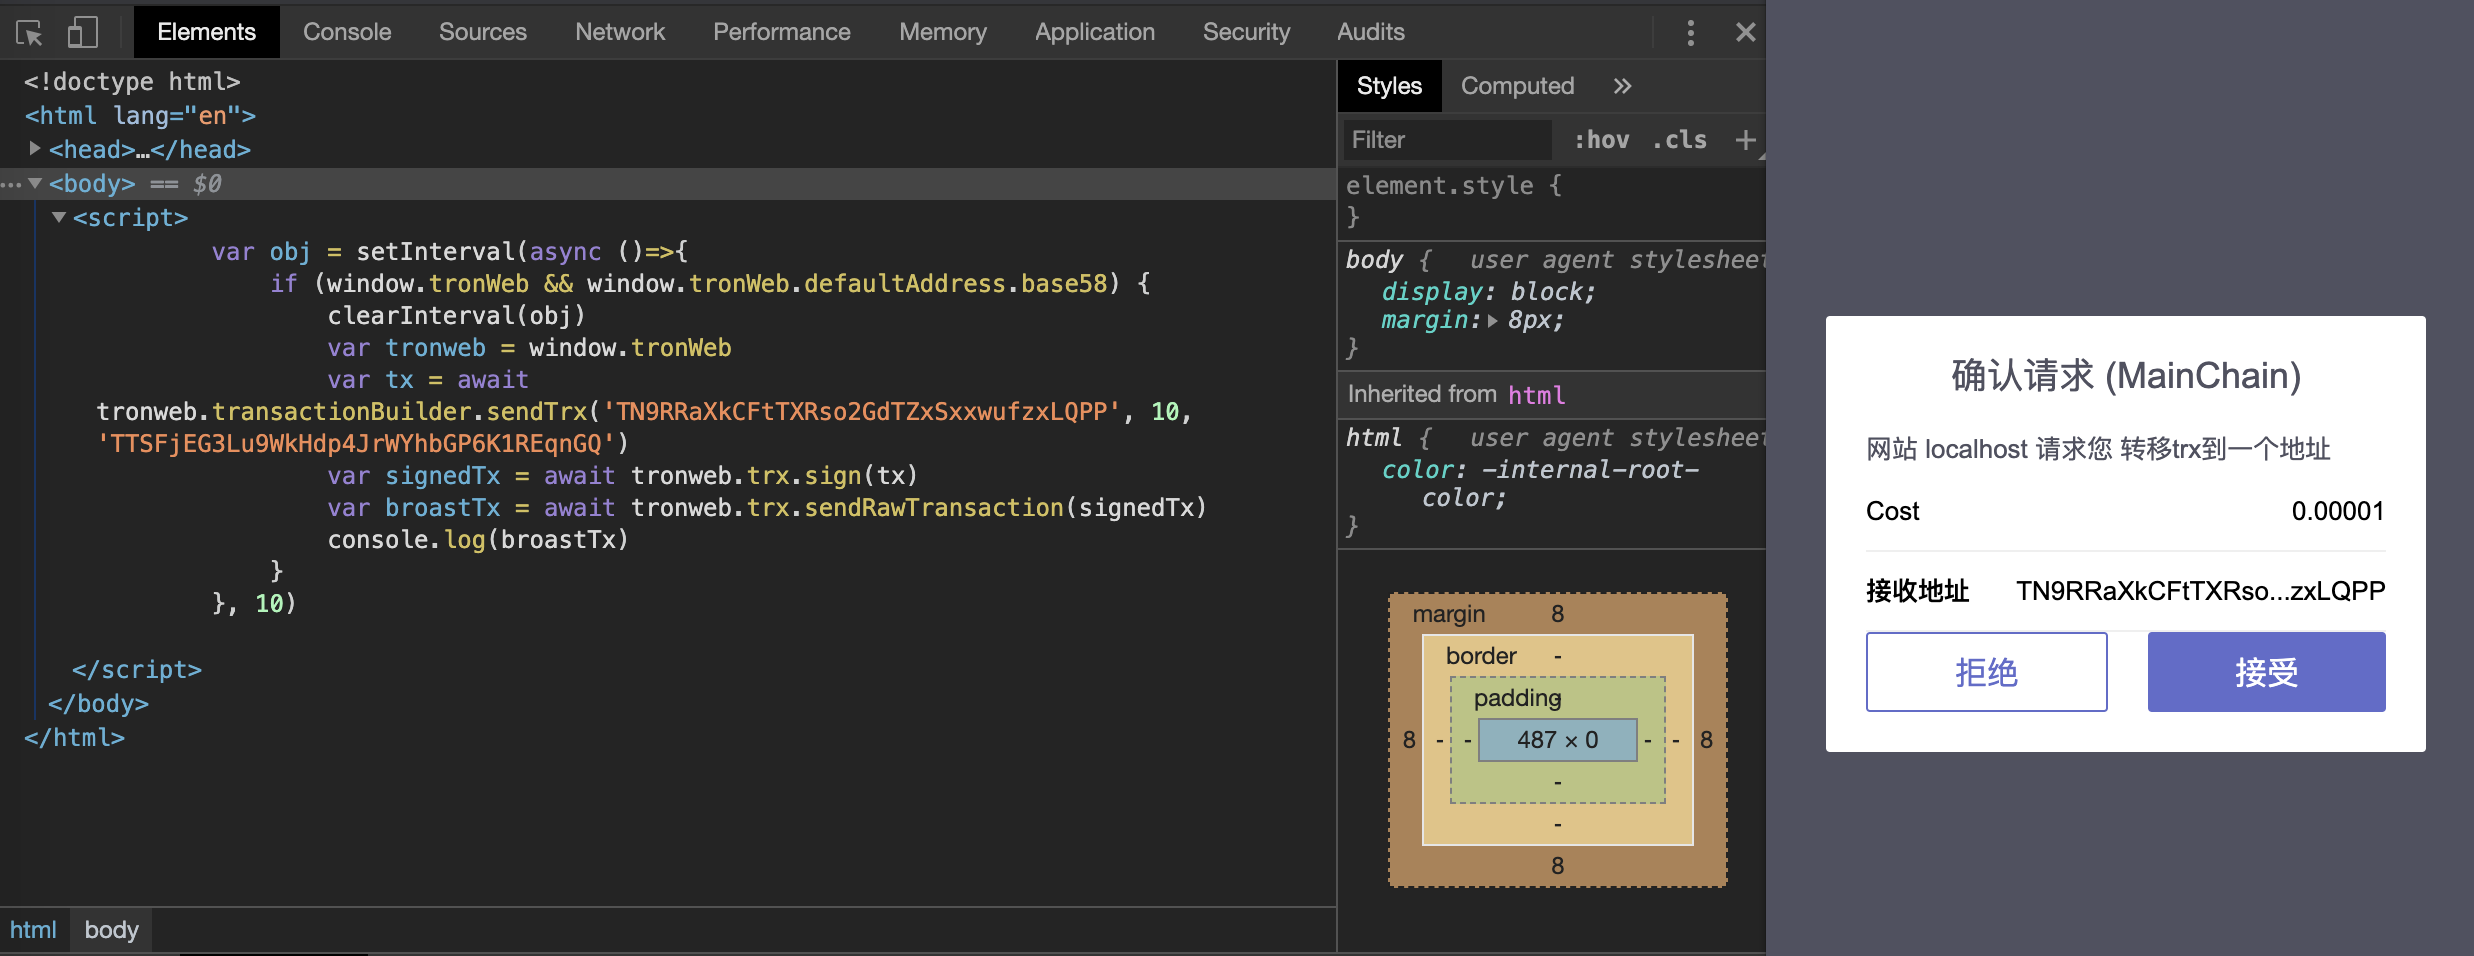
In the process of completing the transaction, tronweb needs to let tronlink perform the signature. Here tronlink rewrites the signature. The signature process is completed in tronlink, and then the signed transaction is returned to tronweb for broadcasting. Let's learn it with a simple example:
<!DOCTYPE html>
<html lang="en">
    <head>
    <meta charset="UTF-8">
    <meta name="viewport" content="width=device-width, initial-scale=1.0">
    <meta http-equiv="X-UA-Compatible" content="ie=edge">
    <title>Document</title>
    </head>
    <body>
    <script>
        var obj = setInterval(async ()=>{
            if (window.tronWeb && window.tronWeb.defaultAddress.base58) {
                clearInterval(obj)
                var tronweb = window.tronWeb
                var tx = await tronweb.transactionBuilder.sendTrx('TN9RRaXkCFtTXRso2GdTZxSxxwufzxLQPP', 10, 'TTSFjEG3Lu9WkHdp4JrWYhbGP6K1REqnGQ')
                var signedTx = await tronweb.trx.sign(tx)
                var broastTx = await tronweb.trx.sendRawTransaction(signedTx)
                console.log(broastTx)
            }
        }, 10)
    </script>
    </body>
</html>
When the code is executed to tronweb.trx.sign (tx), TronLink will pop up a window to confirm the signature.

Now, I believe you have been able to complete TronWeb function calls in conjunction with TronLink.
TronLink events
TronLink currently supports sidechains and mainchains. Developers can detect the event message sent by TronLink in DAPP, what we can learn from this event message contain the sidechain or mainchain currently selected by TronLink, and which account is currently selected. Let's learn it with a simple example.
<!DOCTYPE html>
<html lang="en">
<head>
    <meta charset="UTF-8">
    <meta name="viewport" content="width=device-width, initial-scale=1.0">
    <meta http-equiv="X-UA-Compatible" content="ie=edge">
    <title>Document</title>
</head>
<body>
<script>
    window.addEventListener('message', function (e) {
        if (e.data.message && e.data.message.action == "tabReply") {
            console.log("tabReply event", e.data.message)
            if (e.data.message.data.data.node.chain == '_'){
                console.log("tronLink currently selects the main chain")
            }else{
                console.log("tronLink currently selects the side chain")
            }
        }

        if (e.data.message && e.data.message.action == "setAccount") {
            console.log("setAccount event", e.data.message)
            console.log("current address:", e.data.message.data.address)

        }
        if (e.data.message && e.data.message.action == "setNode") {
            console.log("setNode event", e.data.message)
            if (e.data.message.data.node.chain == '_'){
                console.log("tronLink currently selects the main chain")
            }else{
                console.log("tronLink currently selects the side chain")
            }

        }
    })
    var obj = setInterval(async ()=>{
        if (window.tronWeb && window.tronWeb.defaultAddress.base58) {
            clearInterval(obj)
            let tronweb = window.tronWeb

        }
    }, 10)

</script>

</body>
</html>
The above code involves three events: tabReply, setAccount, and setNode. The following are the triggering scenarios of these events:
The completing TronLink initialization(after page load) | tabReply |
Main chain and side chain switching in TronLink: | setAccount、setNode |
Setting nodes in TronLink | setAccount、setNode |
-
Before the DAPP page is loaded, you can judge the data.message.data.data.node.chain field of the tabReply event to determine whether TronLink chose the side chain or the main chain when the page was loaded. If it is '_', it means the main chain. , Otherwise it is the side chain, and the number of the side chain represented by chain, the number of each side chain is unique.
-
After the DAPP page is loaded, you can judge the data.message.data.data.node.chain field of the setNode event to determine whether the user manually selected the side chain or the main chain in TronLink. If it is '_', it means the main chain , Otherwise it is the side chain, and the number of the side chain represented by chain, the number of each side chain is unique.
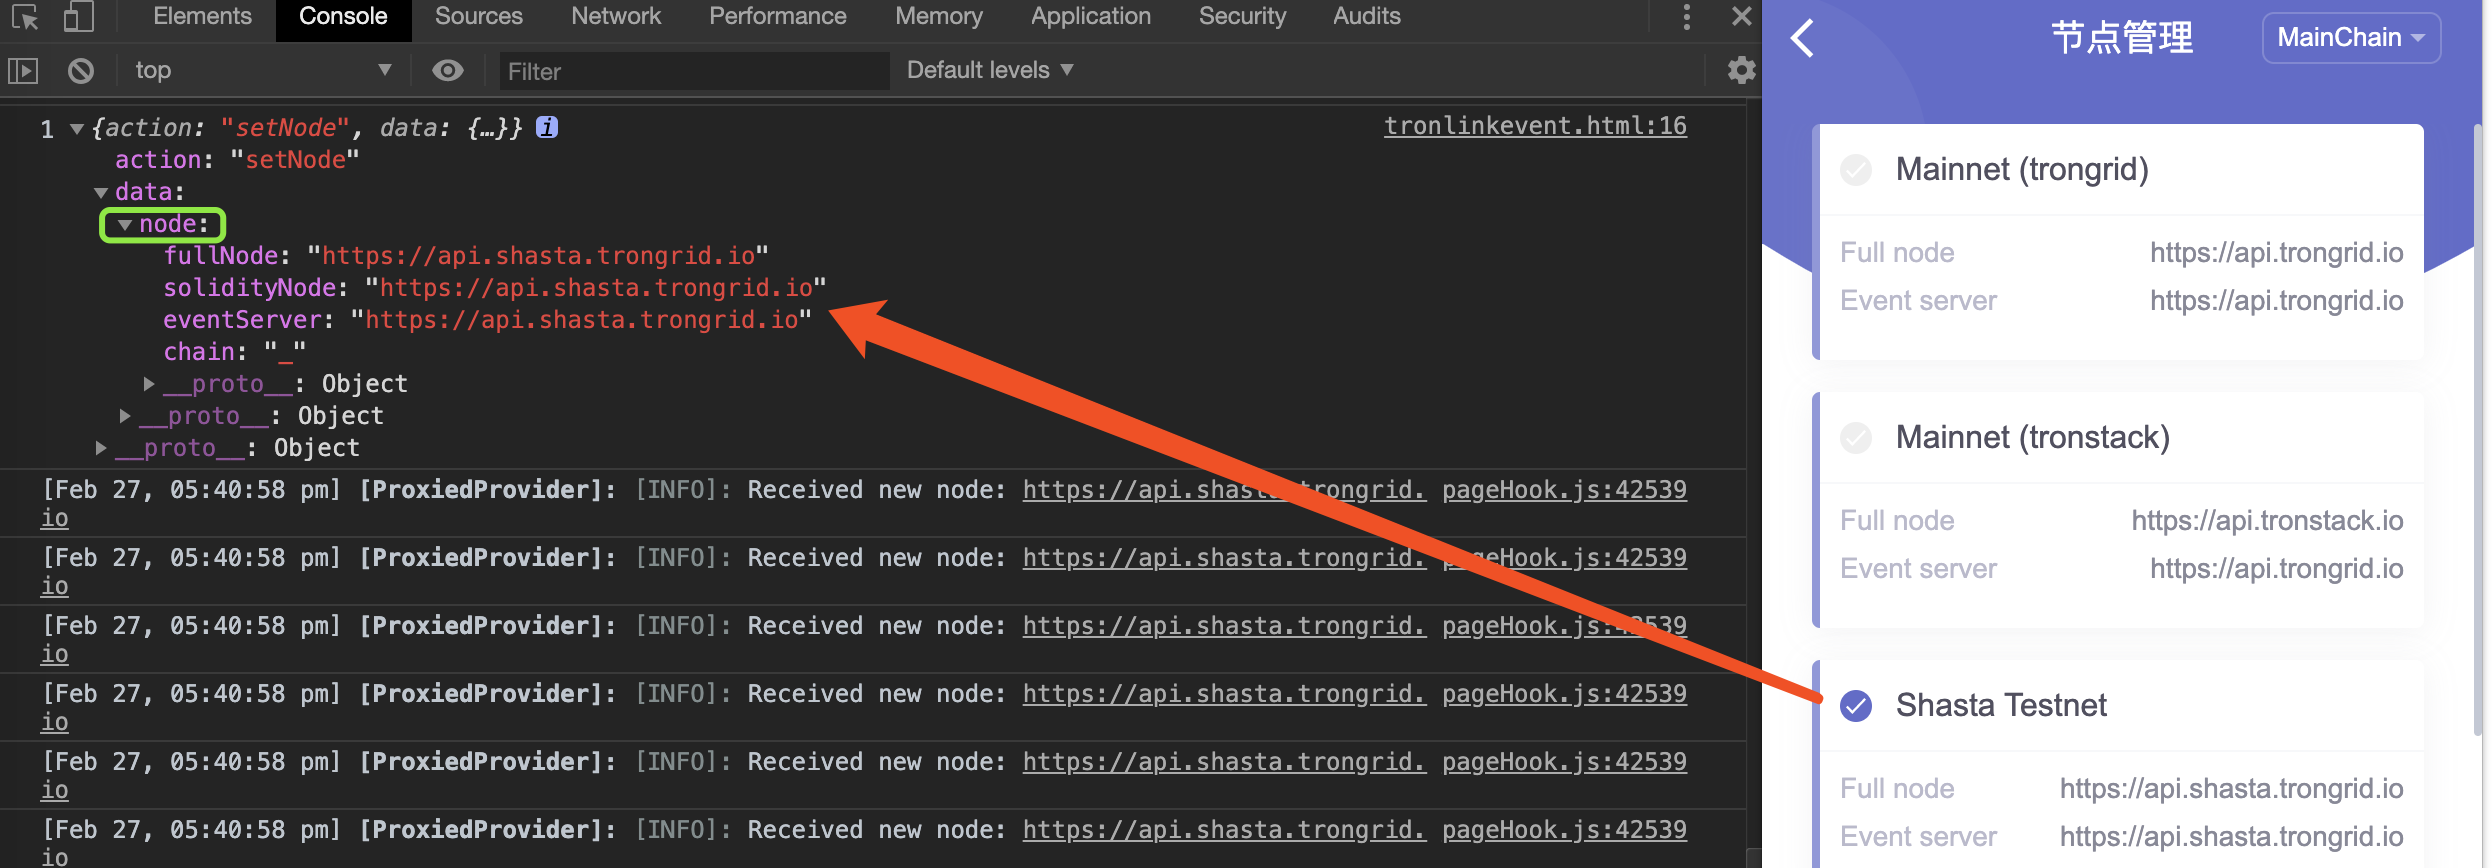
When MainChain is selected, the node in the returned message event is the selected network.

When DAppChain is selected, the node in the returned message event is the selected network.

NoteActually, when calling the functions, for the main chain and side chain, it can be called according to the method,because SunWeb inherits Tronweb.
When the Shasta test network is selected, the node in the returned message event is the selected network.

Updated 3 months ago