GUI and Usage
This article is used to introduce the usage of Tron-IDE, introduce the main page in the form of graphics, and complete the deployment of smart contract and function call.
Home page
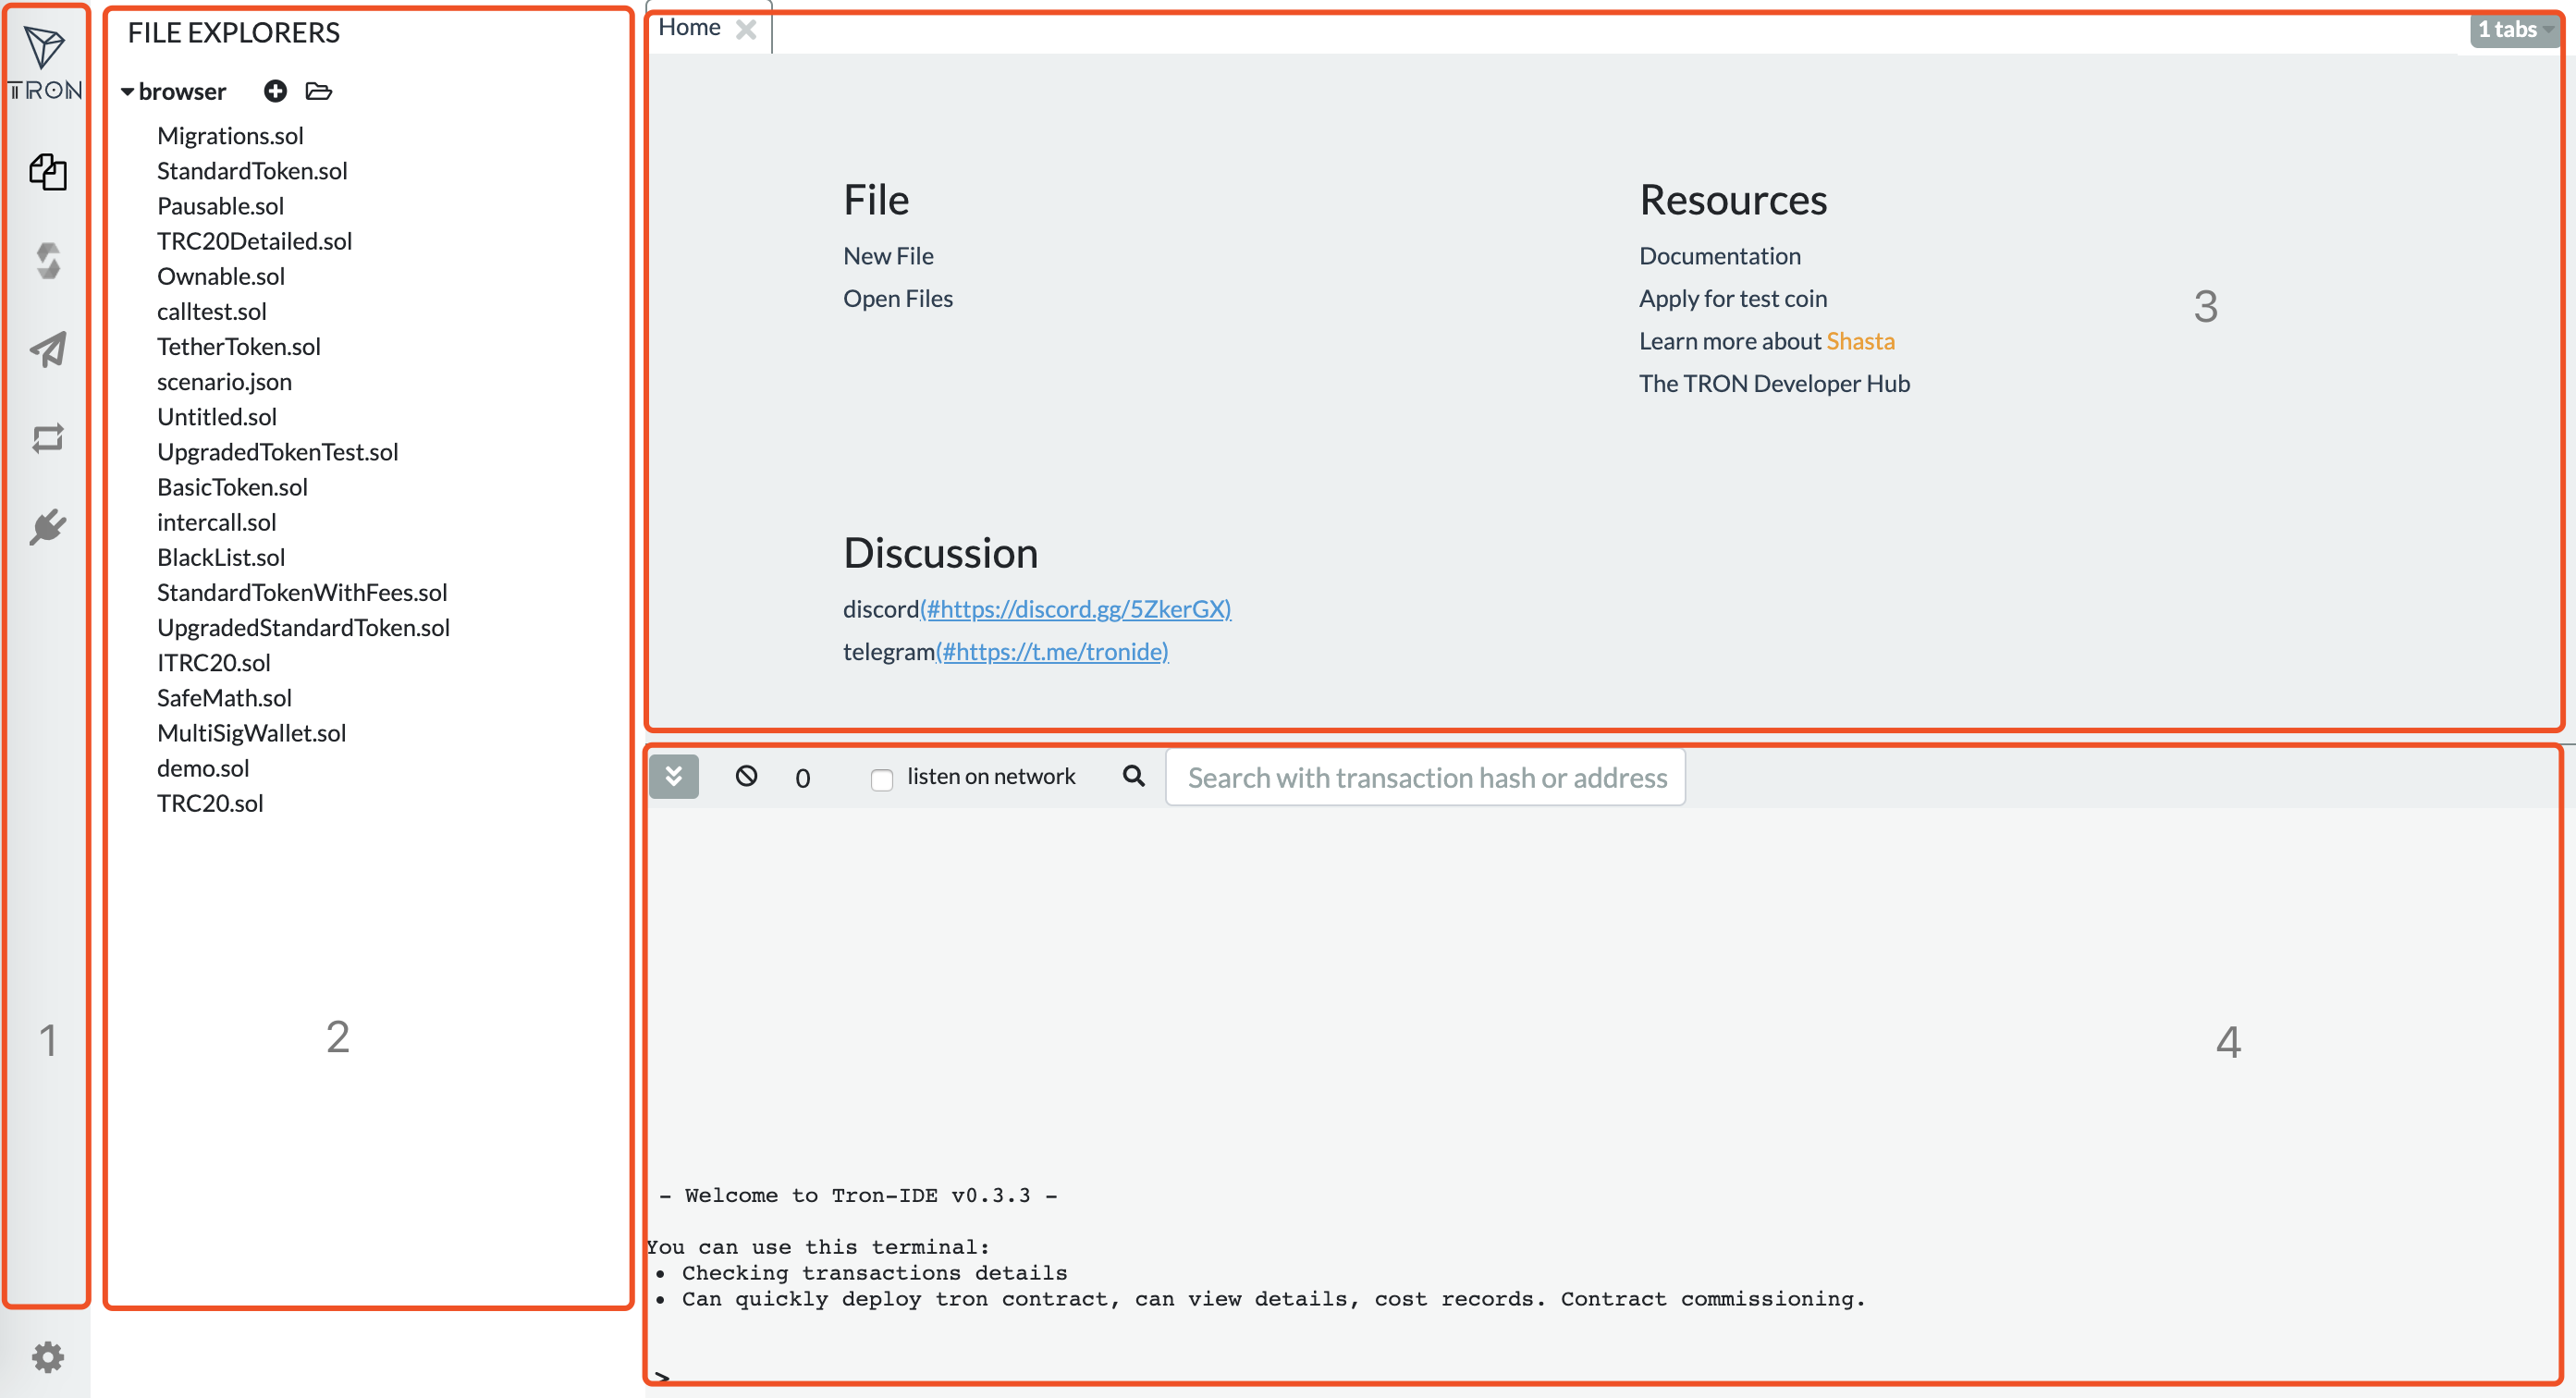
The main interface of Tron-IDE is mainly composed of the above sections 1-4:
Left 1 position, plug-in selection menu
 Left 2 position, plug-in function menu
Right 3 position, Home page and plugin function menu page
 Right 4 position, log and terminal
Deploy smart contracts and call the function.
Login account and select network
Before deploying a smart contract, you need to log in to TronLink with the account which you want to deploy the smart contract.
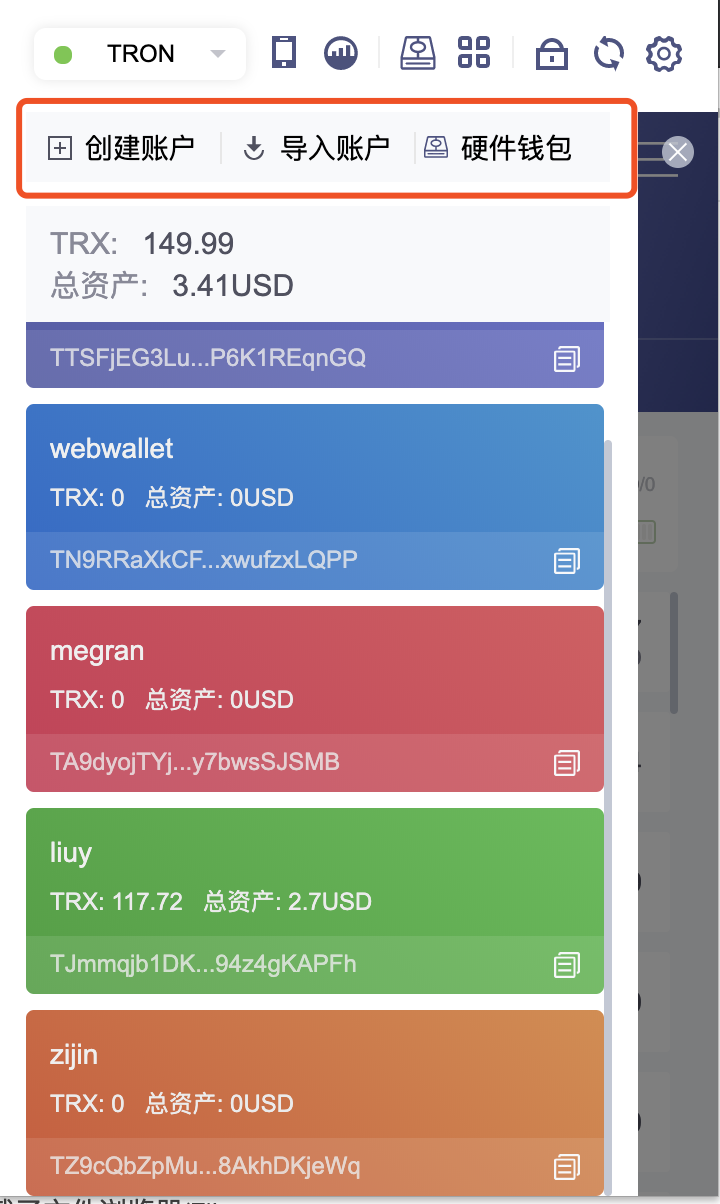
And select the node.
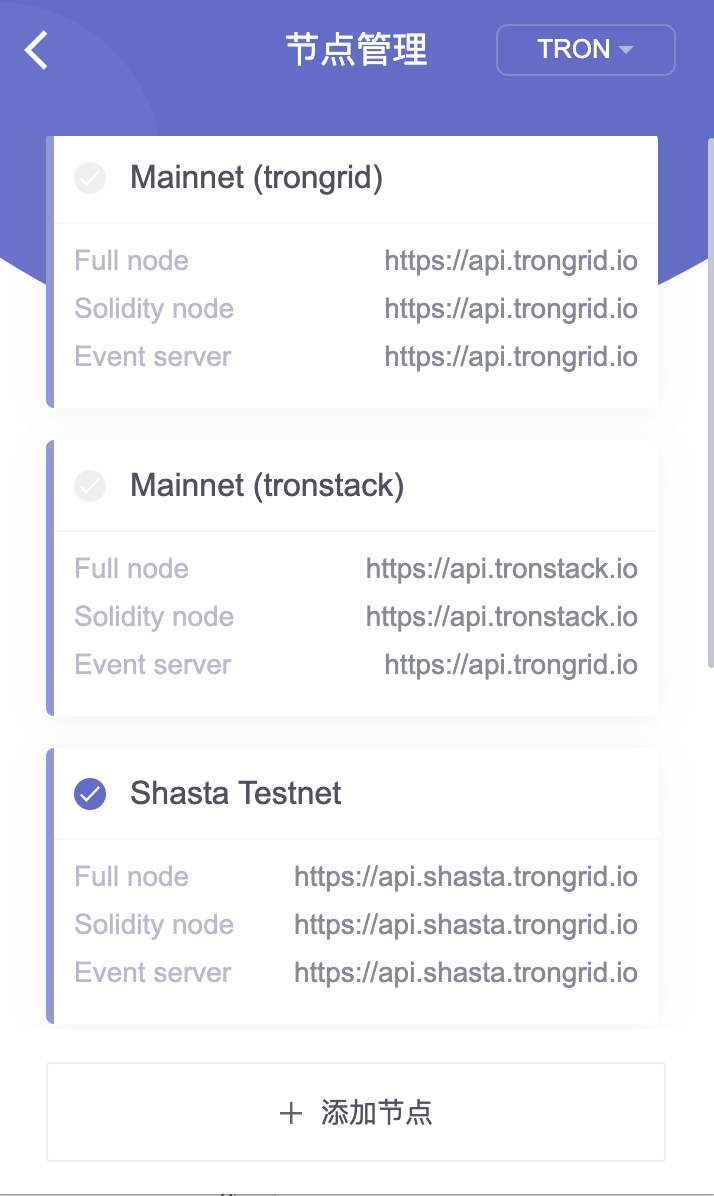
NoteIf you are using a new account of the shasta, you can get test coin here.
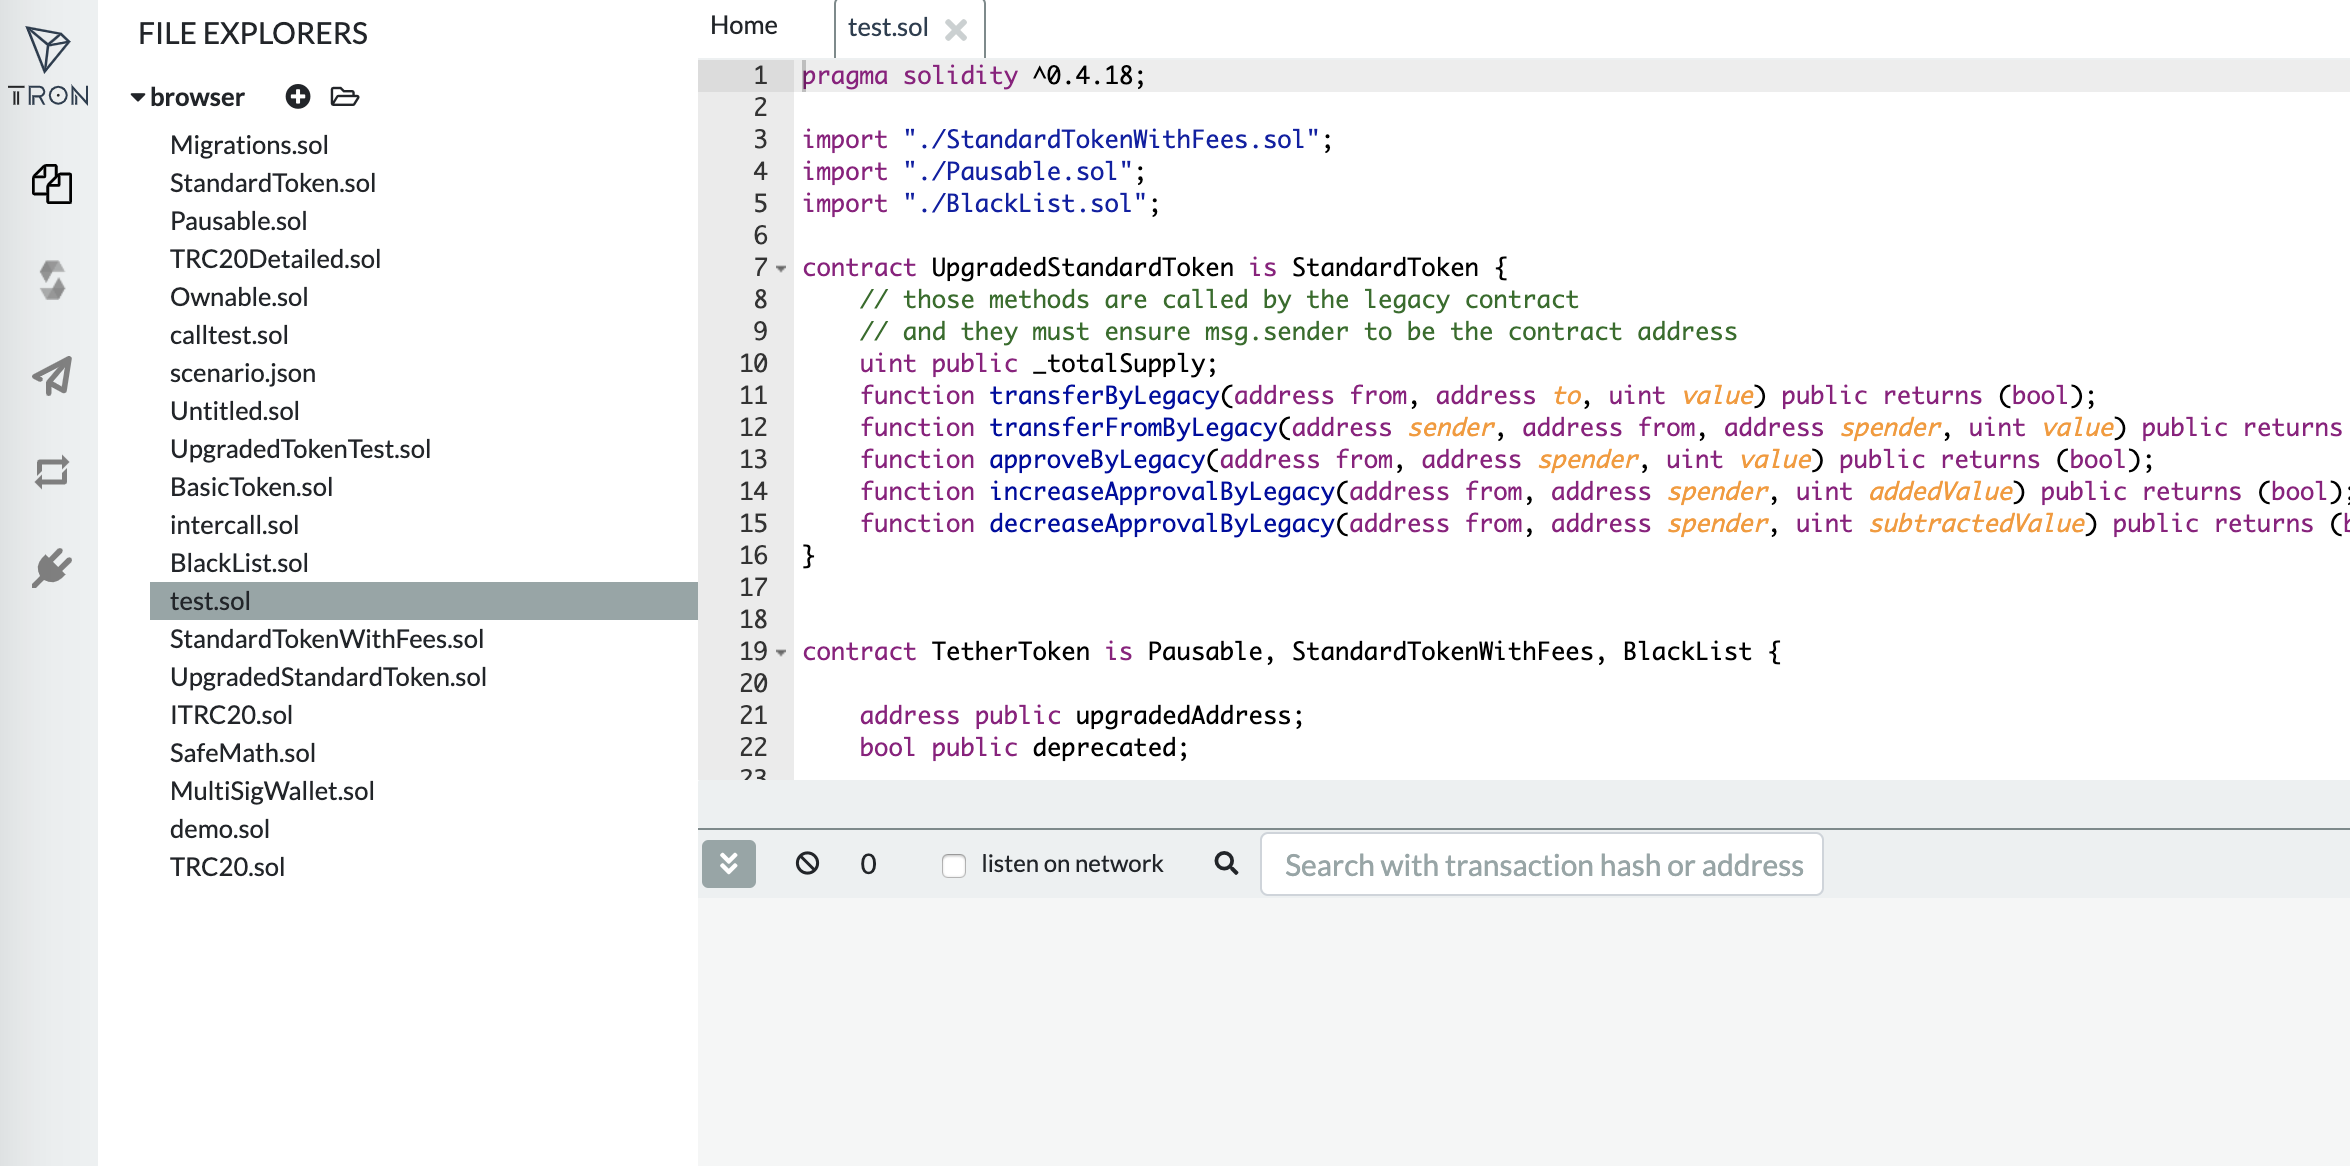
Edit a smart contract
To deploy a smart contract, you need to use the Plugin Manager to load the corresponding plug-ins. File Explorers are loaded by default. In the function menu of this plug-in, we can create a new file through the button to edit a smart contract .
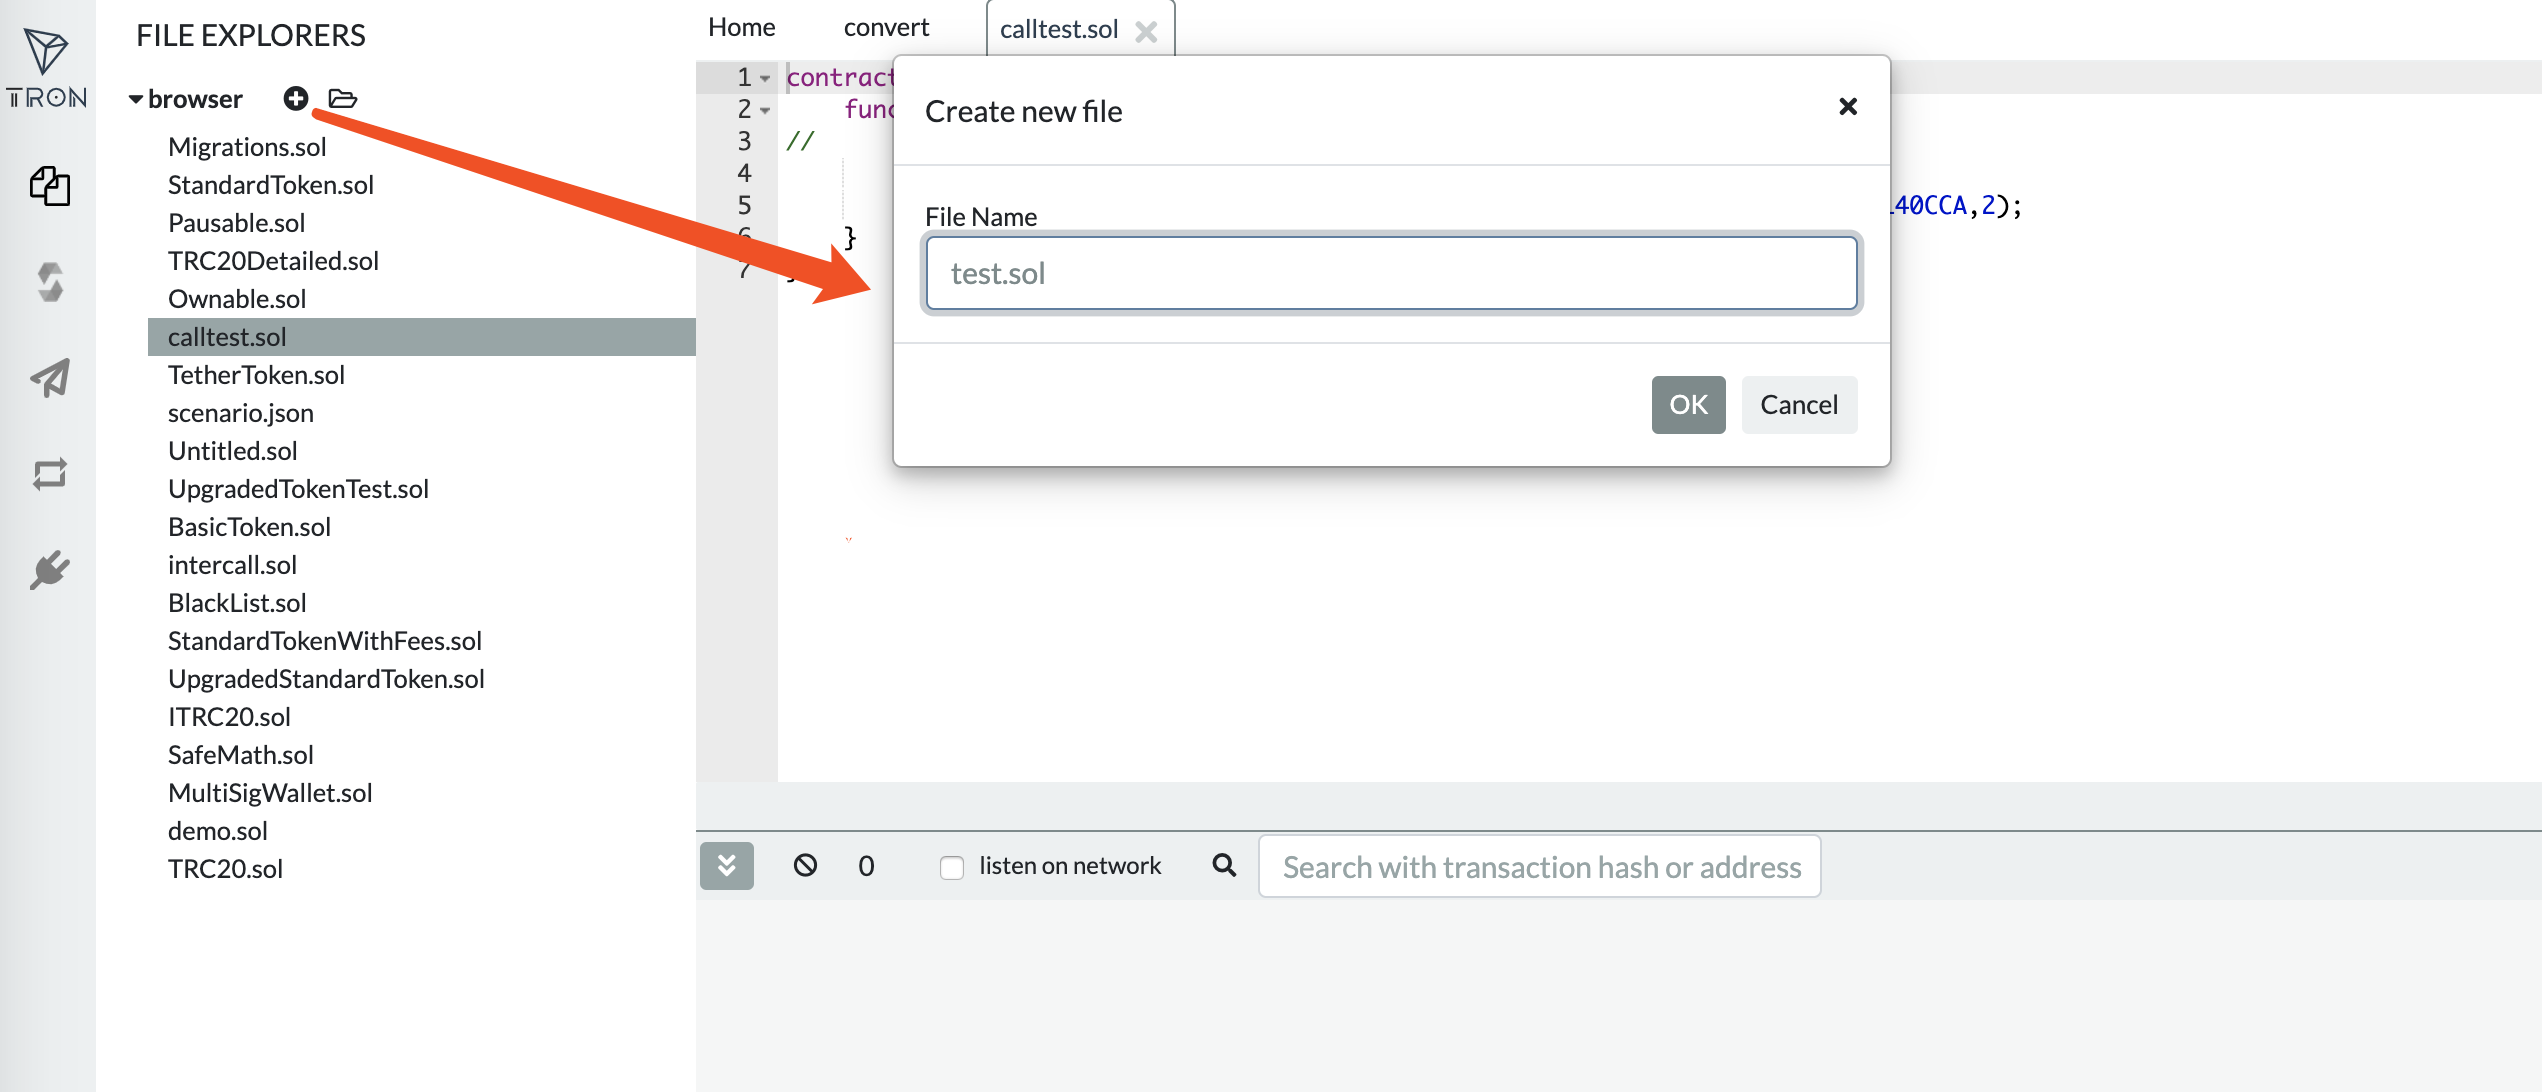
Compile Smart Contract
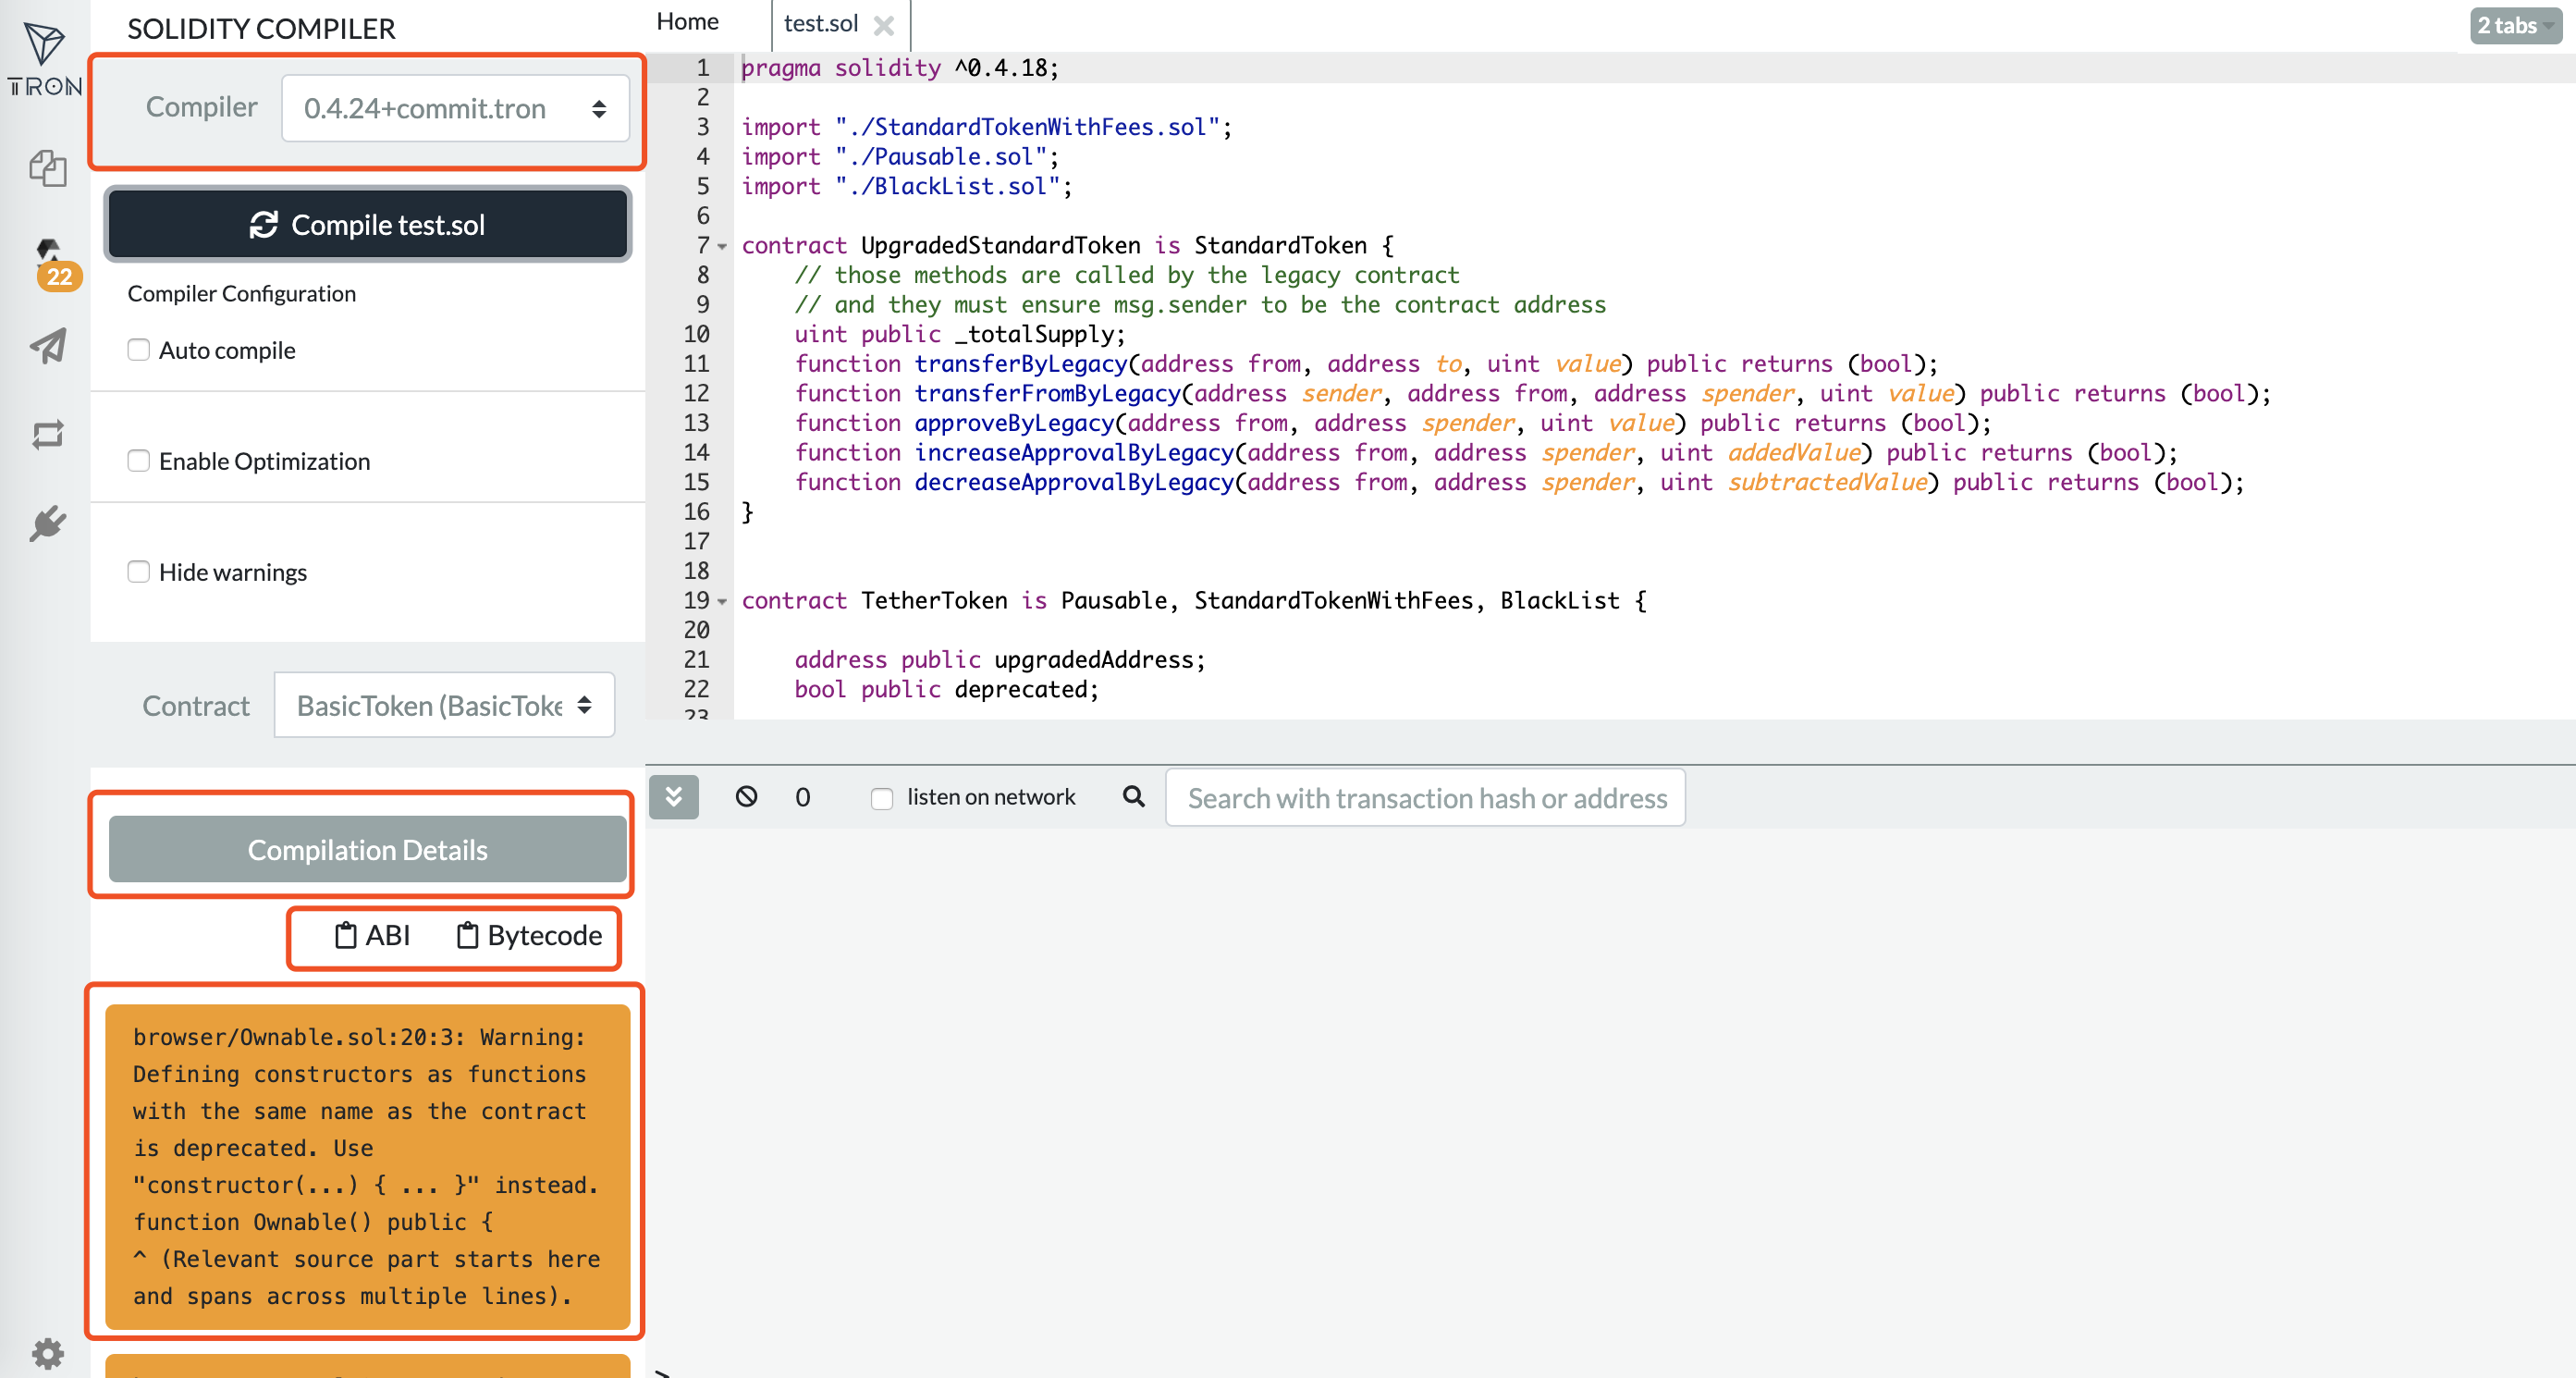
Use the SOLIDITY compiler plug-in (Solidity compiler), select the appropriate version, and compile the edited smart contract. After the compiling is successful, it will return the compiling result information, including ABI, Bytecode, etc .; if the compilation fails, the specific information in red will be returned in the lower left .
Deploy Smart Contracts
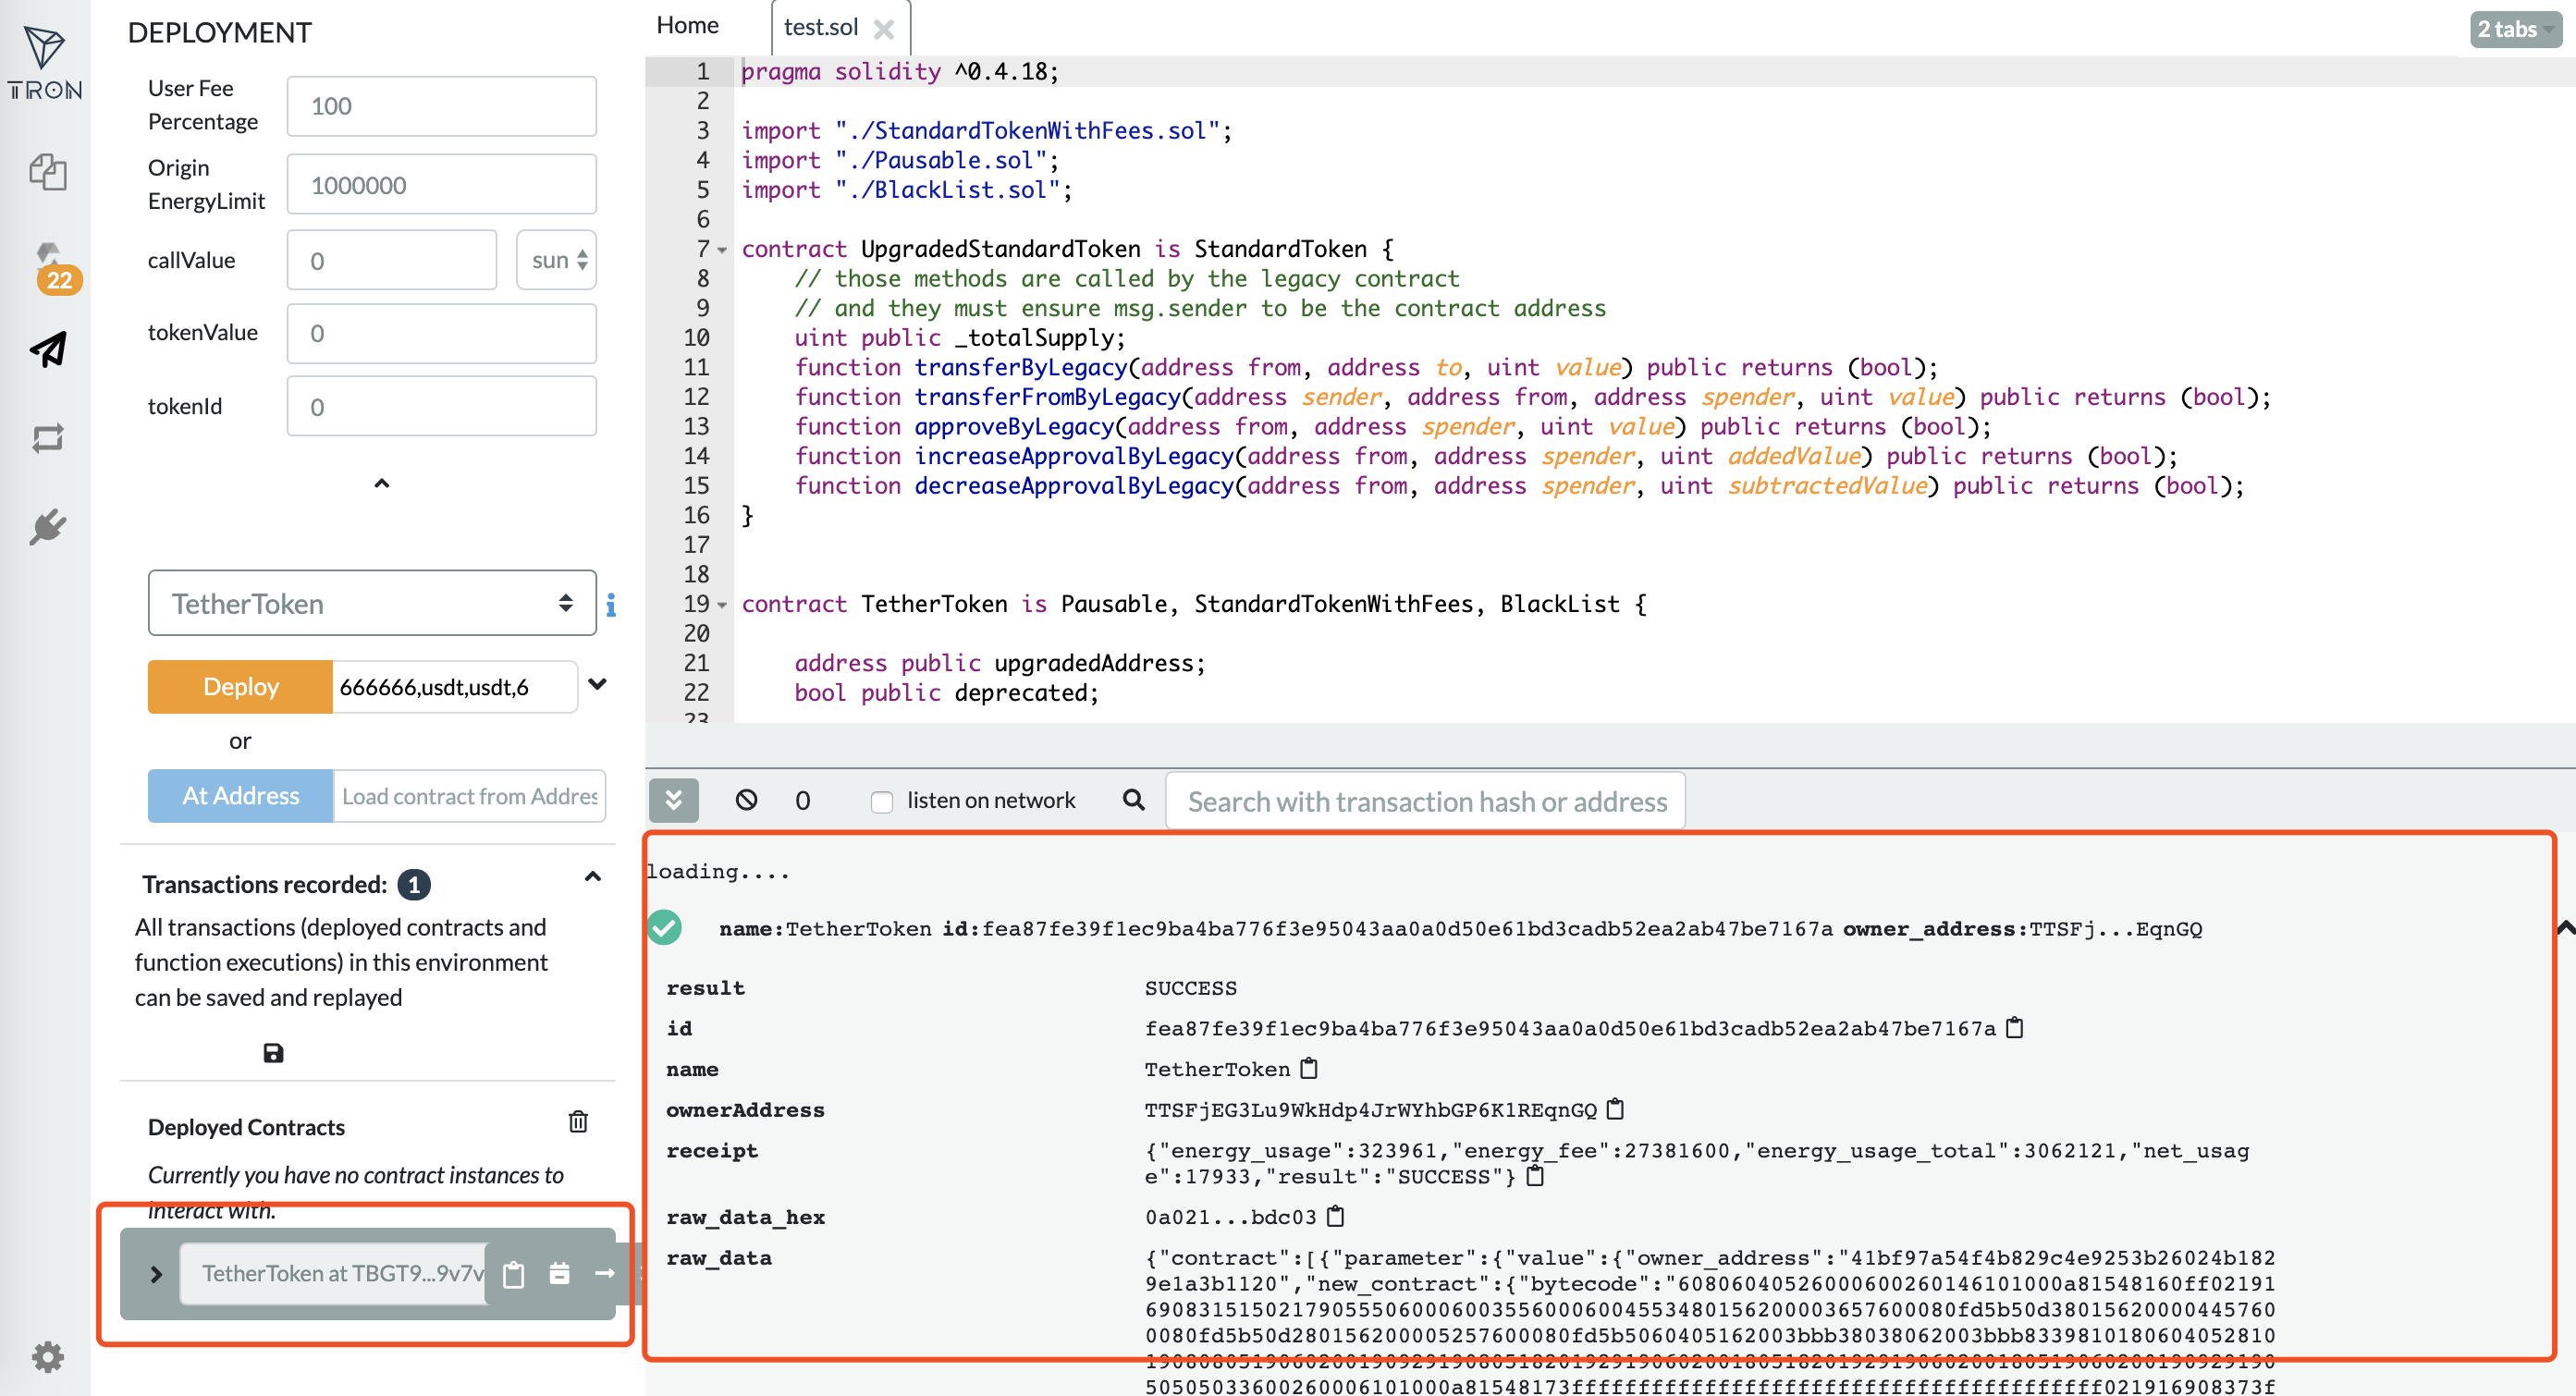
After successful compilation, use the deployment plugin (DEPLOYMENT). After successful deployment, the terminal will return transaction information.
Call the function
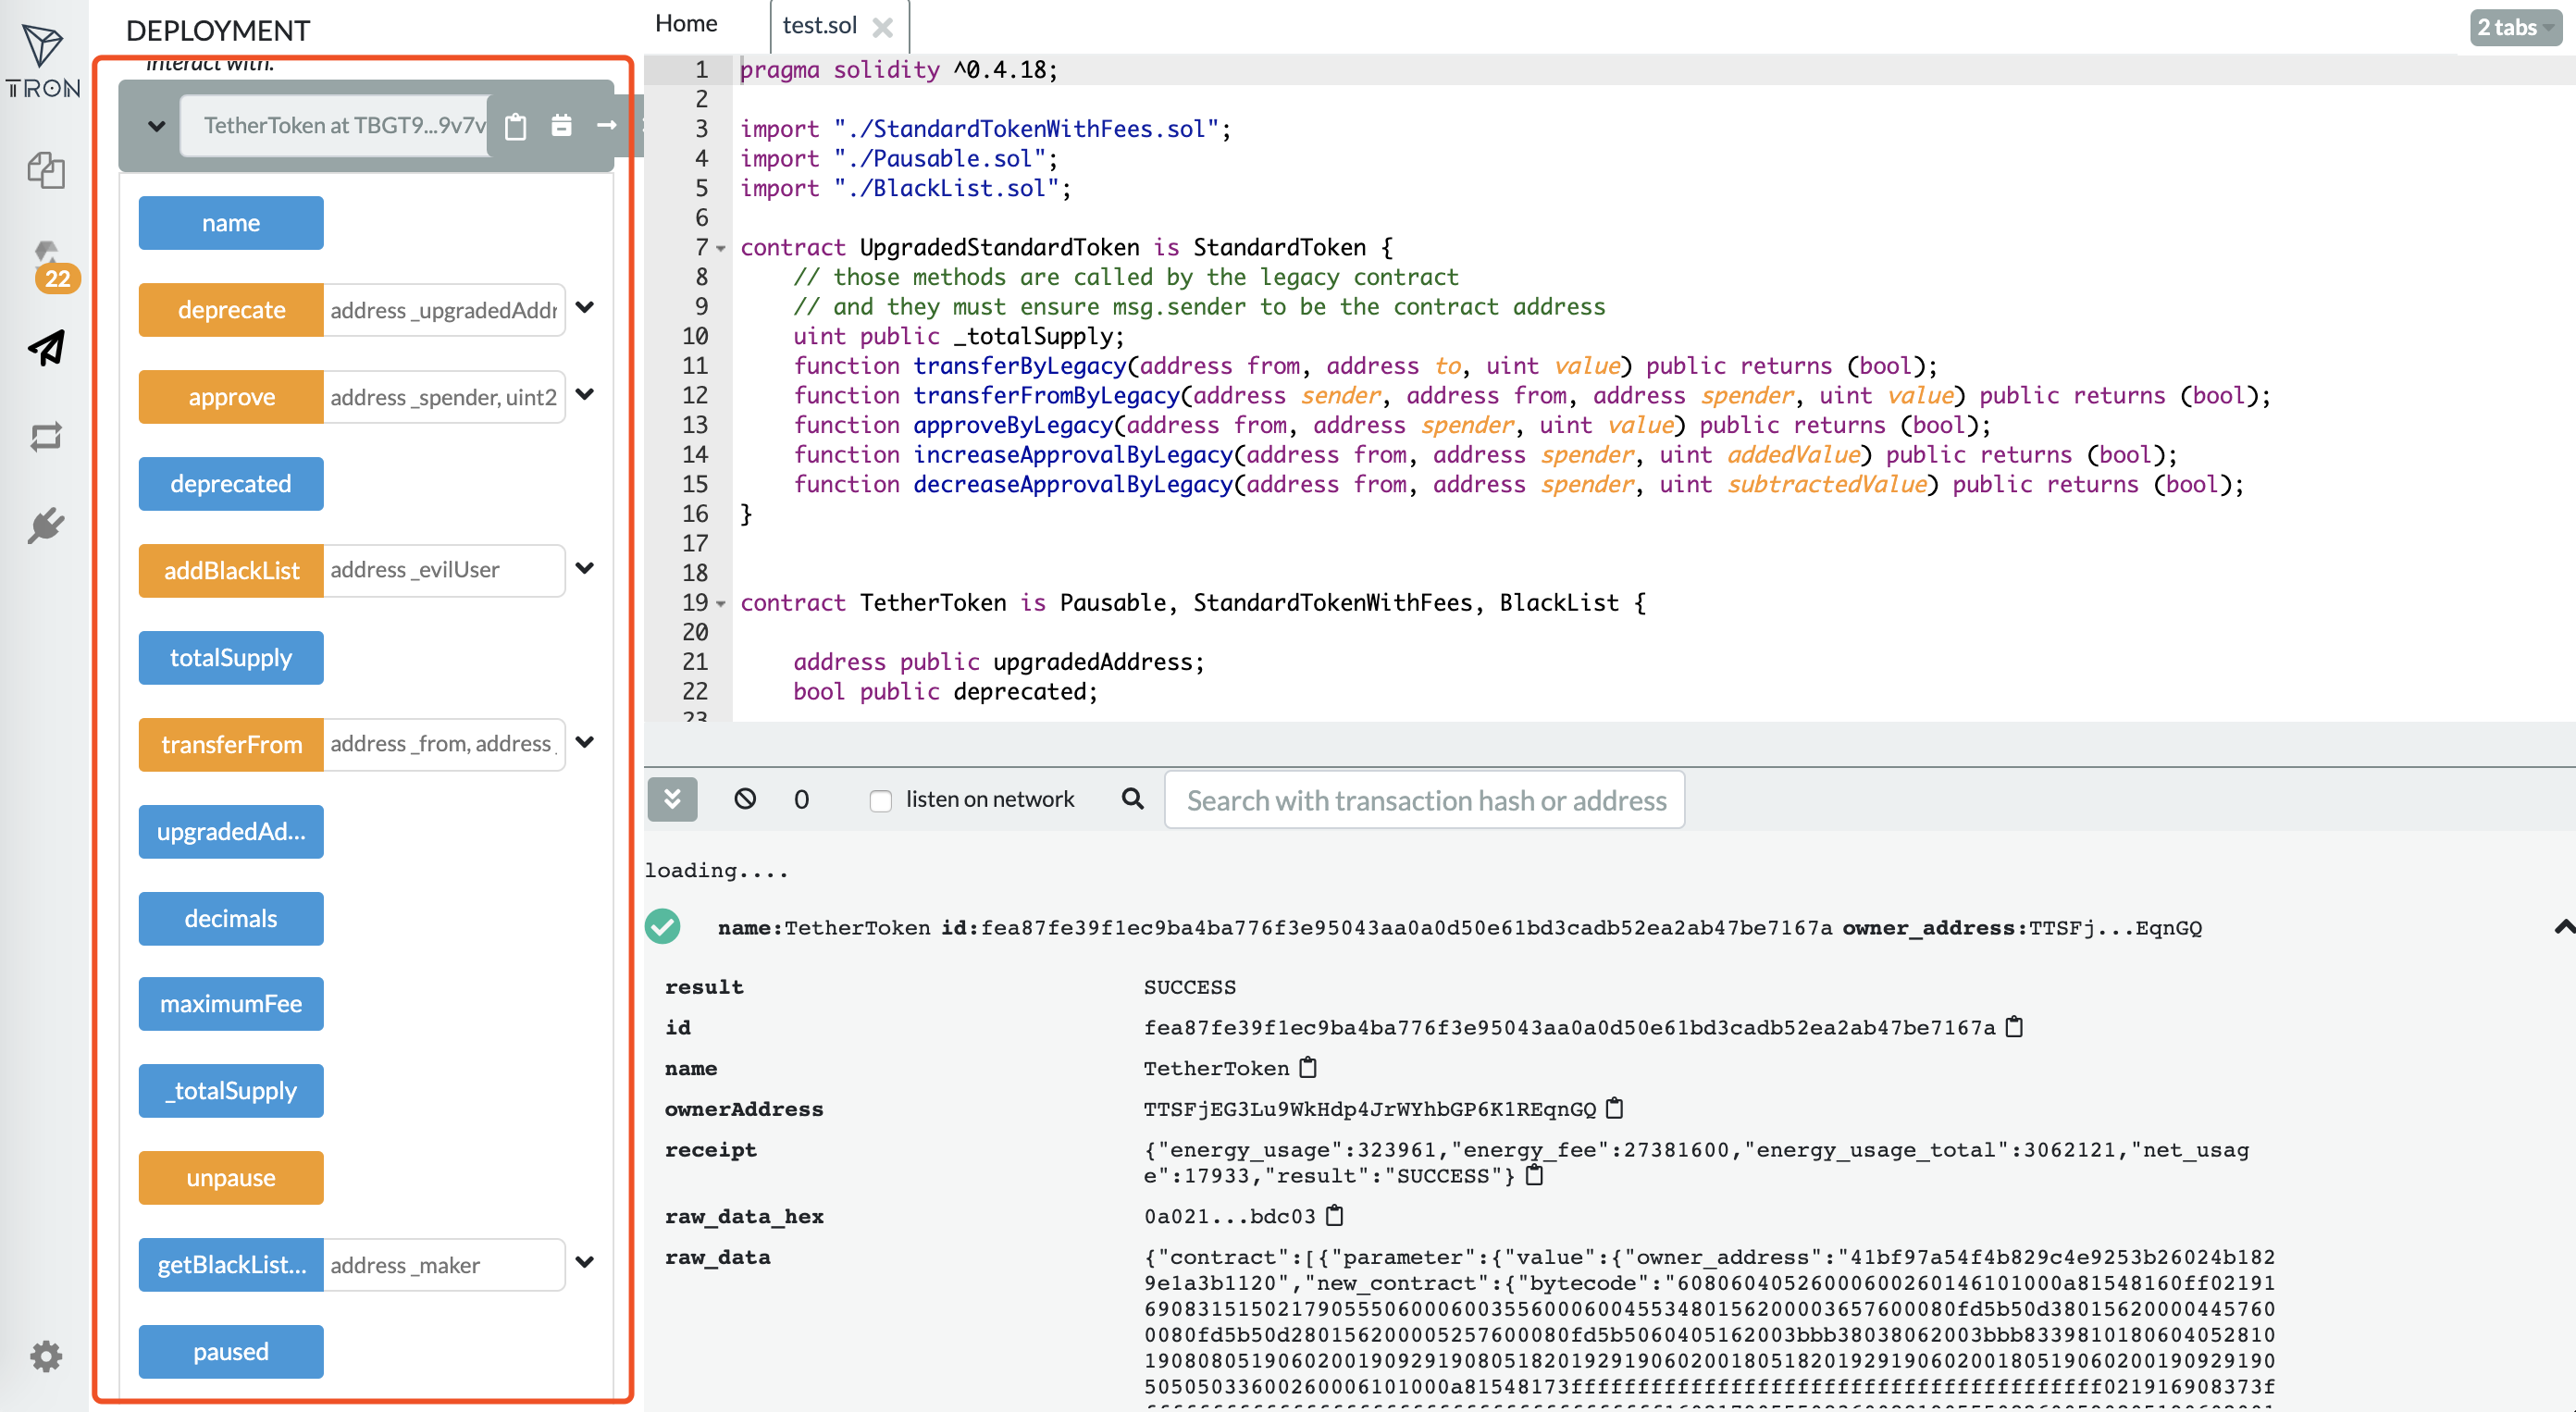
After successful deployment, the smart contract address is automatically loaded, and the function can be called in the drop-down menu; the existing smart contract address can also be loaded through the button 'At Address'.
Updated 3 months ago