TRON-CLI
Introduction
TRON-CLI is a command line tool which allows developers to quickly set up and manage TRON Nodes and service.
Dependencies
- Python 3.6+
- JDK 1.8
- MongoDB (for event server)
- MacOS or Linux
Installation
In the destination directory, optionally set up the python virtual environment and activate the environment. Then perform the pip install for troncli.
python3 -m venv venv    // Optional step

. ./venv/bin/activate   // Optional step

pip install troncli
Why Python Virtual Environments?TRON-CLI, like many Python programs, contains essential dependency files. In the absence of a Python Virtual Environment, a
pip installcommand by default downloads the required package into your local machine's lib/python/site-packages directory. If another Python program checks for a different version of the same package dependency, that program may end up using the wrong package since there exists no indication of version number. With a Python Virtual Environment, all the required dependencies are neatly packaged into avenvdirectory that conveniently resides on the same level as your working directory. This eliminates any potential confusion stemming from package name overlap, as well as making the package easier to locate.
A successful pip install within the virtual environment produces the following output:
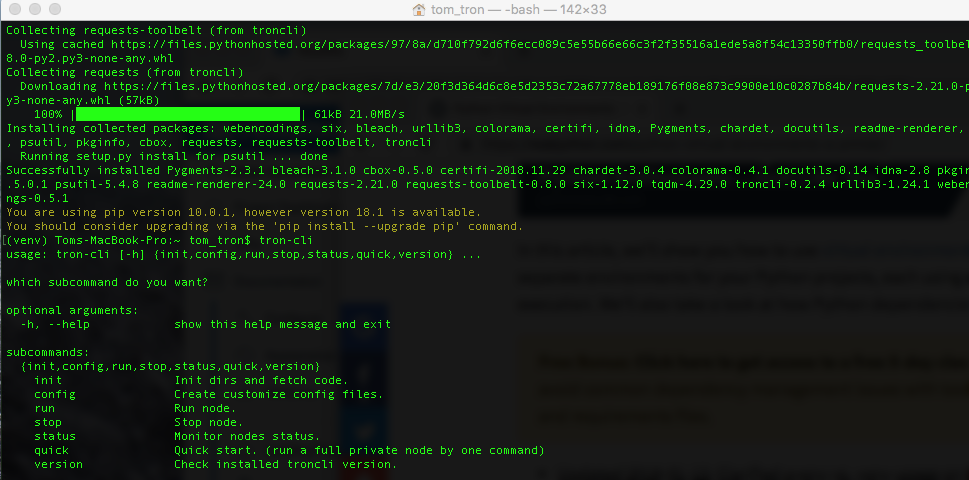
Successful pip install output
TRON-CLI Interactive Mode
tron-cli iQuickly set up what you want by answering a few questions:

TRON-CLI Quickstart
For those wanting to start up a local private network, you can run the command tron-cli quick. This command sets up the tron_nodes directory and sub-folders, moves the .jar files into the folders, sets up the configuration files on default ports, runs the node, and outputs the status details.
tron-cli quickBy default, it will set up a private test-net full node.
- You can also type
--nettype mainto set up a Full Node that syncs to the Mainnet. - Type
--reset Trueto reset all.

TRON-CLI Mainnet
The following procedures allow for advanced users to customize their setup and connect to the Mainnet. The process consists of initialization, settings configuration, and running the node.
Initialization
Run the 'tron-cli init' command to set up the directories, download the .jar files, and move the .jar files into the directories:
tron-cli initThis command creates a directory called tron_nodes in the working directory and then creates the four folders fullnode, soliditynode, eventnode, and gridapi. The command then downloads full.jar and solidity.jar, and places these executable files within their respective folders.
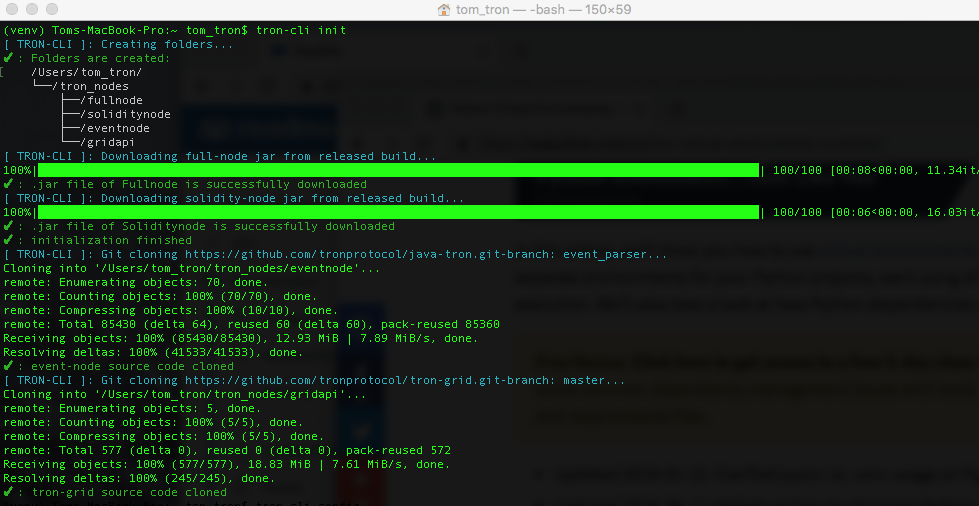
Successful TRON-CLI init output
Configuration
TRON-CLI allows users to easily configure HTTP and gRPC IP ports for Full and Solidity nodes. The default settings are:
Full Node HTTP: 8500
Solidity Node HTTP: 8600
Event-Node HTTP: 8400
Full Node RPC: 58500
Solidity Node RPC: 58600
Event-Node RPC: 58400
To customize a setting, simply execute the tron-cli config --nettype command. For example, to set Full Node HTTP port to 8090, run tron-cli config --fullhttpport 8090:
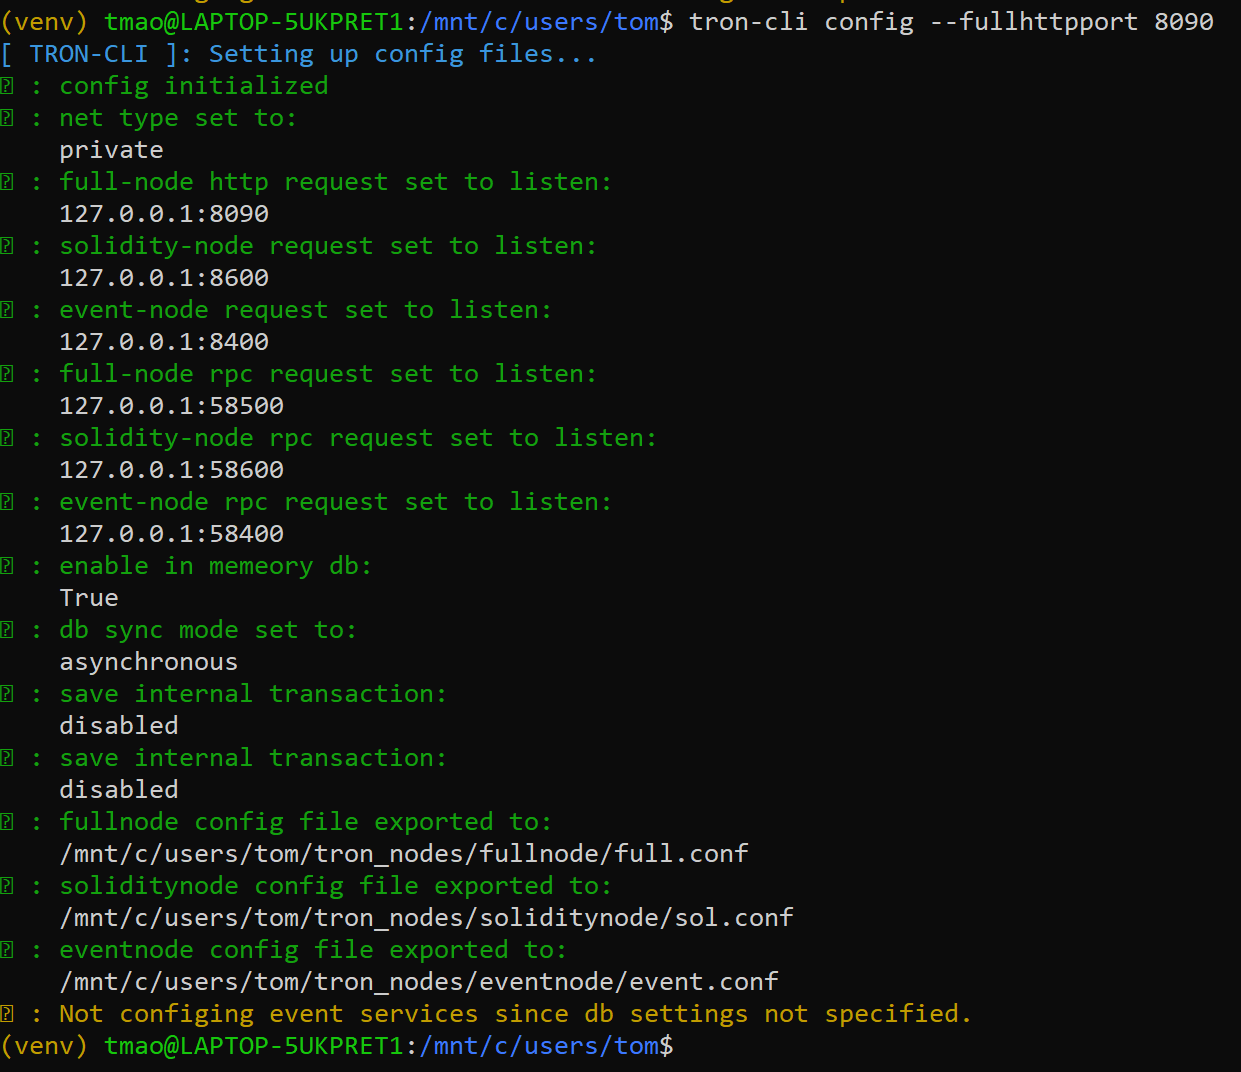
Full Node HTTP port set to 8090
Run Node
To launch a full node only, execute tron-cli run:
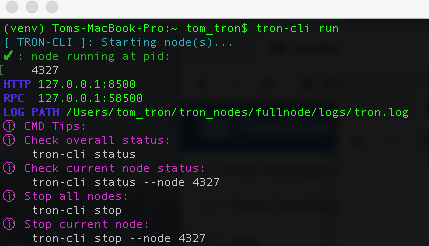
Running the full node
You can then check the overall node status with tron-cli status:
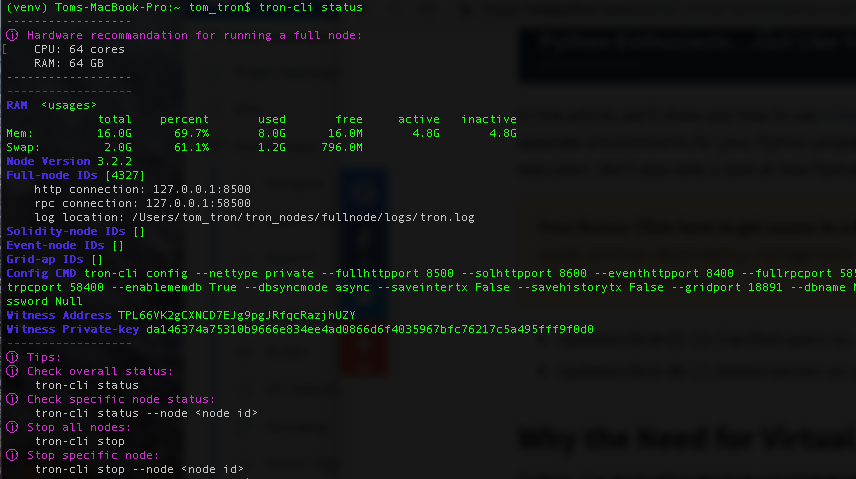
Checking TRON-CLI overall node status
To run a solidity node, run the command tron-cli run --nodetype sol. For event node, run the command tron-cli run --nodetype event:
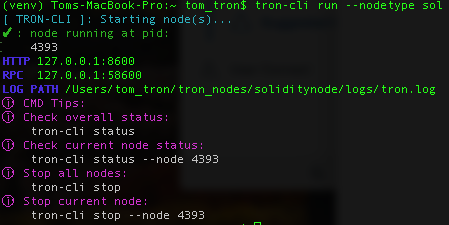
Running TRON-CLI Solidity Node
Check Logs
Once both a Full Node and Solidity Node are running, you can view the synchronization logs. The Full Node log is located under tron_nodes/fullnode/logs/tron.log, while Solidity Node log is located under tron_nodes/soliditynode/logs/tron.log. The logs are updated dynamically, with the Solidity Node 1 block behind the Full Node due to syncing.
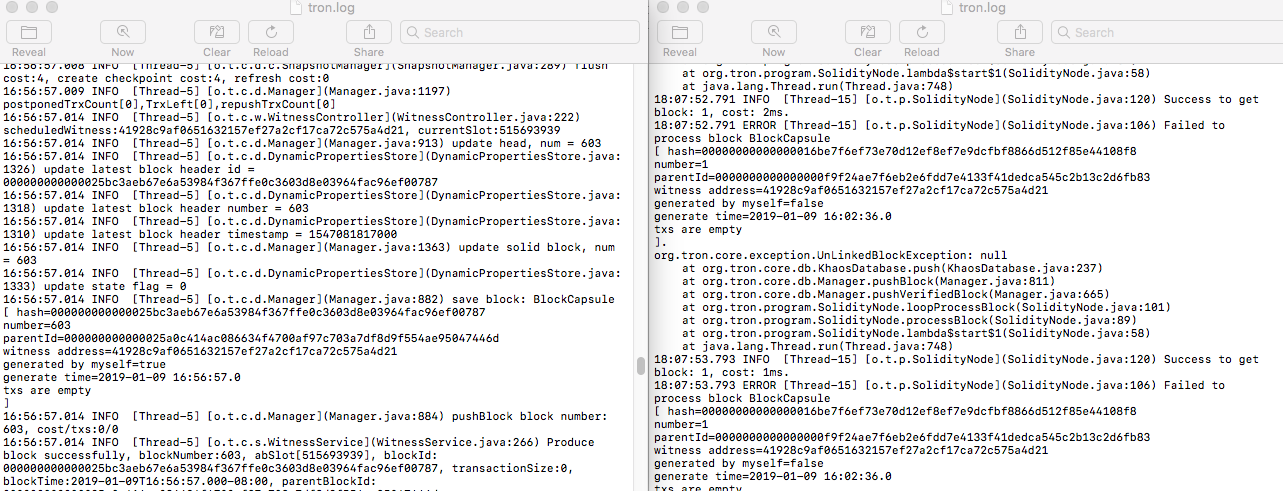
Full Node (left) and Solidity Node (right) logs.
Stop Node
Stop a node easily by running the following command:
tron-cli stop --node NODENUMBER
Common Use Cases
Note: It is highly suggested to first take a look at tron-cli i, as Interactive Mode should cover most use cases.
1. Private Net Nodes Setup
Setup Full Node
tron-cli quickAdd Solidity Node
tron-cli run --nodetype sol2. Mainnet Nodes Setup
Init
tron-cli initConfig to Mainnet
tron-cli config --nettype mainRun Full Node
tron-cli run3. Advanced Config to Start Nodes
Initialize
tron-cli init --version latest --reset TrueDetail Configuration (Specify parameter to overwrite default)
tron-cli config --nettype private --fullhttpport 8500 --solhttpport 8600 --eventhttpport 8400 --fullrpcport 58500 --solrpcport 58600 --eventrpcport 58400 --enablememdb True --dbsyncmode async --saveintertx False --savehistorytx False --gridport 18891 --dbname Null --dbusername Null --dbpassword NullRun Full/Sol
tron-cli run --nodetype full4. Private Full Node + Event Node + Tron-Grid
Install MongoDB and create User and Database. Then initialize.
tron-cli initConfig (Specify parameter to overwrite default) dbname, dbusername, and dbpassword are required to set
tron-cli config --nettype private --fullhttpport 8500 --solhttpport 8600 --eventhttpport 8400 --fullrpcport 58500 --solrpcport 58600 --eventrpcport 58400 --enablememdb True --dbsyncmode async --saveintertx False --savehistorytx False --gridport 18891 --dbname events --dbusername tron --dbpassword 12345678Run Full Node, Event Node, and Tron-Grid
tron-cli run
tron-cli run --nodetype event
tron-cli run --nodetype grid
5. Mainnet Event Node + Tron-Grid
Install MongoDB and create User and Database. Then initialize
tron-cli initConfig (Specify parameter to overwrite default) dbname, dbusername, and dbpassword are required to set
tron-cli config --nettype main --fullhttpport 8500 --solhttpport 8600 --eventhttpport 8400 --fullrpcport 58500 --solrpcport 58600 --eventrpcport 58400 --enablememdb True --dbsyncmode async --saveintertx False --savehistorytx False --gridport 18891 --dbname events --dbusername tron --dbpassword 12345678Run Event Node
tron-cli run --nodetype eventRun Tron-Grid
tron-cli run --nodetype gridCommands Overview
Command | Functions | Usage Example 1 | Usage Example 2 |
|---|---|---|---|
tron-cli init --version --reset | Initiate directories and fetch the code. | tron-cli init | tron-cli init --version 3.2.2 --reset True |
tron-cli config --nettype ---nettype --fullhttpport --solhttpport --eventhttpport --fullrpcport --solrpcport --eventrpcport --enablememdb --dbsyncmode --saveintertx --savehistorytx --gridport --dbname --dbusername --dbpassword | Create and customize configuration files. | tron-cli config | tron-cli config --nettype private --fullhttpport 8500 --solhttpport 8600 --eventhttpport 8400 --fullrpcport 58500 --solrpcport 58600 --eventrpcport 58400 --enablememdb True --dbsyncmode async --saveintertx False --savehistorytx False --gridport 18891 --dbname events --dbusername tron --dbpassword 12345678 |
tron-cli run --nodetype | Run nodes. | tron-cli run | tron-cli run --nodetype full |
tron-cli stop --node | Stop nodes. | tron-cli stop | tron-cli stop --node 7777 |
tron-cli status --node | Monitor nodes status. | tron-cli status | tron-cli status --node 777 |
tron-cli quick --reset | Quick Start. | tron-cli quick | tron-cli quick -- reset True |
tron-cli version | Check installed troncli version. | tron-cli version | tron-cli version |
tron-cli -h, --help | Check out the help manual. | tron-cli -h | tron-cli --help |
Installation FAQs
- How to fix "fail to build a wheel for psutil" error?
a. Please check if clang is installed correctly, or install it using Homebrew:
brew install --with-toolchain llvmb. Please check if you are using Python 3.x
- How to test in a virtual environment?
a. Create Virtual Environment
python3 -m venv venvb. Activate VENV
. ./venv/bin/activatec. Install TRON-CLI in VENV
pip install tronclid. Deactivate the VENV when done testing or using
deactivateGitHub Link
https://tronprotocol.github.io/tron-cli/Updated 3 months ago