Android Wallet
Introduction
TRON Wallet is a multi-functional Android wallet for the TRON network. It allows quick and easy account interaction, safely secures your assets and account data in a cold wallet setup. This app offers you one of the safest ways to protect your private data. The TRON Wallet, along with other TRON projects, is aimed to strengthen the community by establishing improved accessibility and communication for its users.
Features
- create wallet
- create a private/public key pair
- create a 24 words recovery phrase (human readable private key recovery phrase) (BIP39)
- encrypt private information with a password
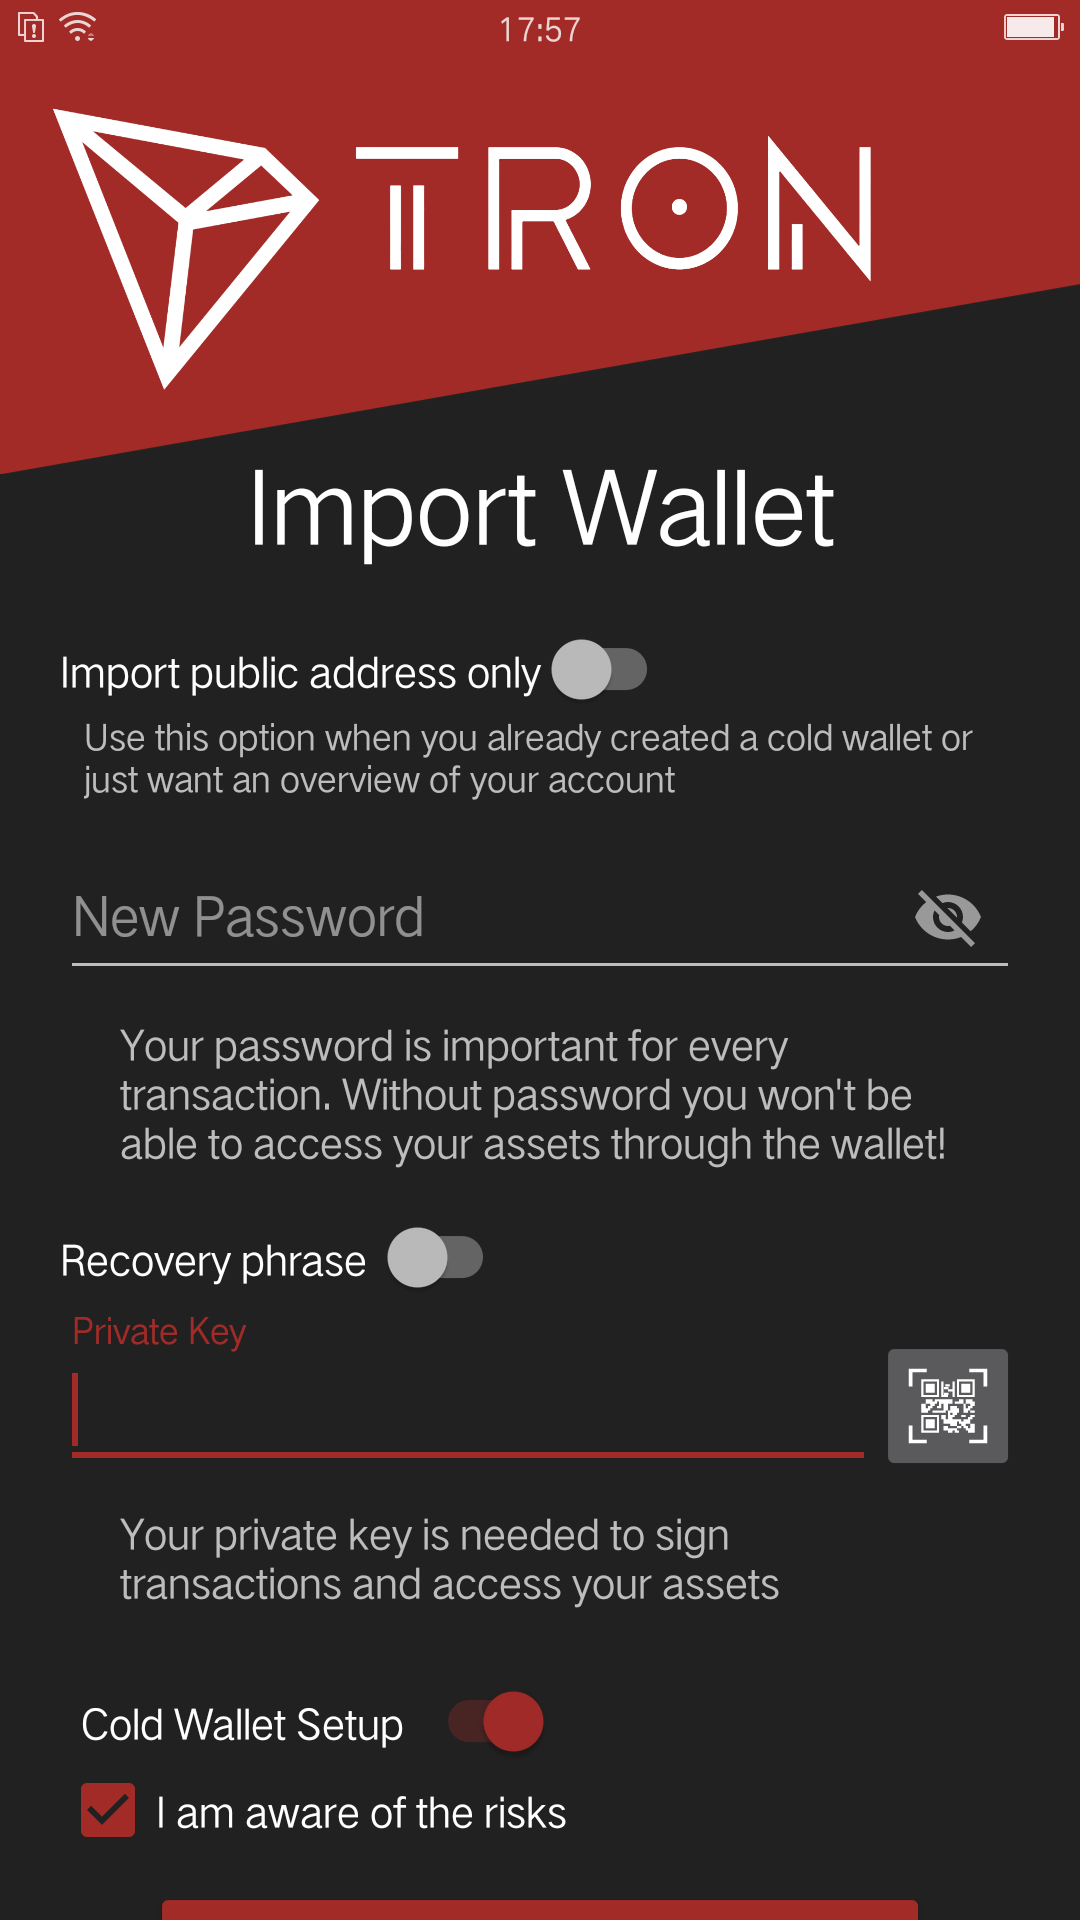
Import Wallet
- import with the private key or 24 words recovery phrase
- import public address (only when setup)
Wallet Functionalities
- individual connection (connect to any node, e.g. private net)
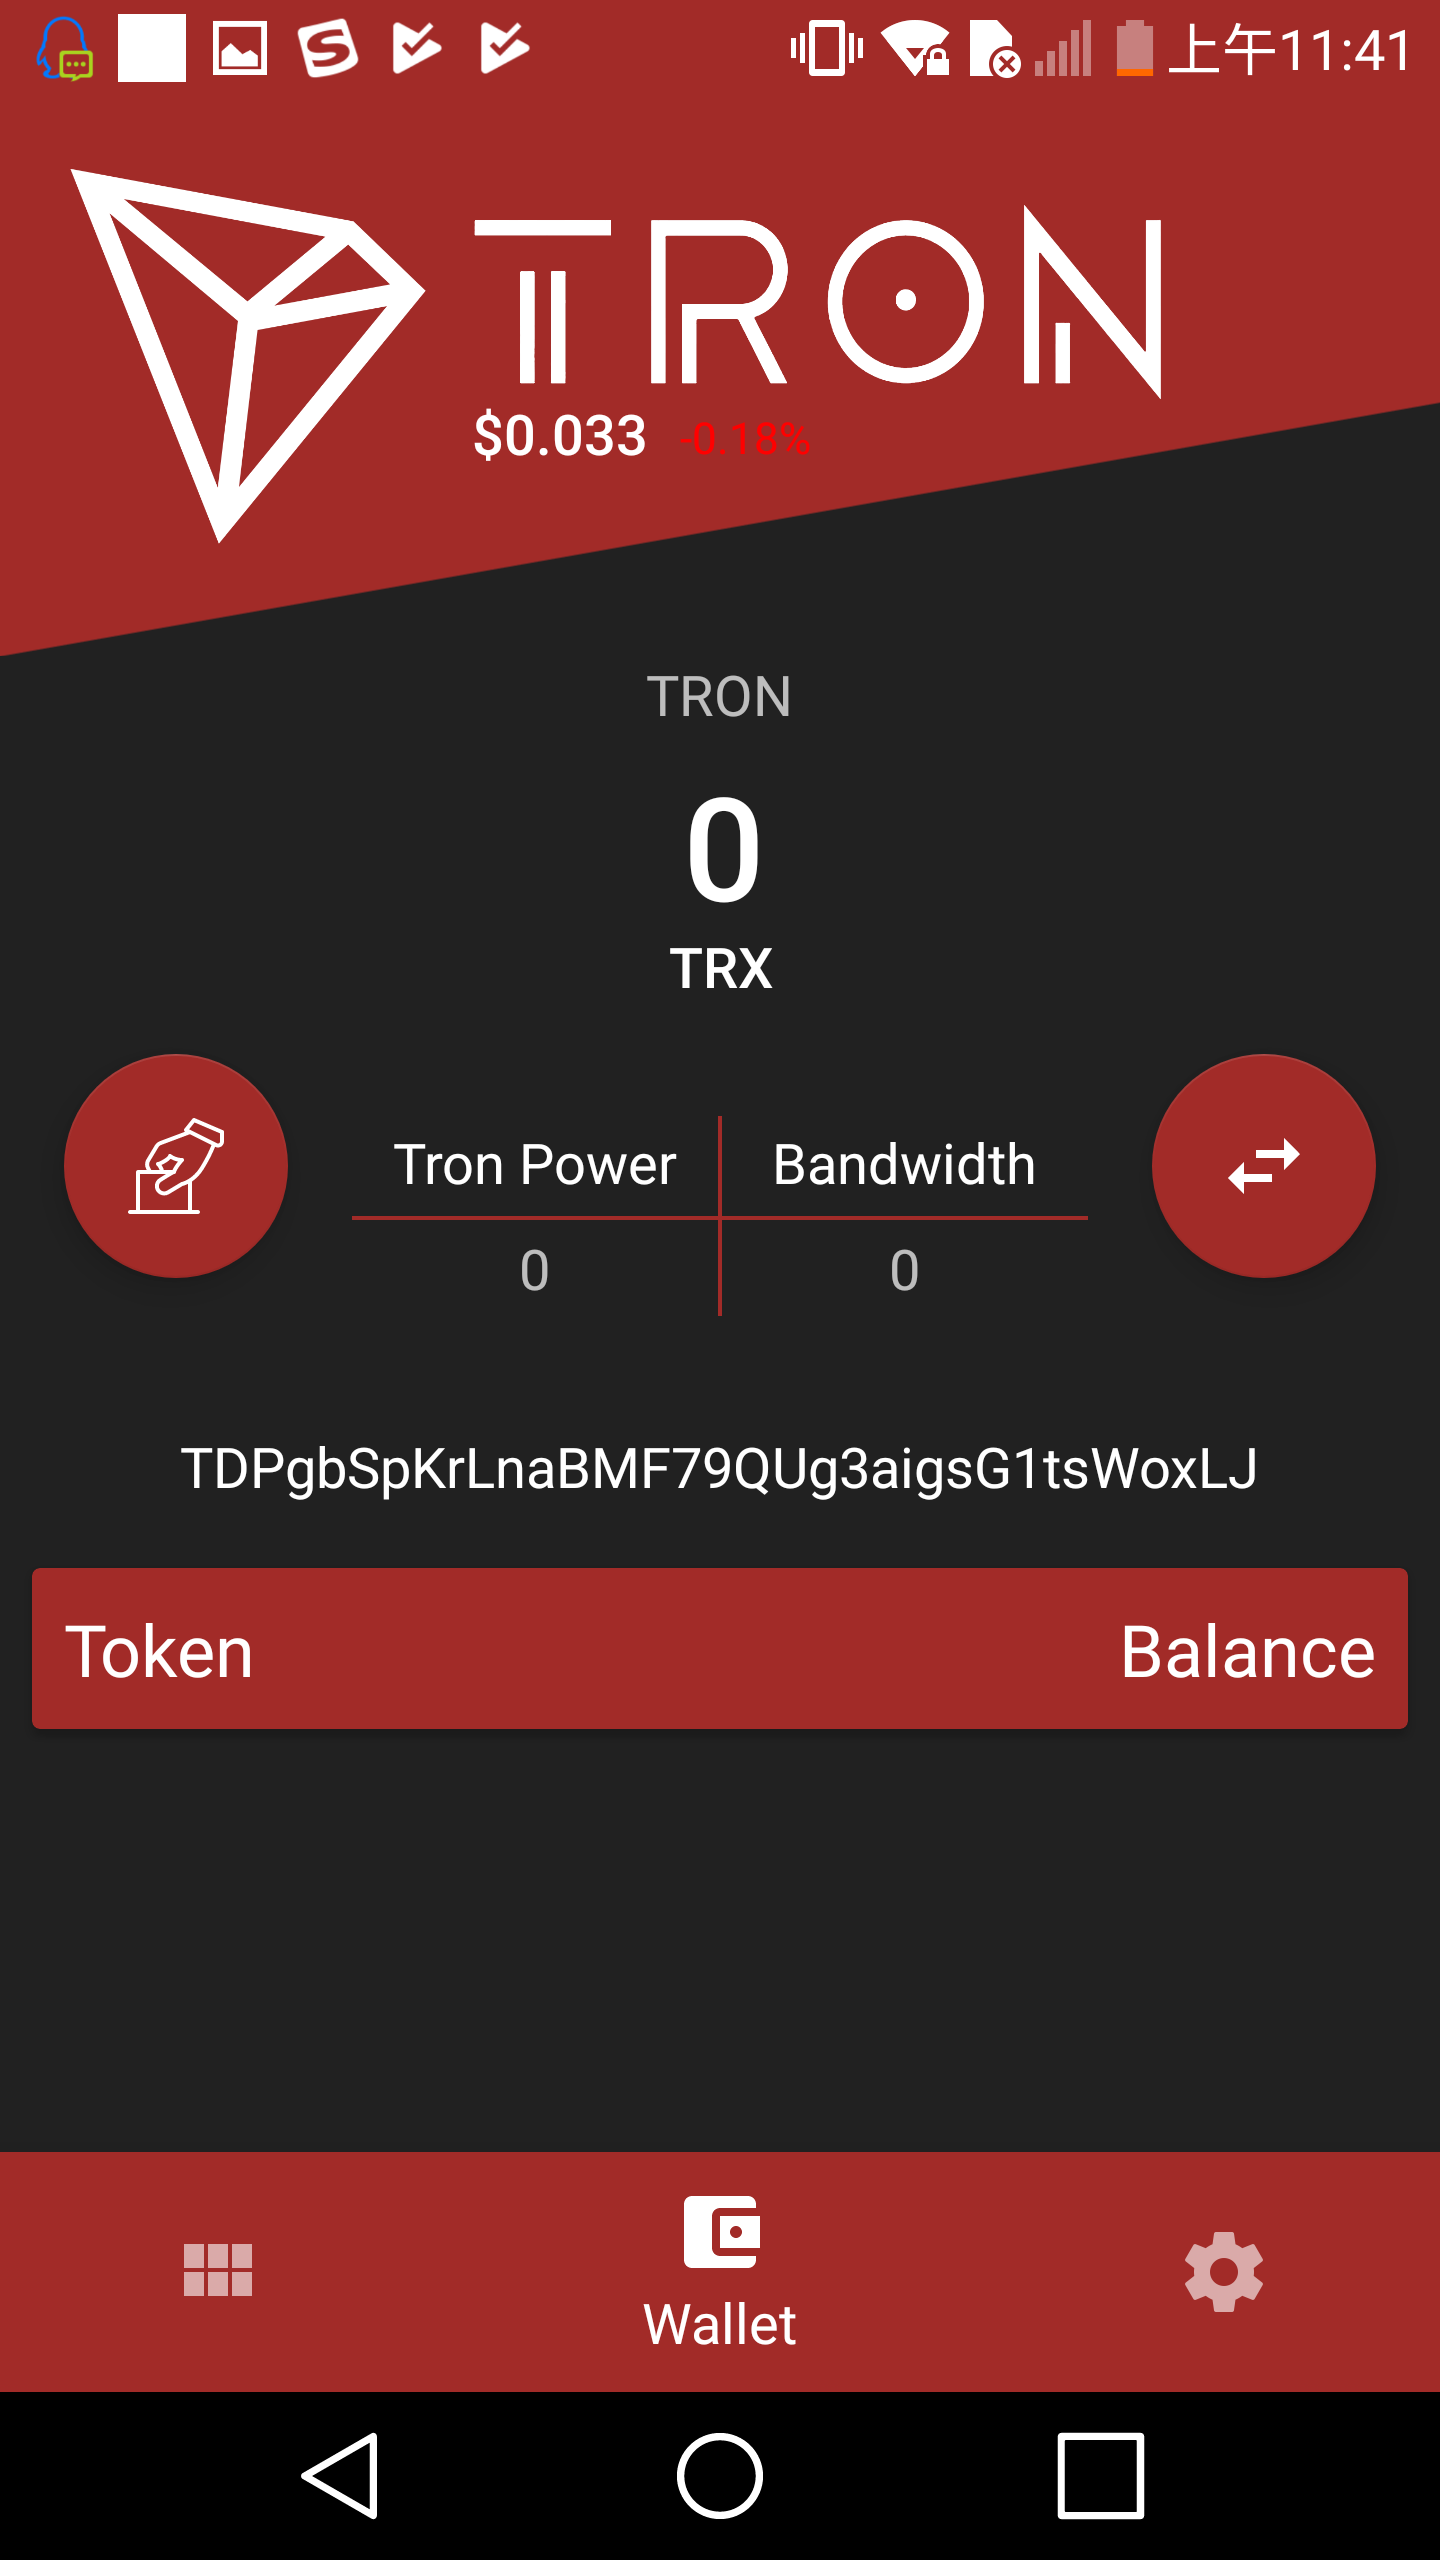
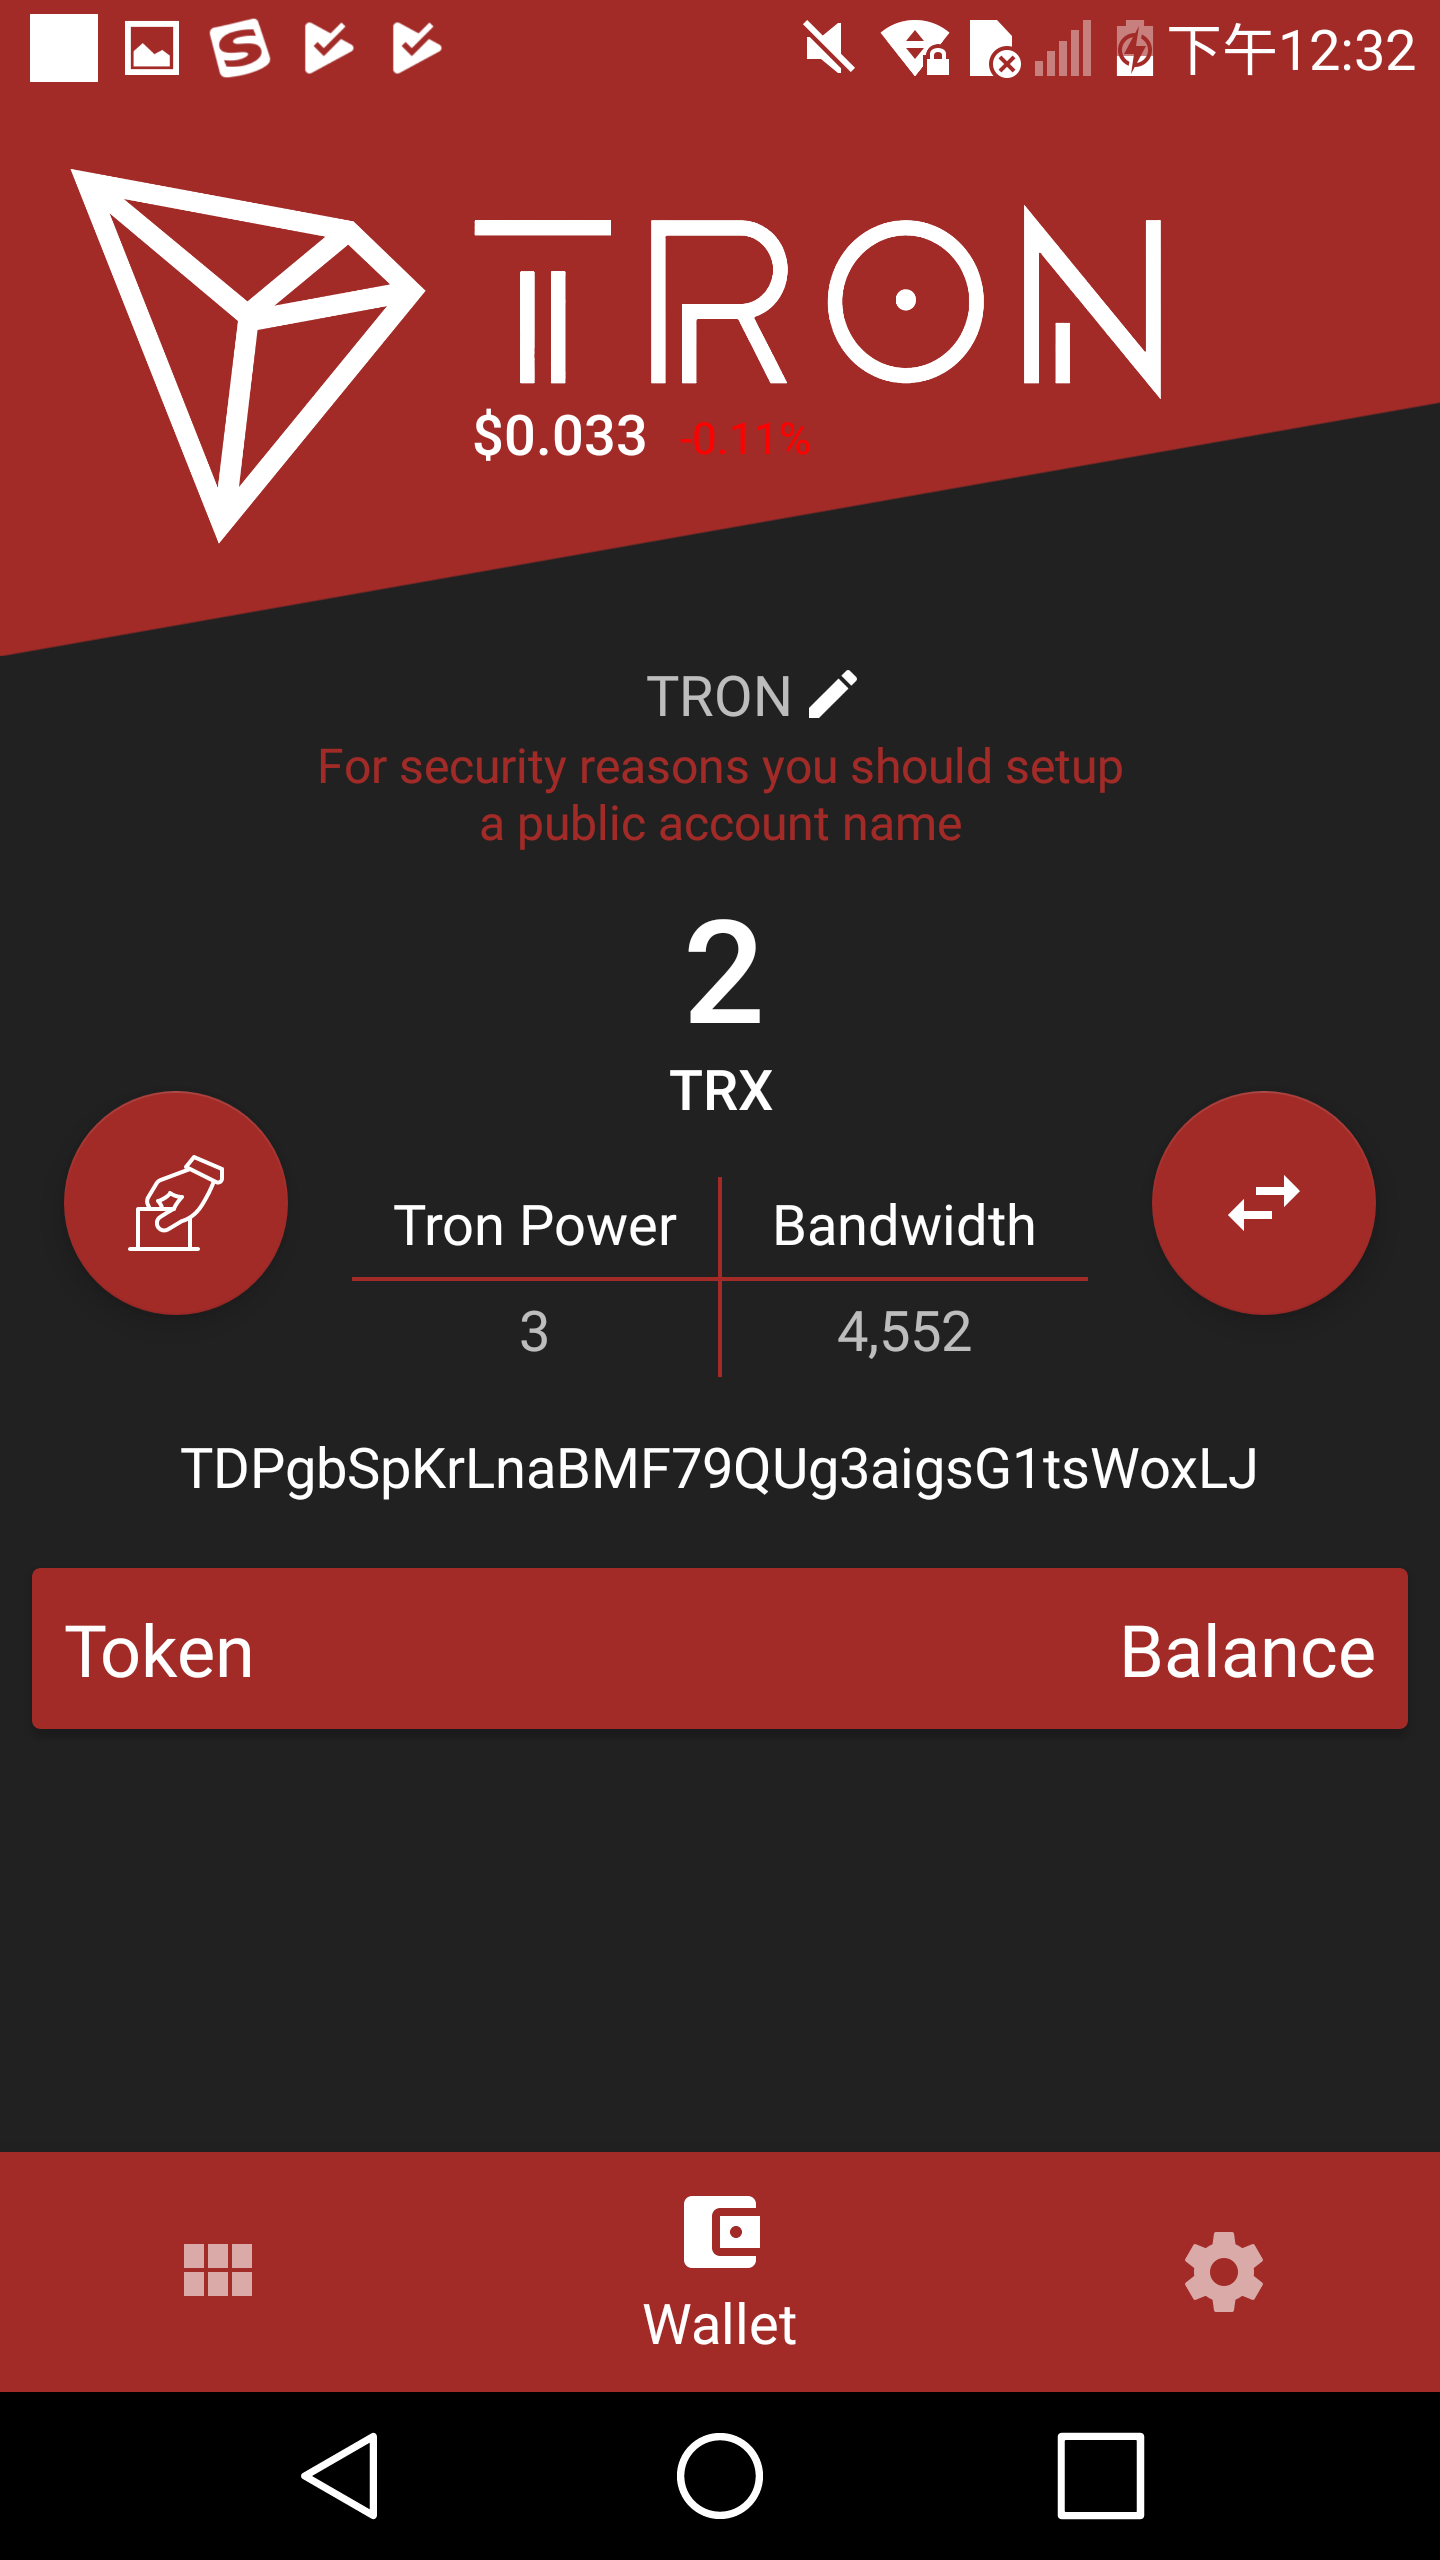
- check balance (TRX, TRC10 tokens, TRC20 tokens)
- toggle market price view
- check frozen asset amount
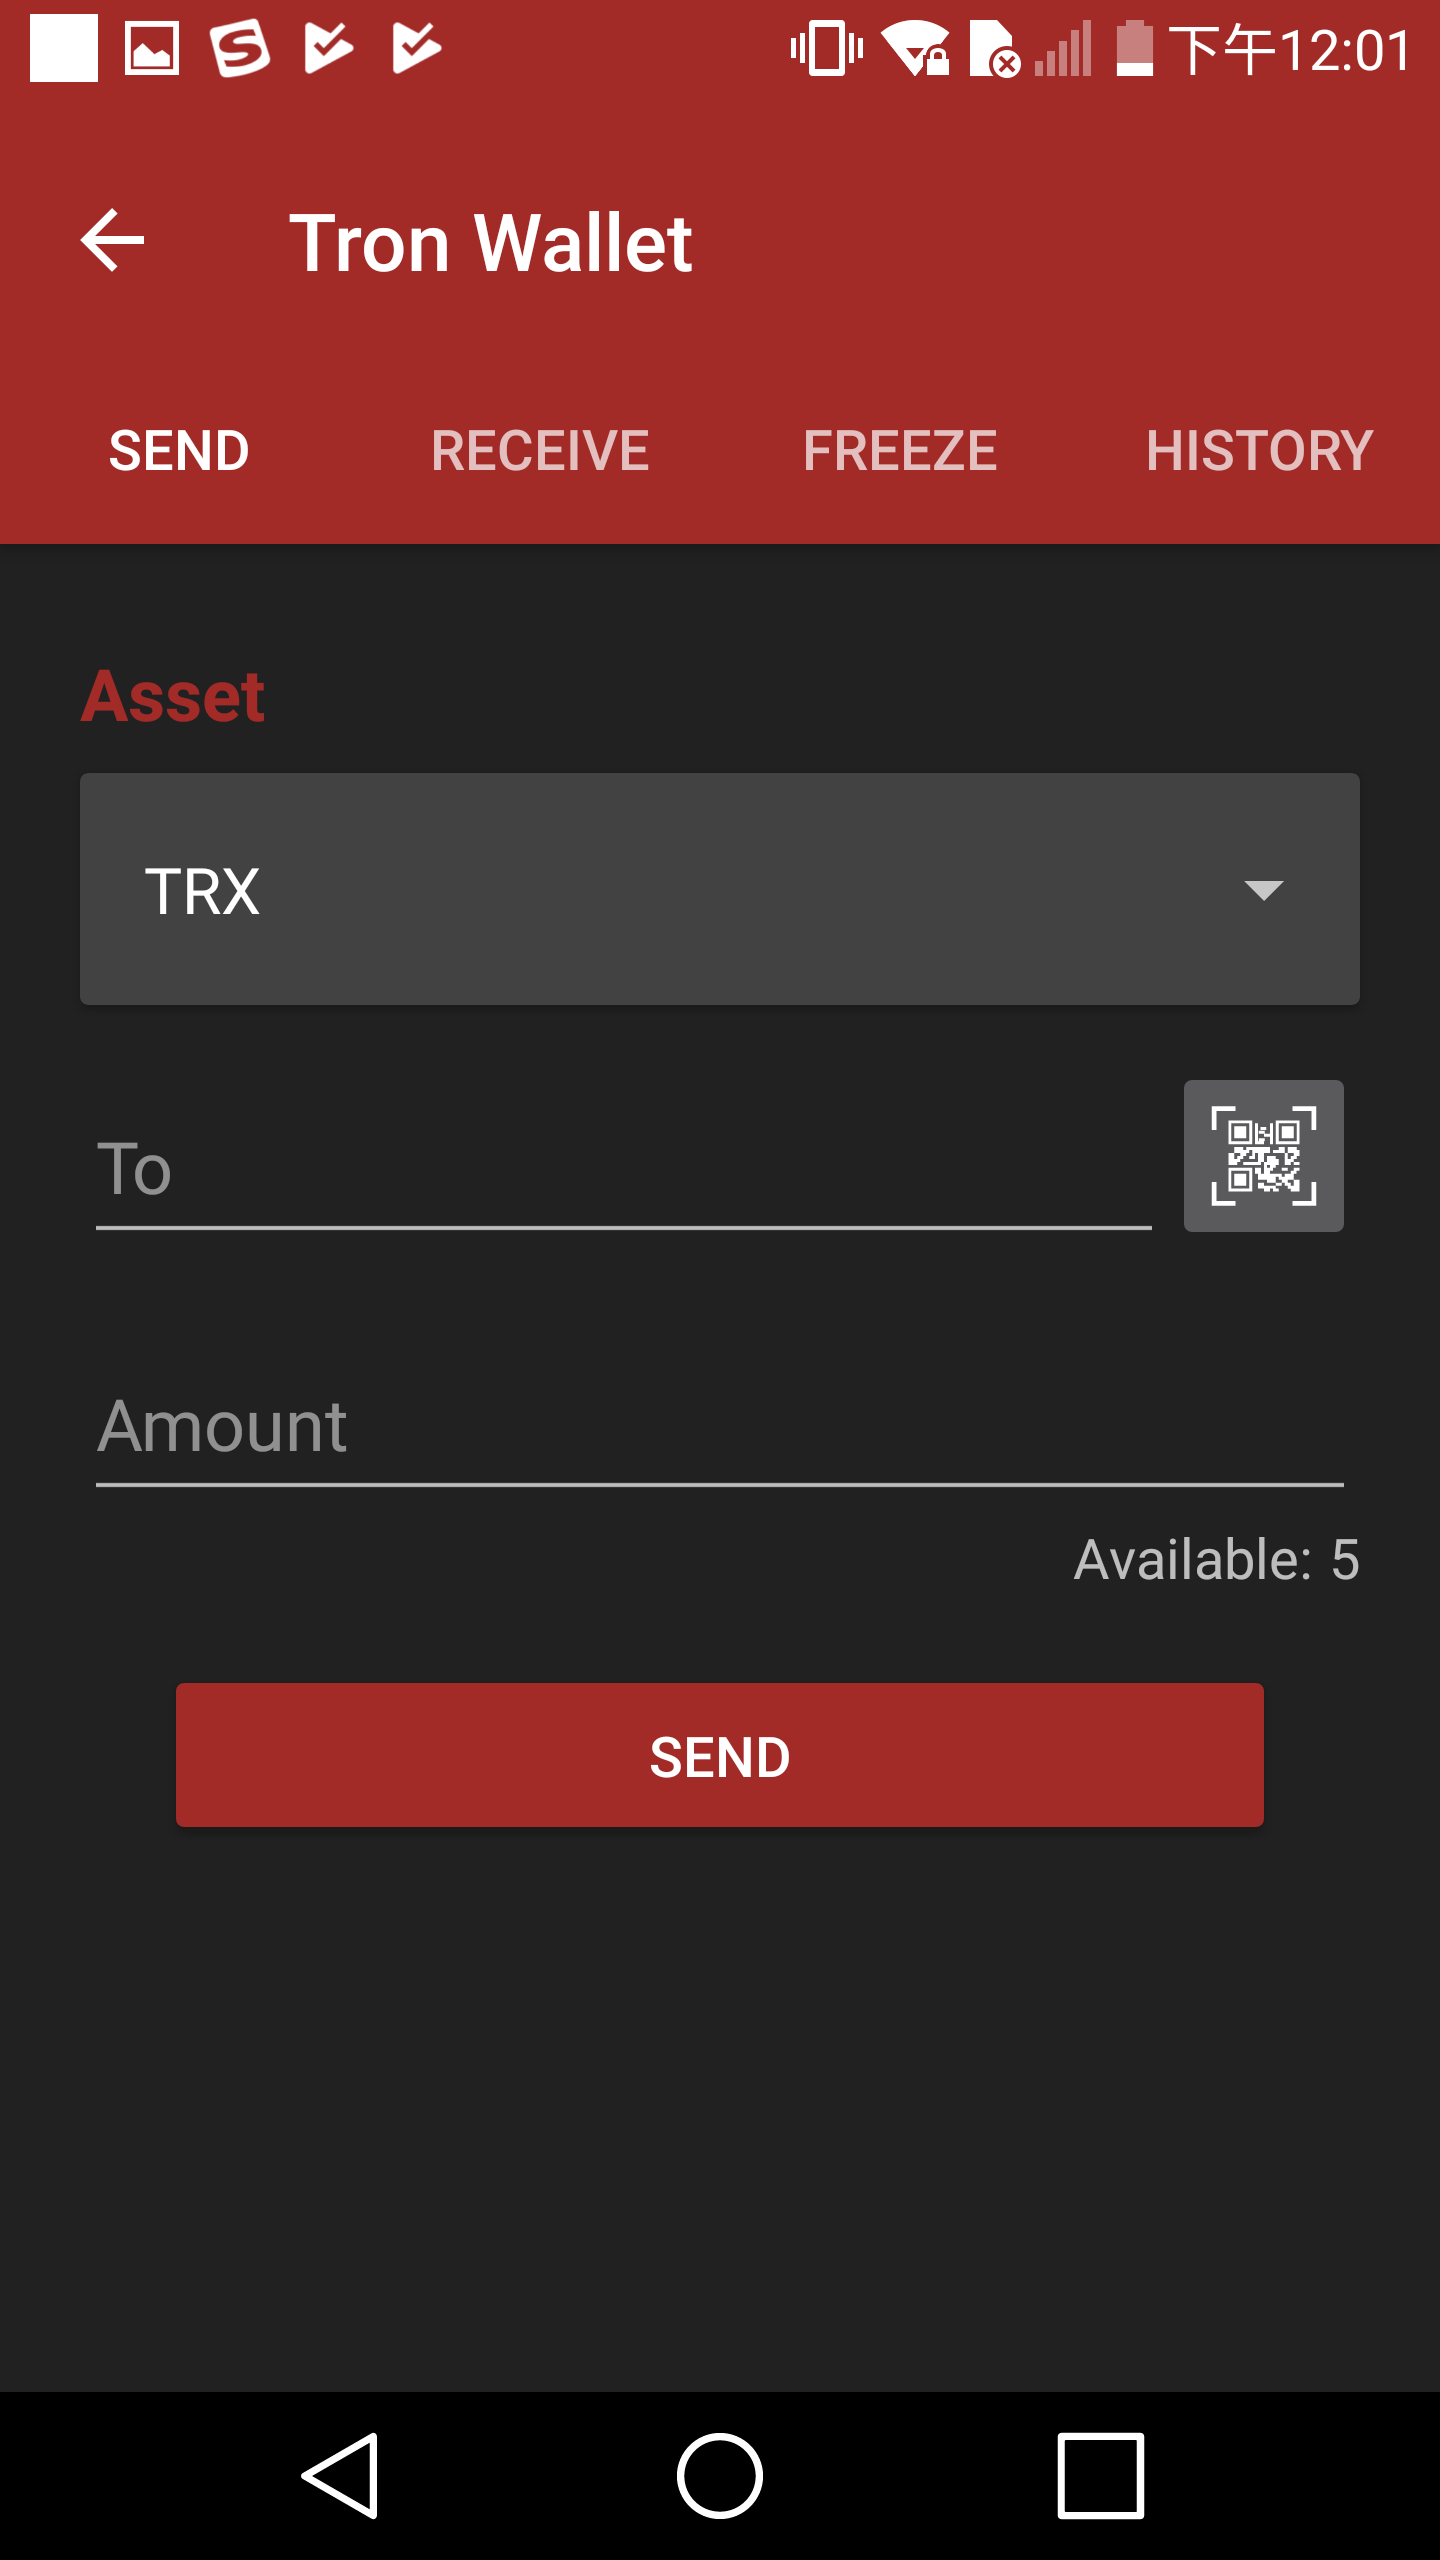
- send TRX and tokens
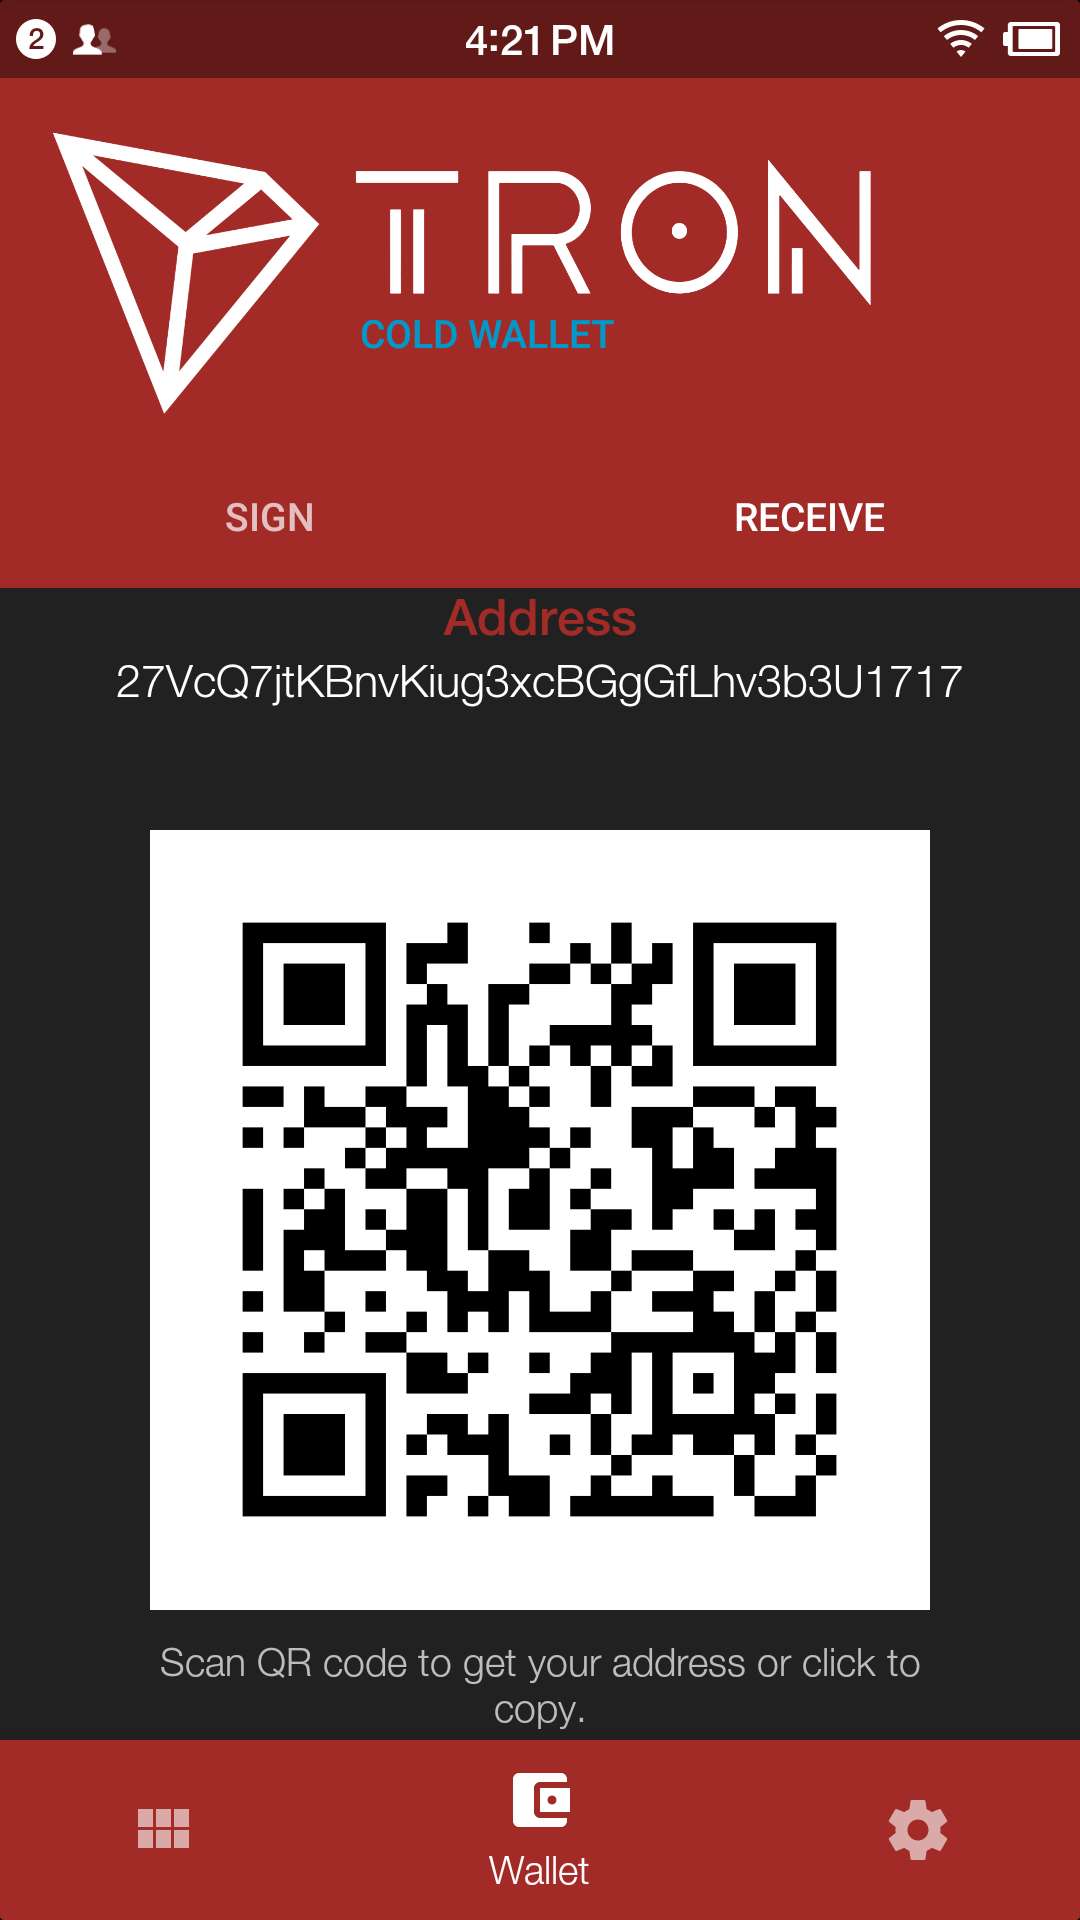
- receive TRX and tokens with QR code
- freeze TRX to get votes and bandwidth
- cast your votes for representatives
- offline signing mechanism with QR code scanning
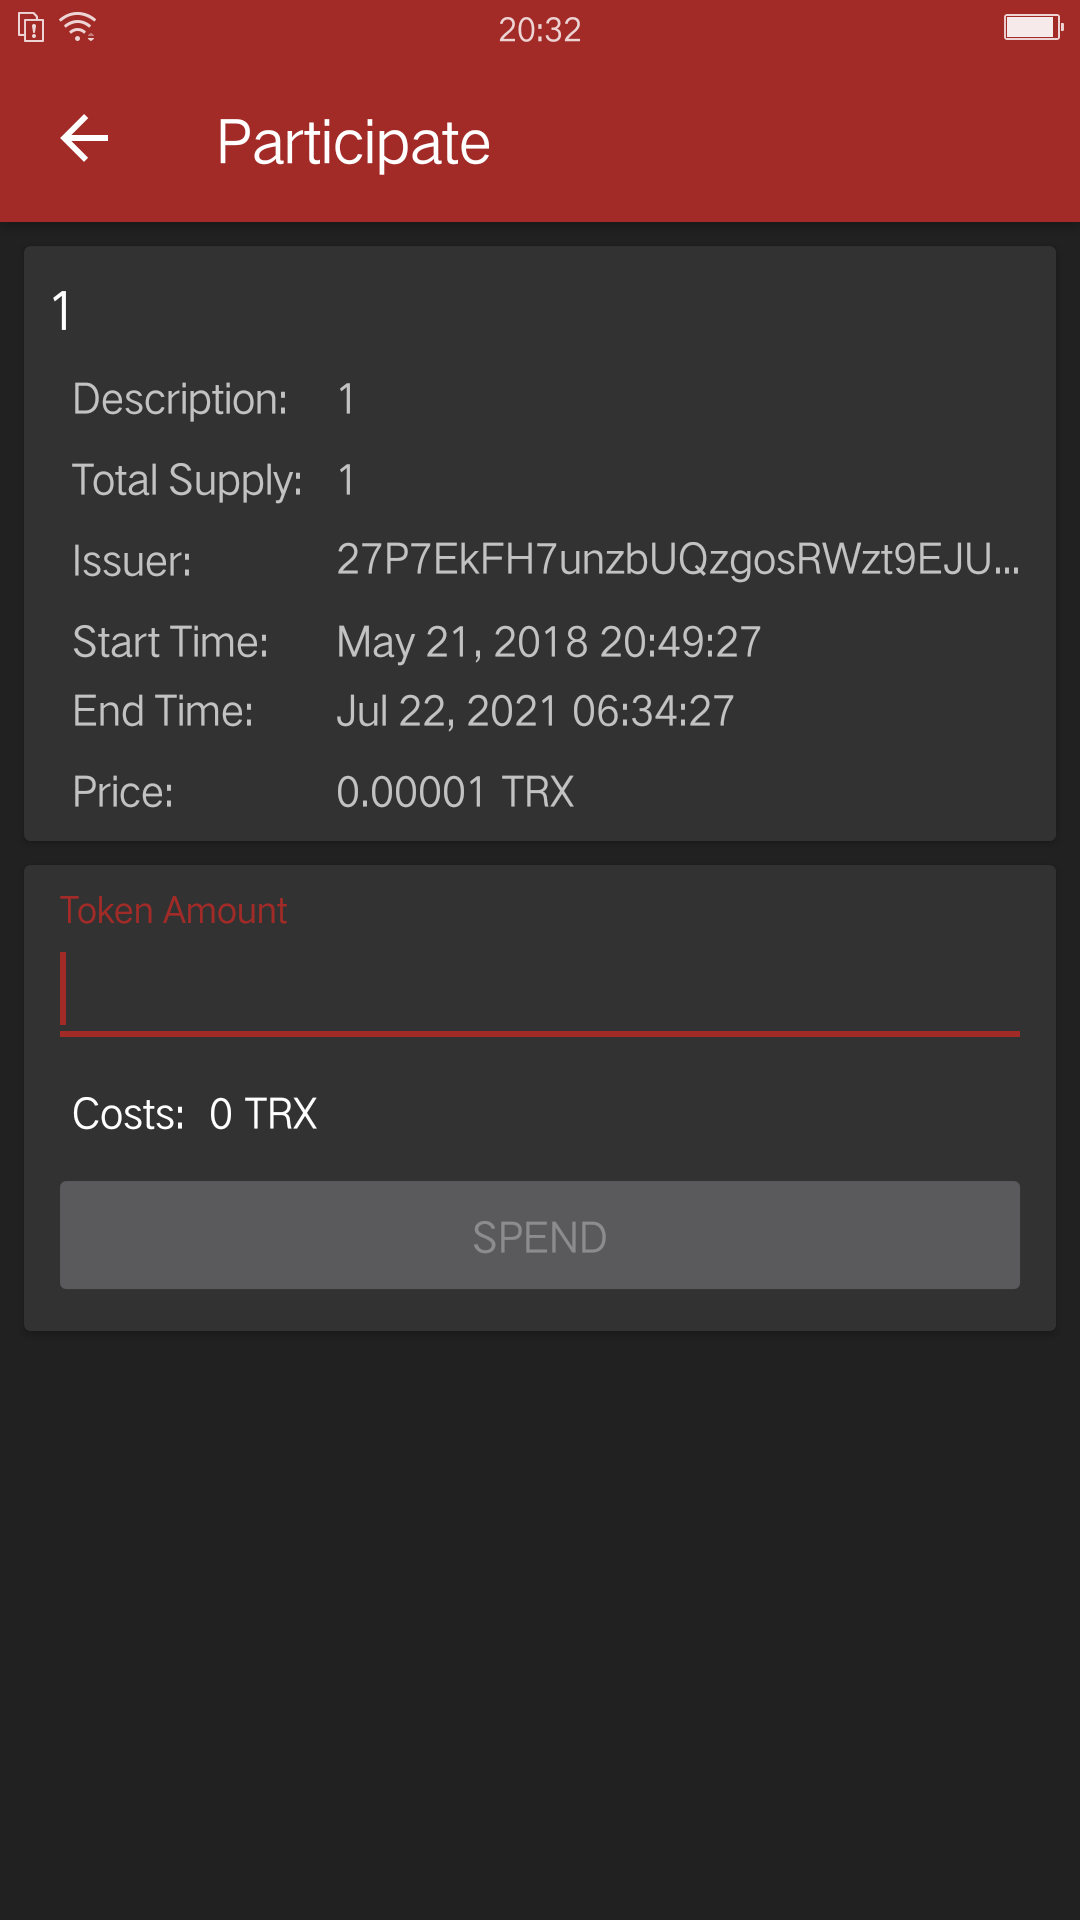
- participate in token distributions
- manually set your node connection
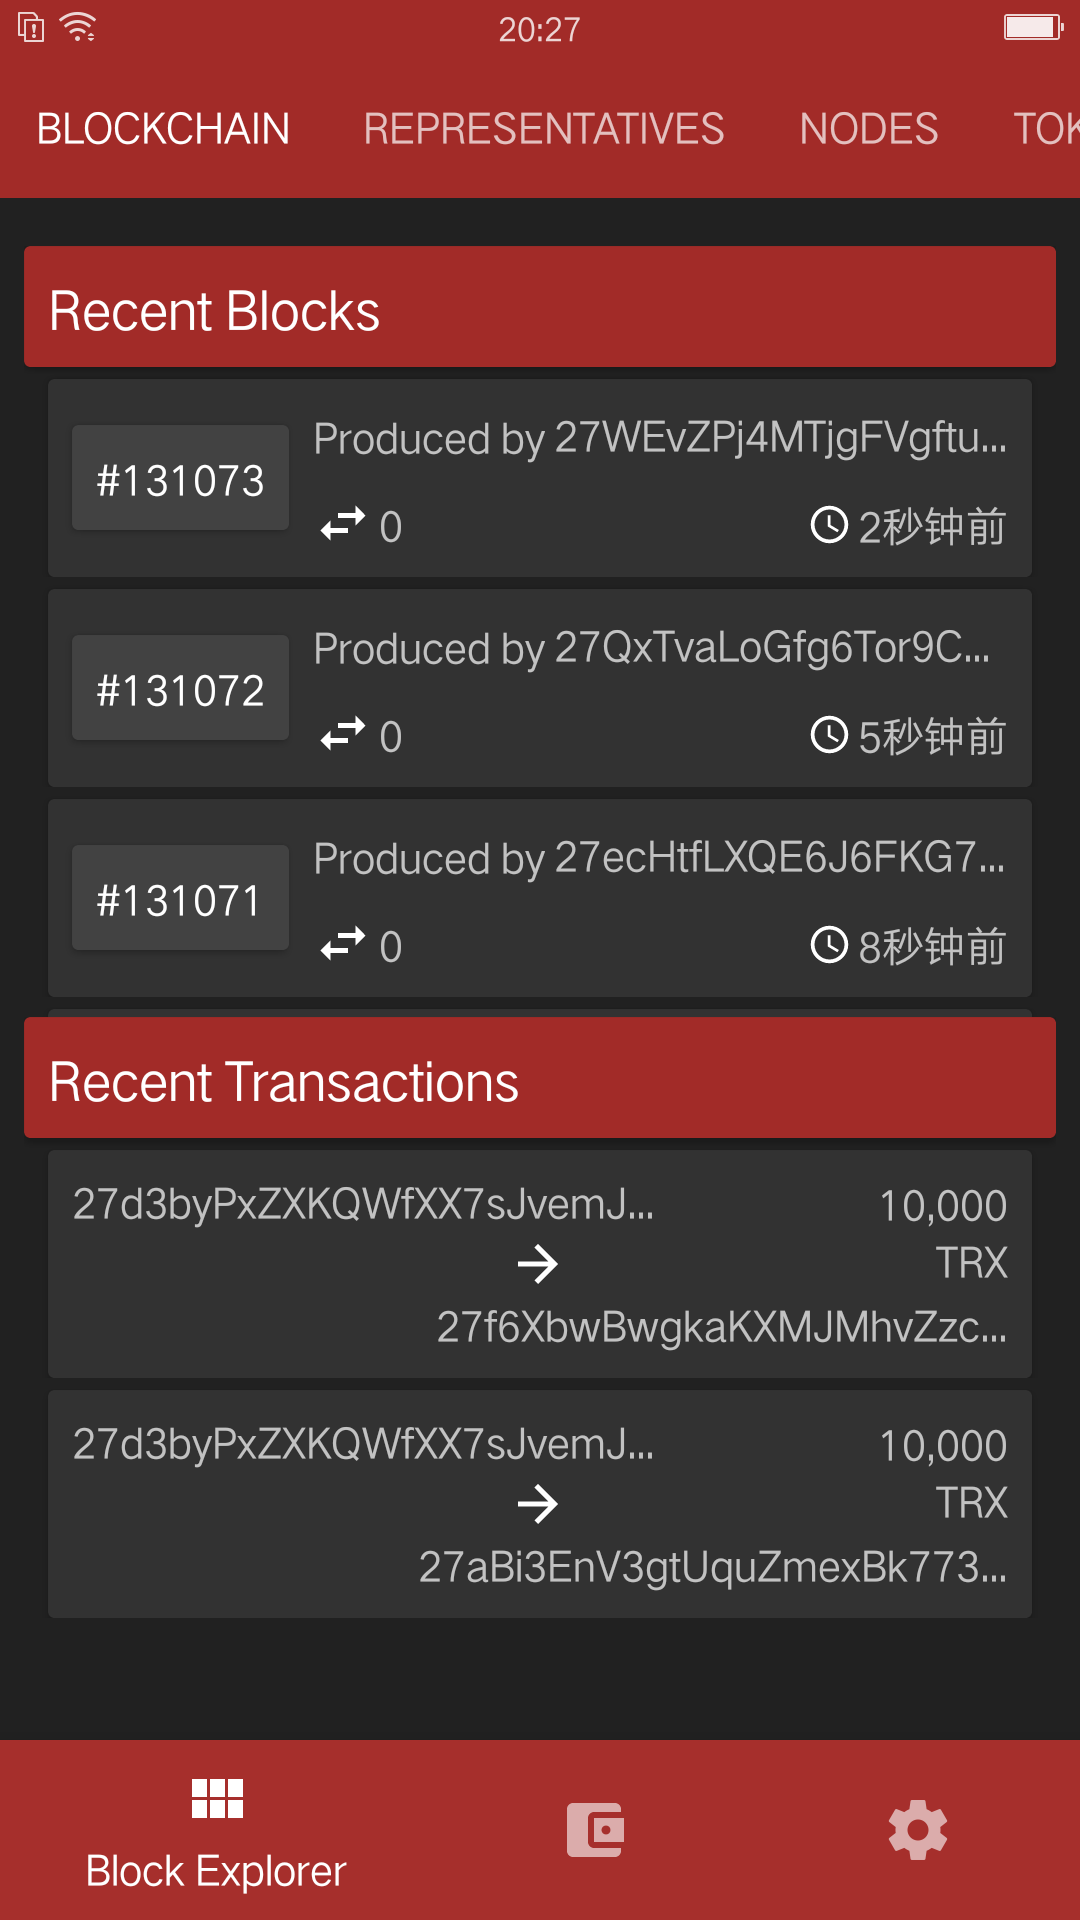
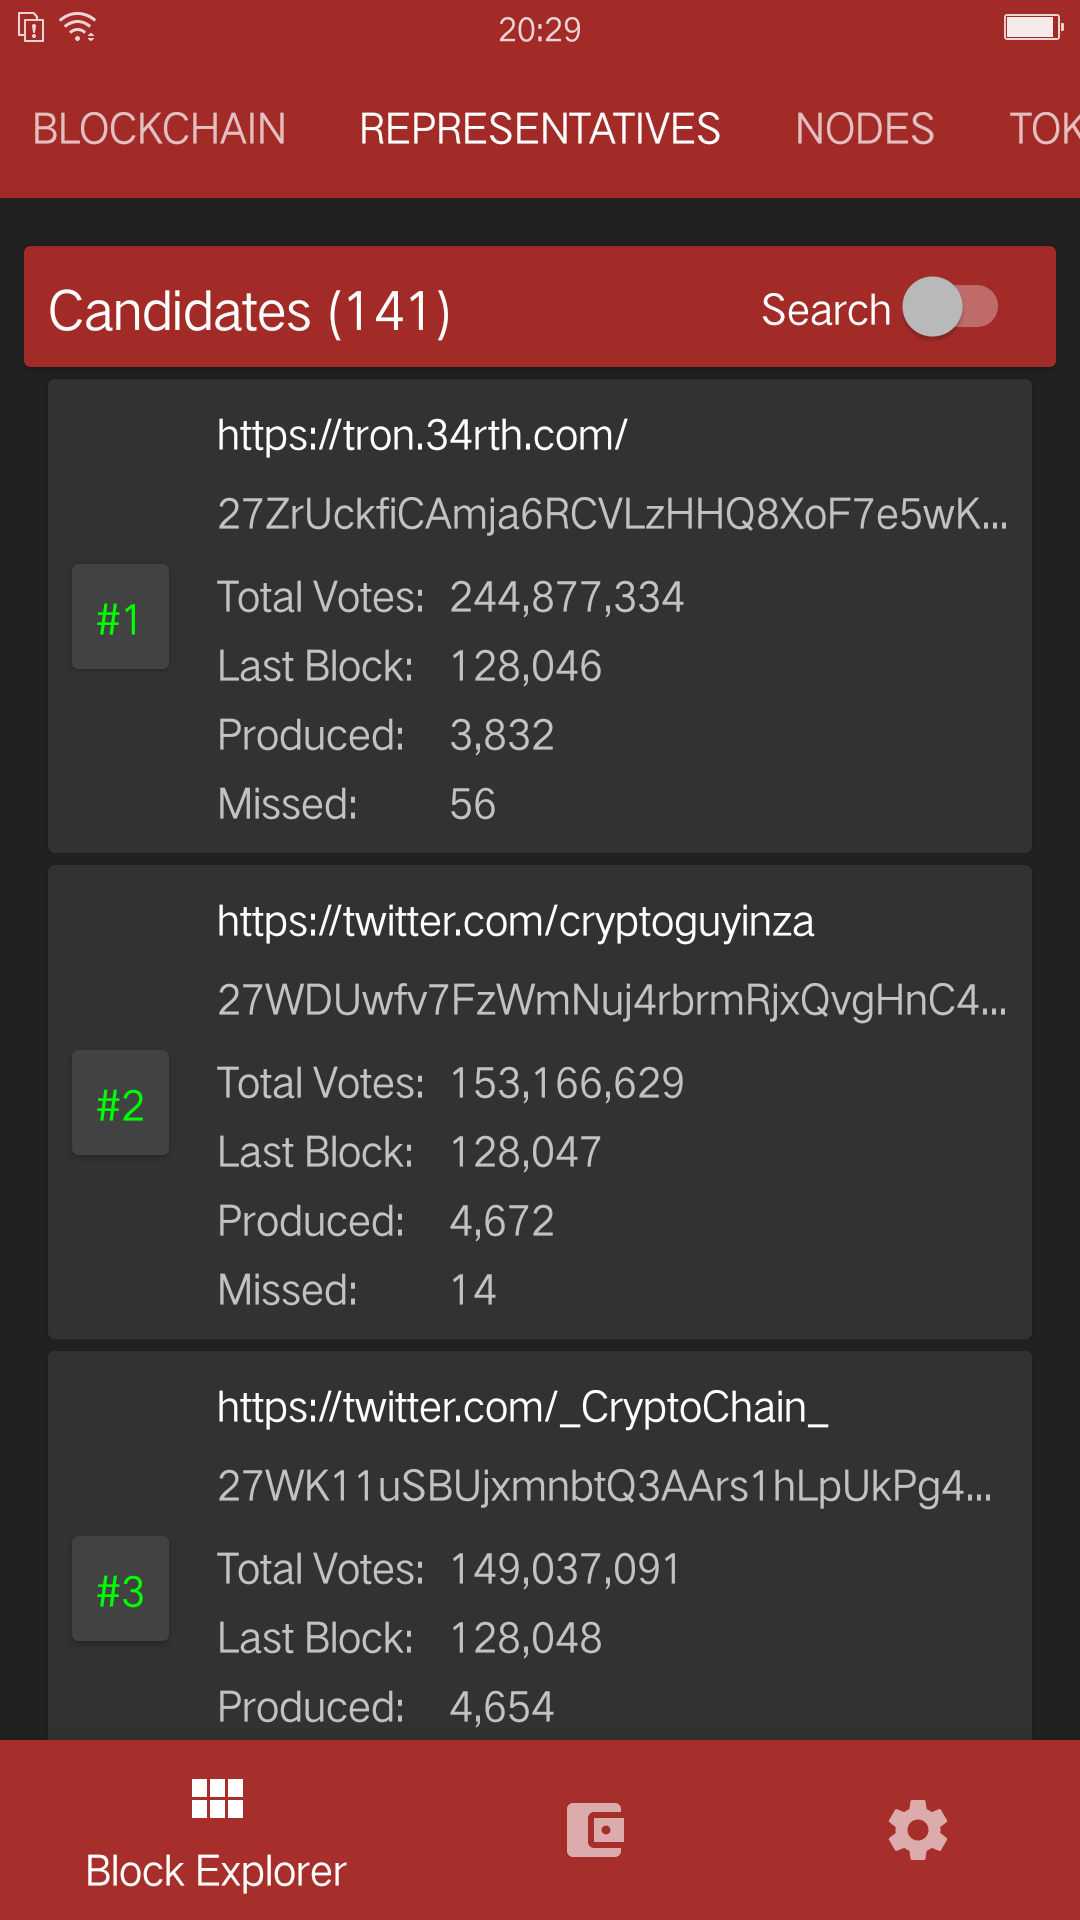
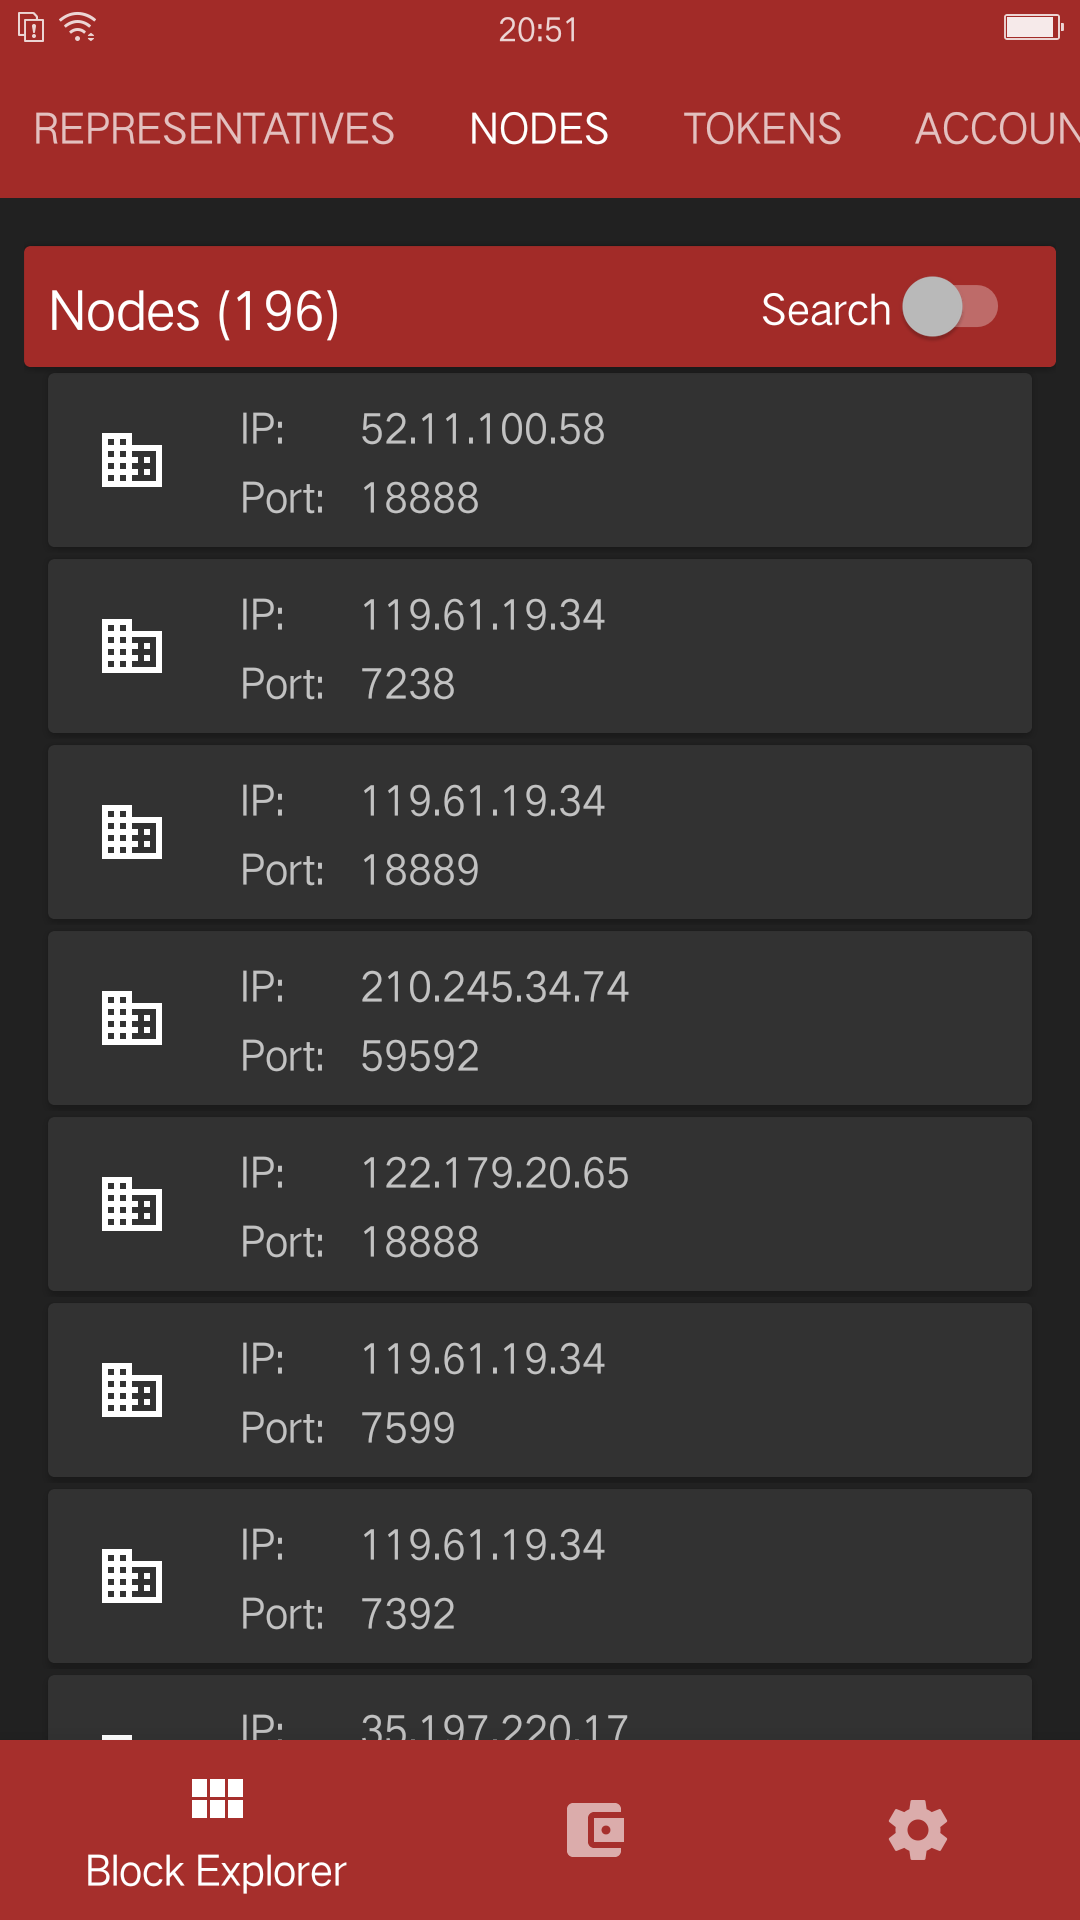
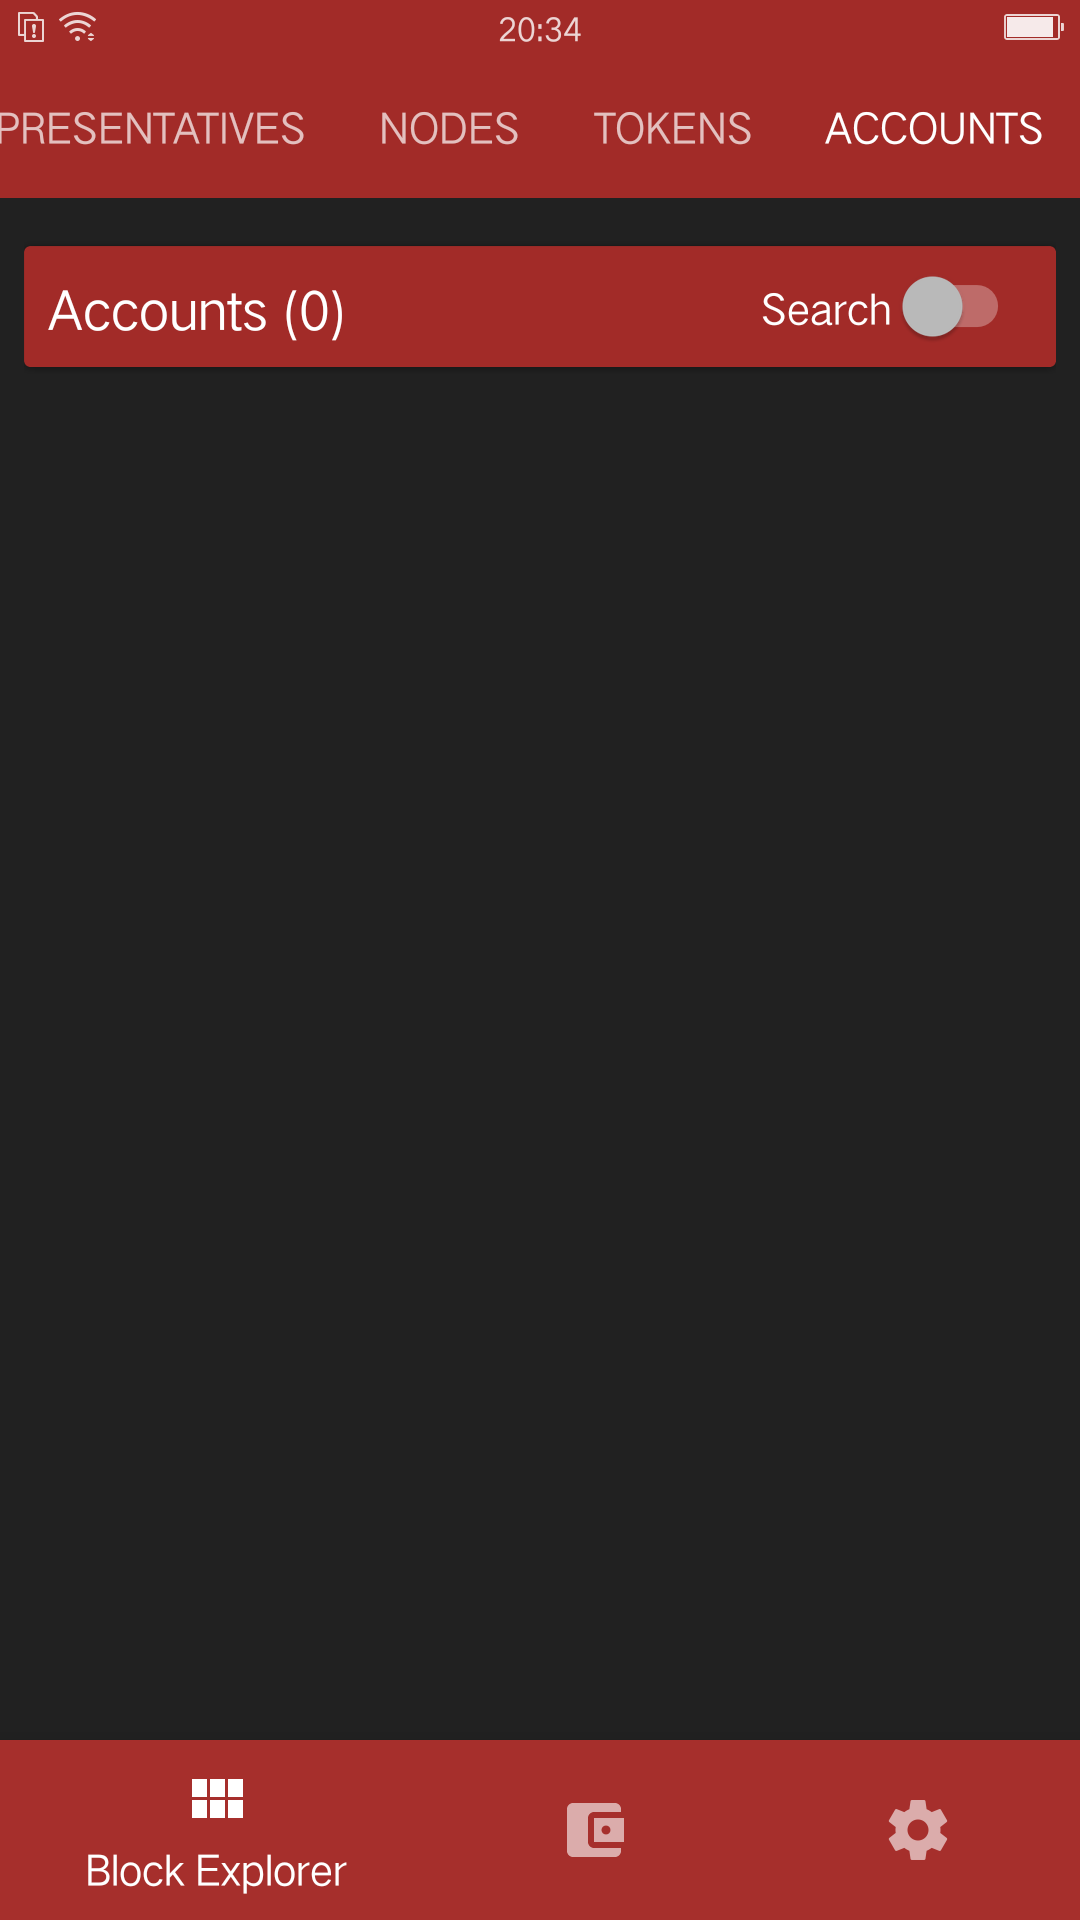
Block Explorer
- check latest blocks
- check latest transactions
- check representative candidates
- check connected nodes
- check token distributions
- check accounts
- search filter
Wallet Setups
Watch only setup
- import only your public address
- completely safe because no private information is accessible
- overview of your account
- creates unsigned transactions (used in combination with a cold wallet setup)
Hot Wallet Setup
- owns public and private key
- overview your account
- full access (sending, freezing, voting, ...)
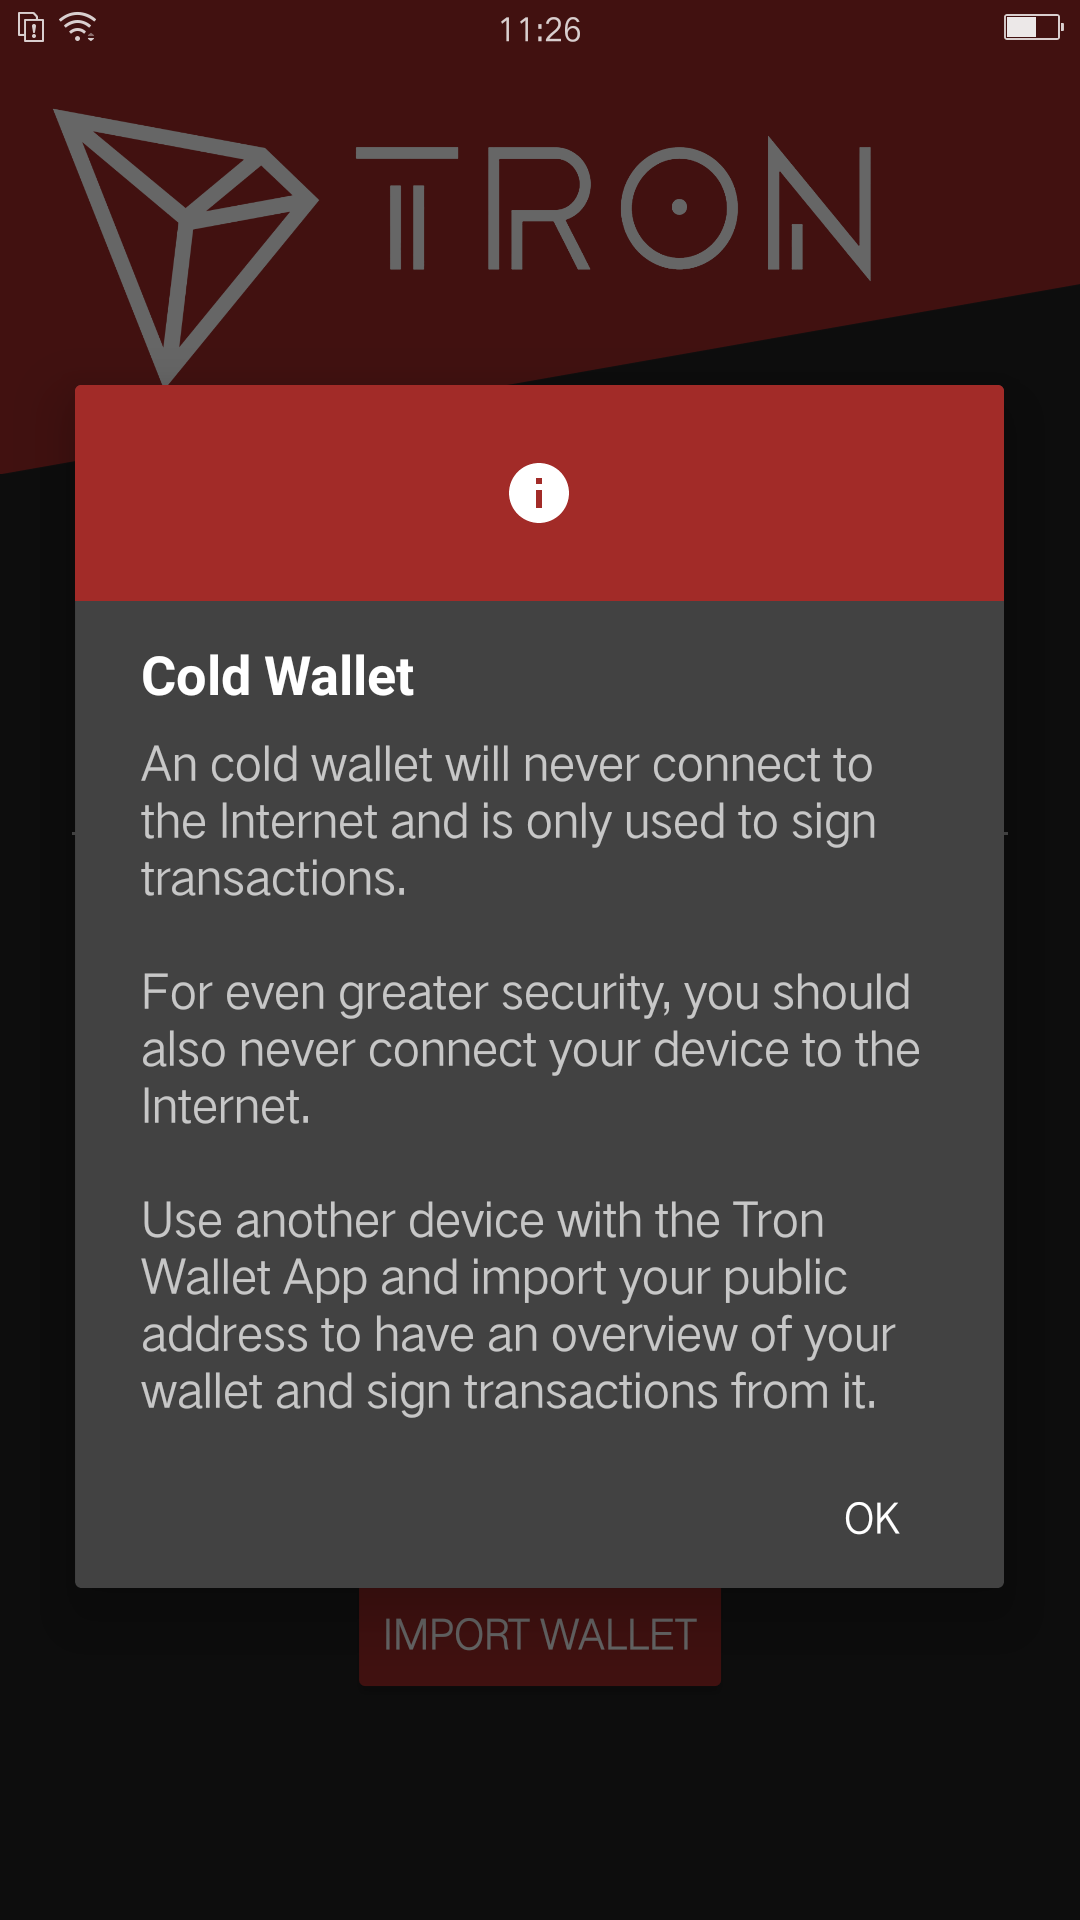
Cold Wallet Setup
- minimalistic and safest wallet
- owns public and private key
- never connects to the internet (to be completely secure of your cold wallet, you should never connect your device to the internet)
- signs transactions (used in combination with a watch only setup)
Check Blocks & Recent Transactions
Check SR Candidate Information
Check Node Information
Token Offering Participation
- select the token you’d like to buy

- input quantity of purchase
Check Account Information
Import Wallet
There are 3 methods to import a wallet:
- import public address (watch-only setup)
- import with the private key
- import 24-word recovery phrase
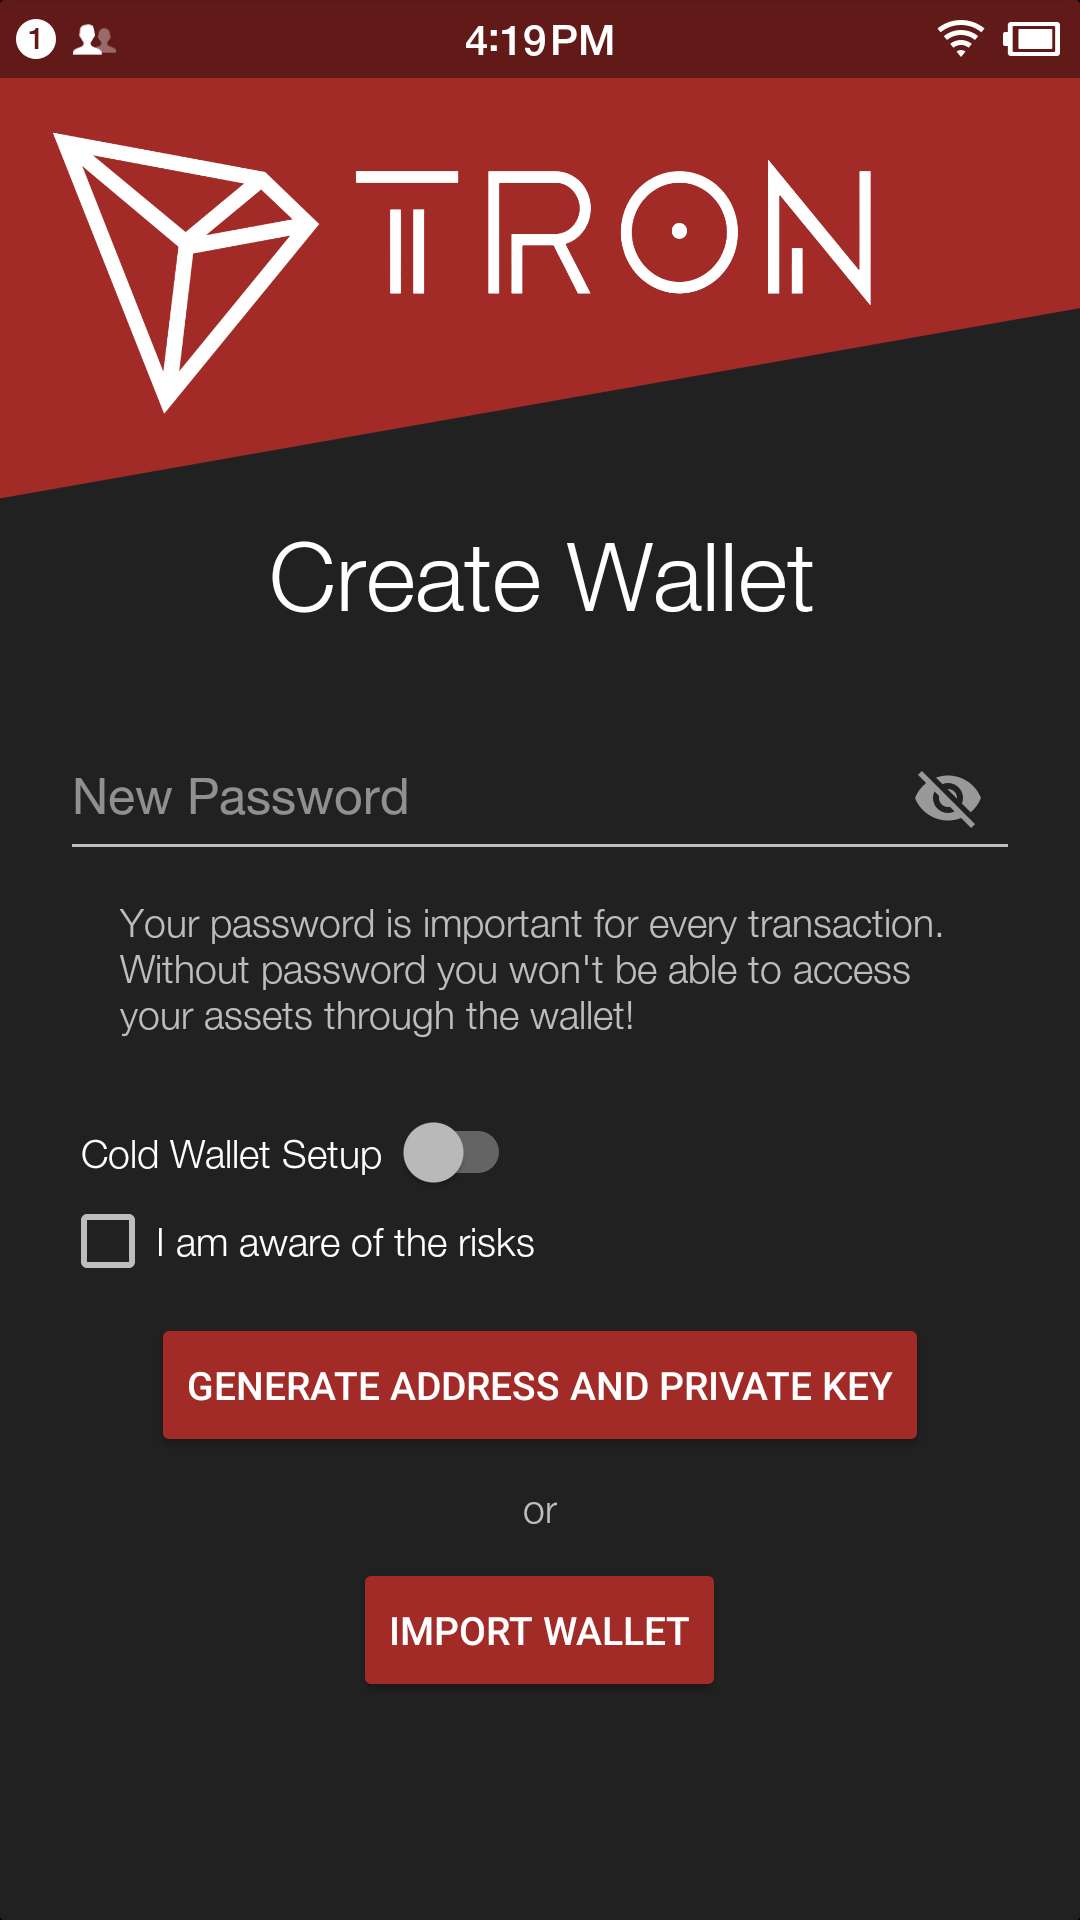
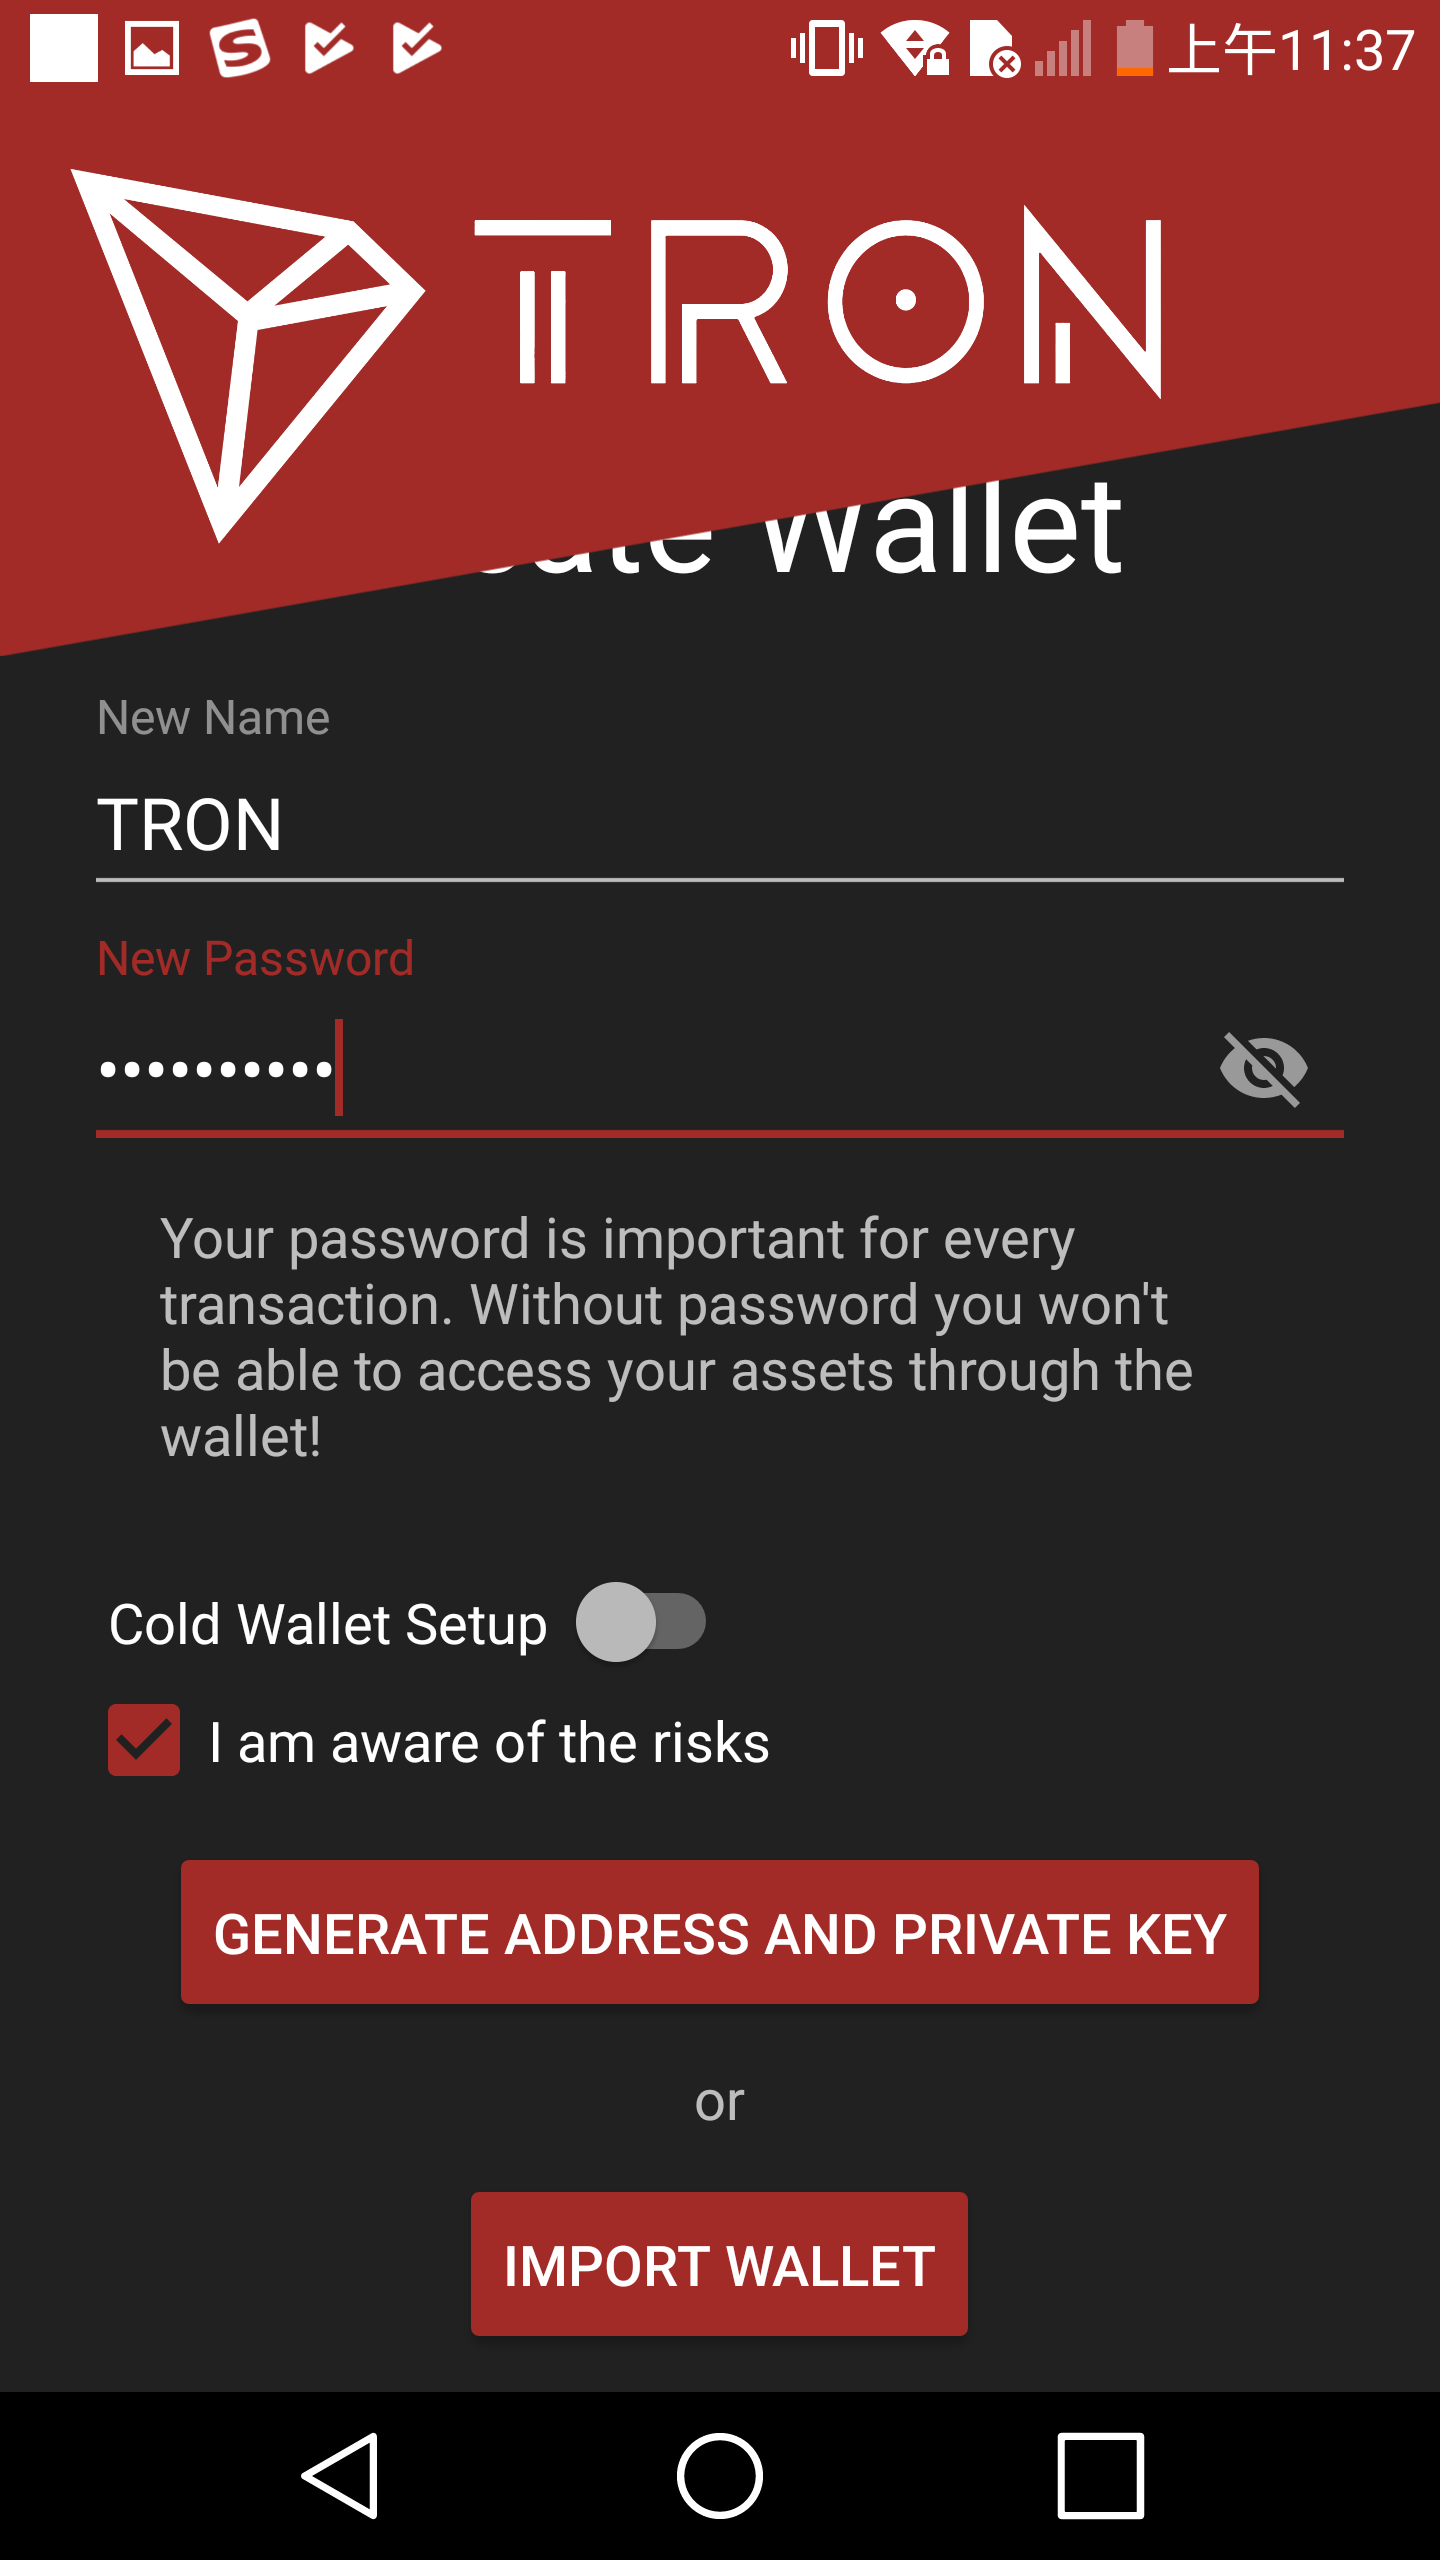
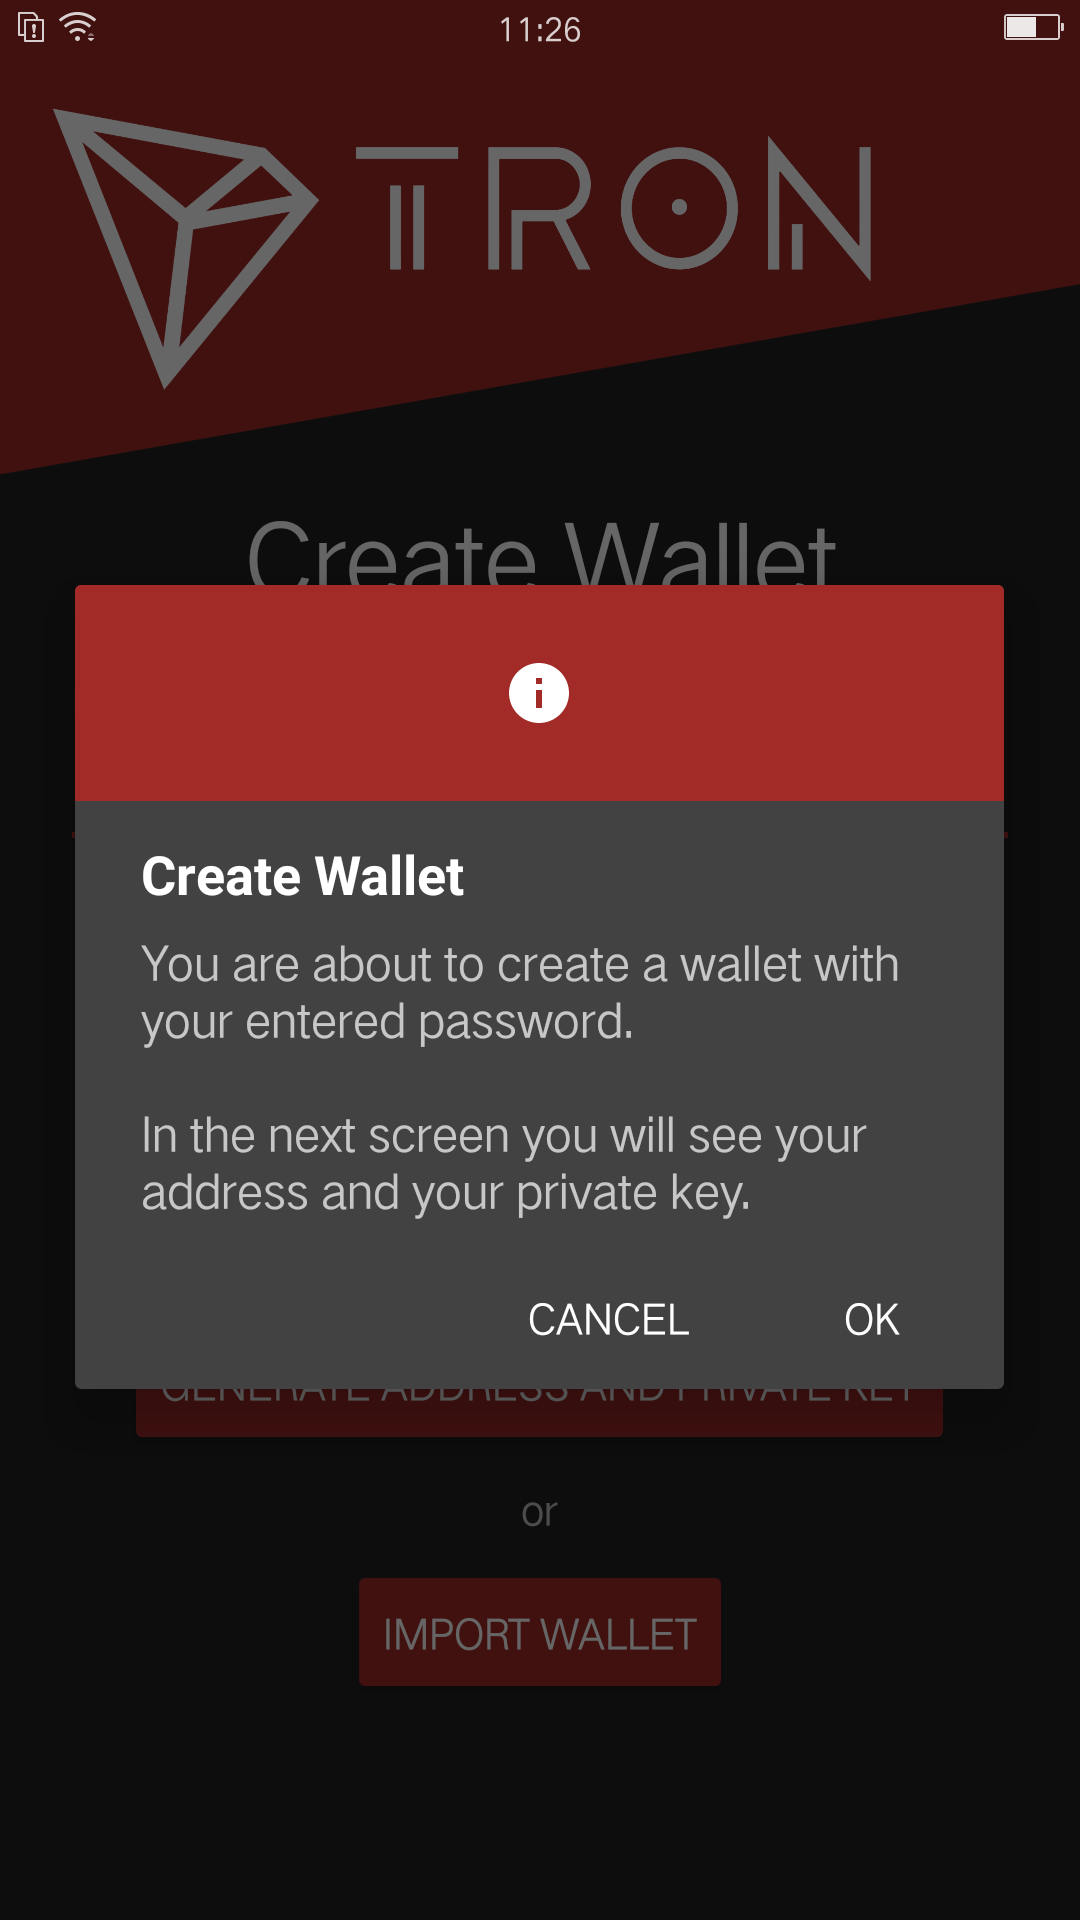
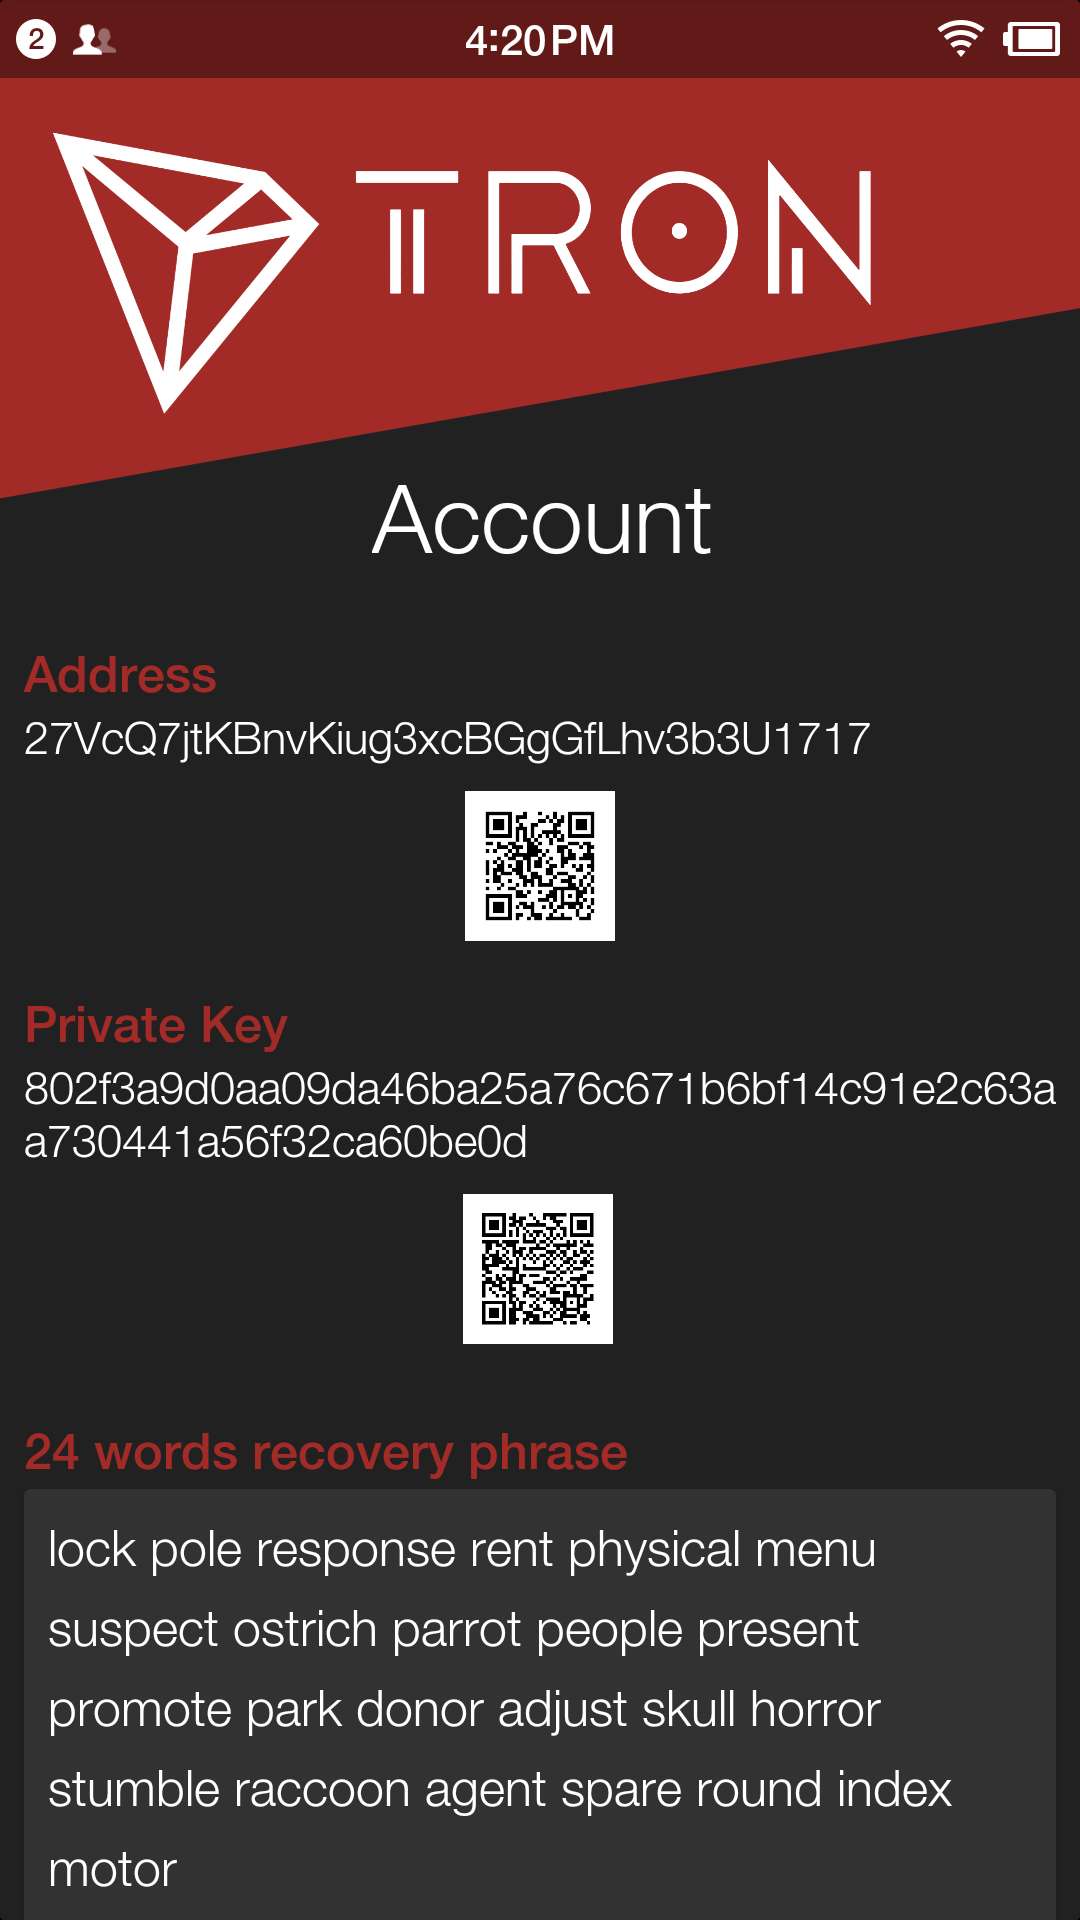
Create Account
-
Go to Account Creation page.
-
Select your Wallet Setup.
-
Cold wallet creation: toggle COLD WALLET SETUP, check "I AM AWARE OF THE RISKS", then set the name and password.
-
Hot wallet creation: don’t toggle COLD WALLET SETUP, check "I AM AWARE OF THE RISKS", then set the name and password.
-
-
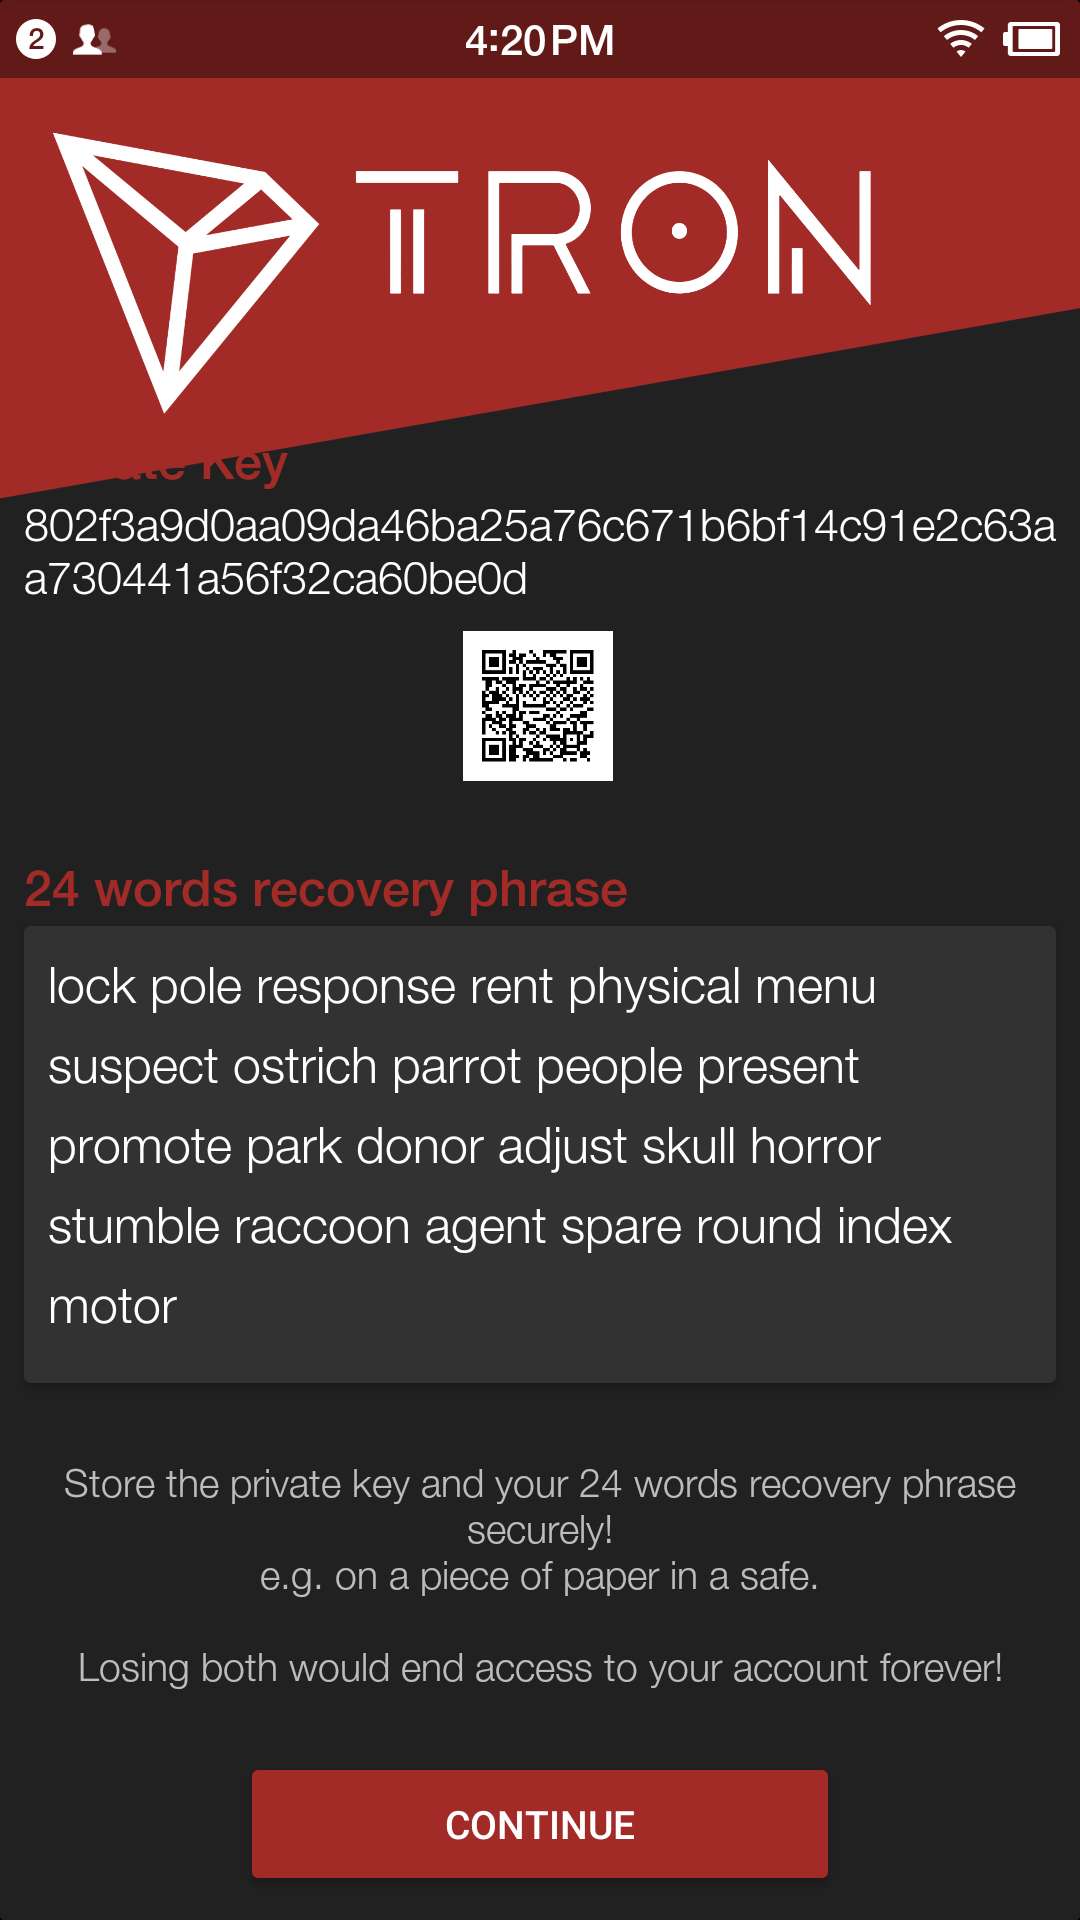
Tap "GENERATE ADDRESS AND PRIVATE KEY" and tap "OK" after reading the information page.
-
Make sure to save your private key and 24-word recovery phrase.
-
Tap "CONTINUE" and enter wallet page.
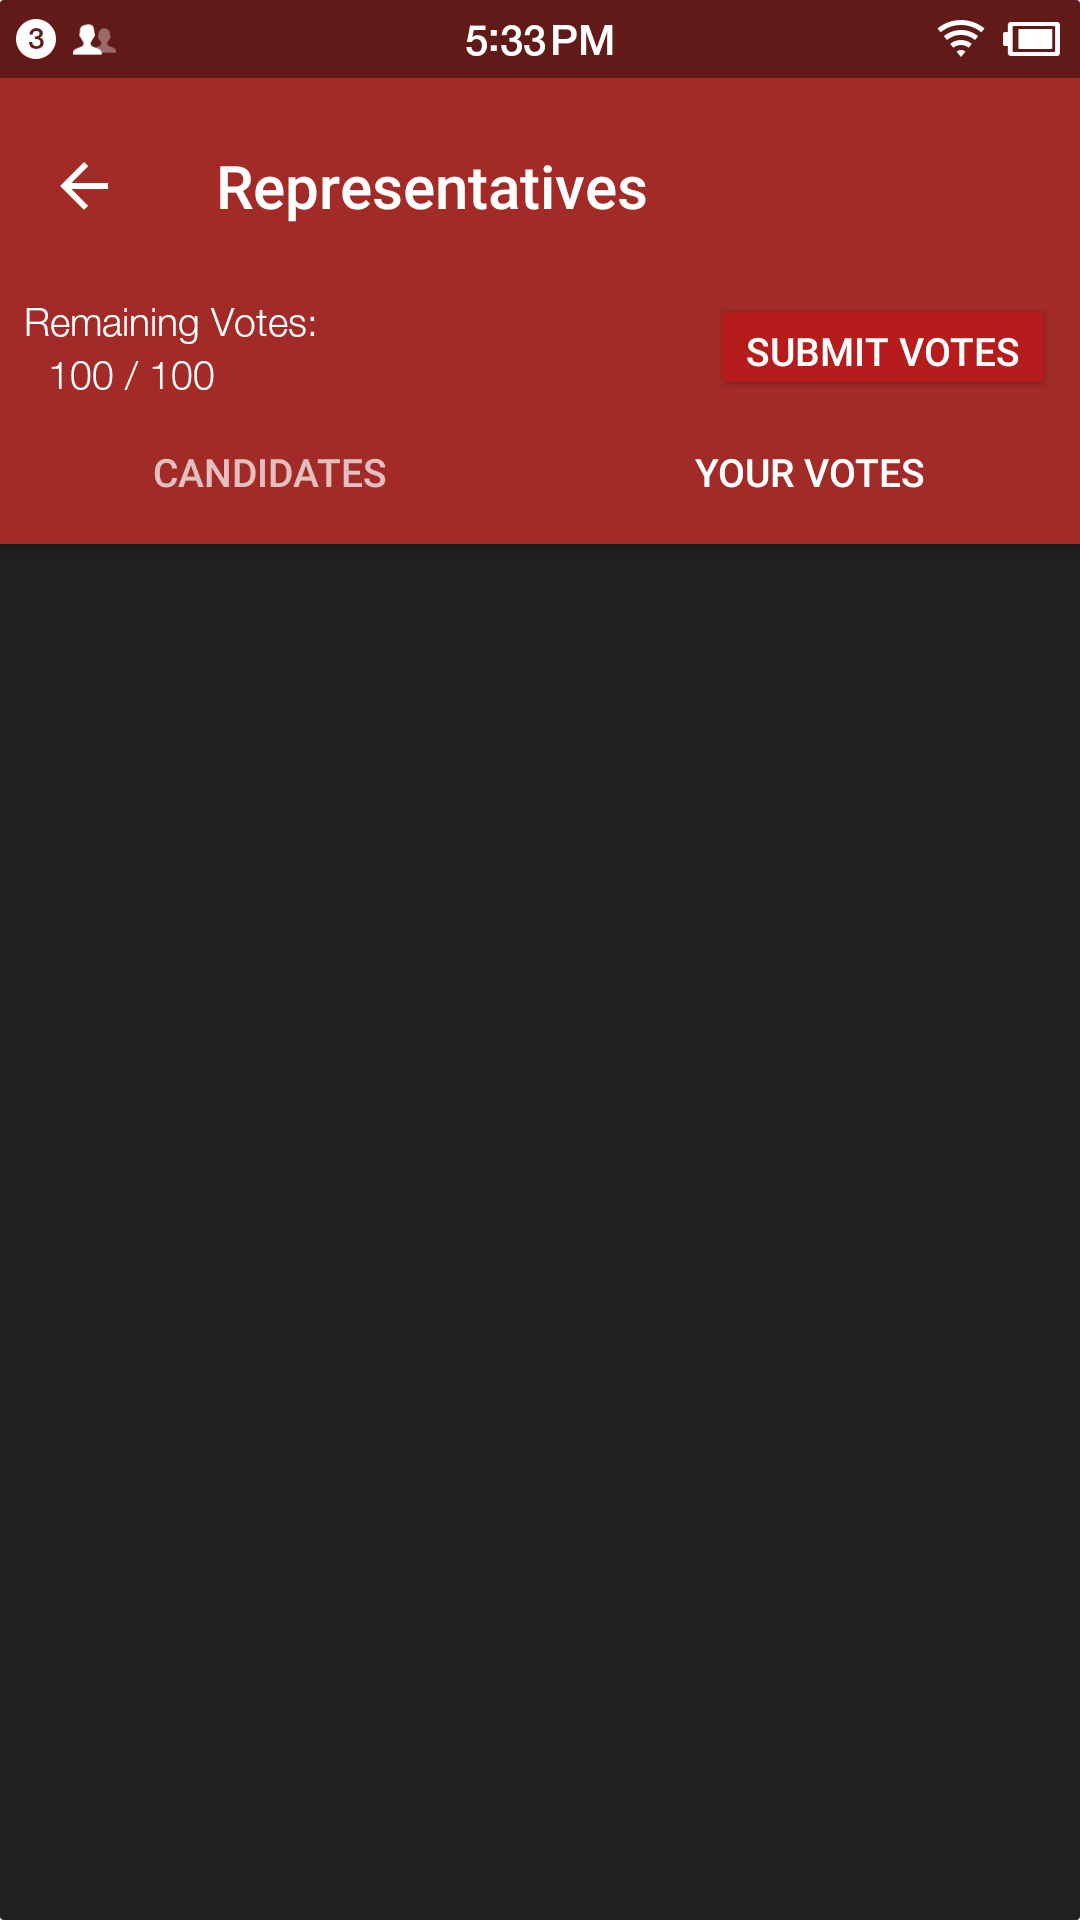
Voting
Users can vote in hot wallet setup.
-
Enter the wallet page.
-
Enter the transfer page.
-
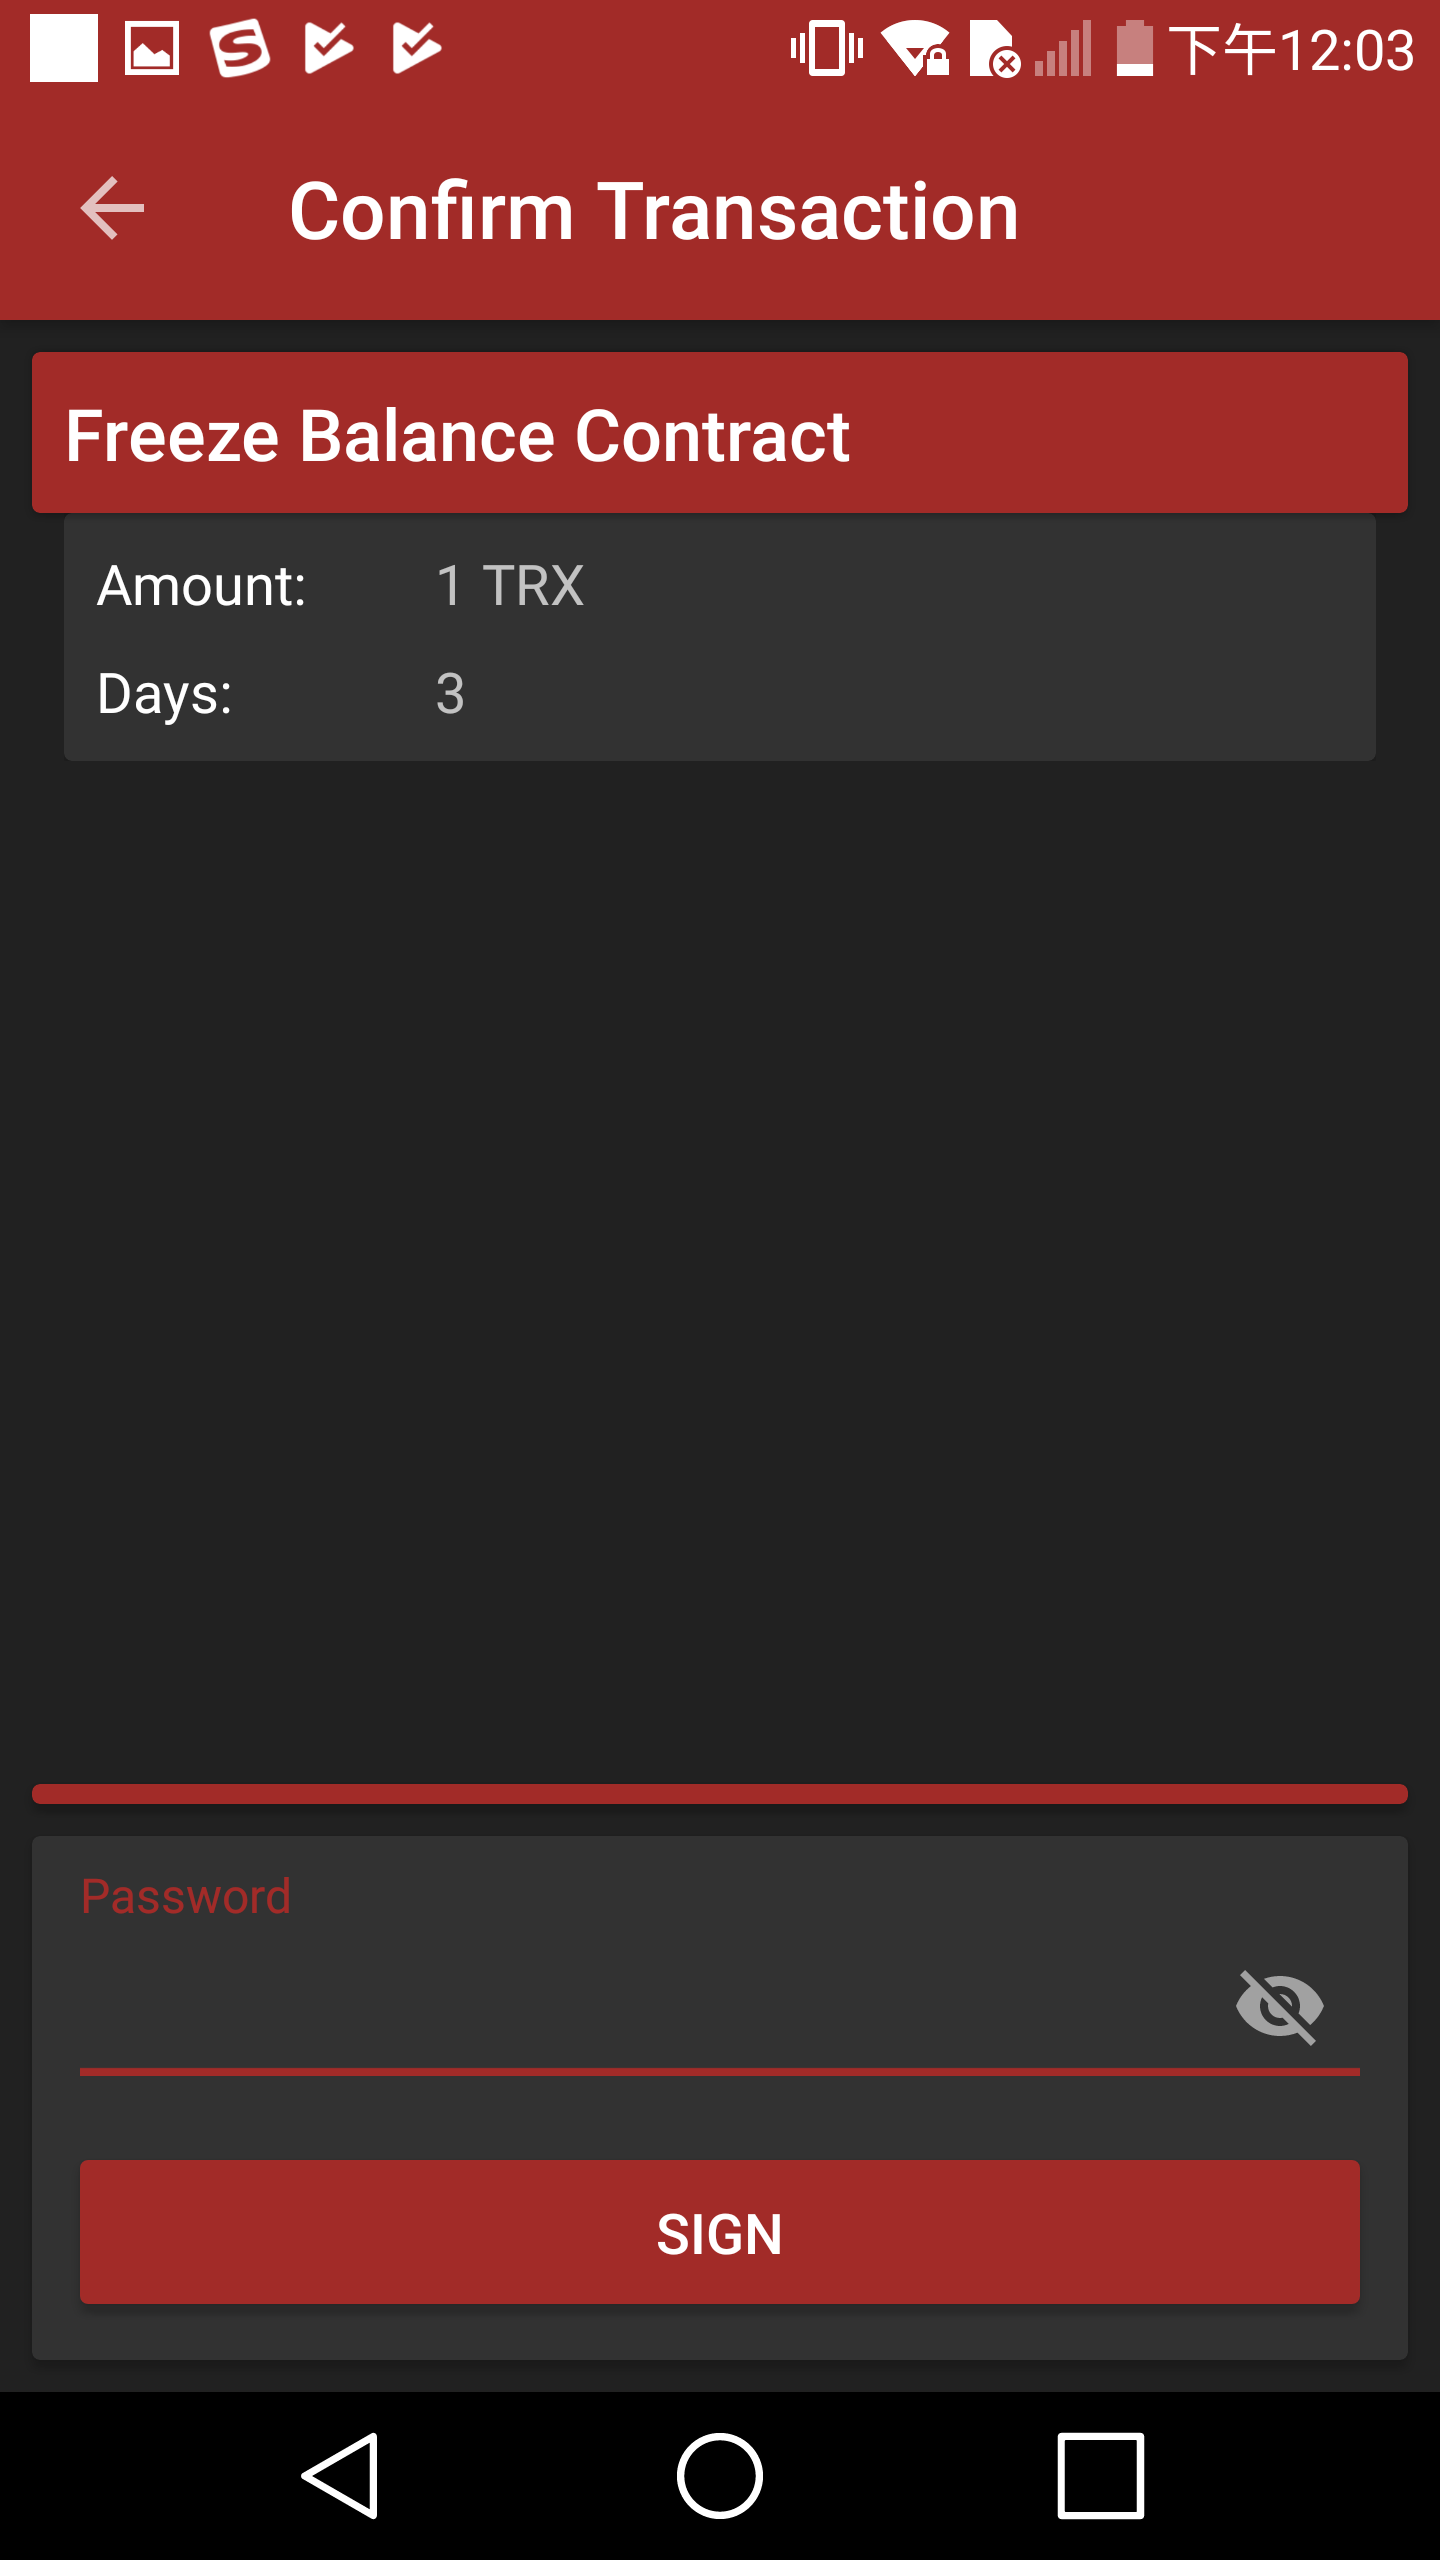
Select freeze and enter freeze page.
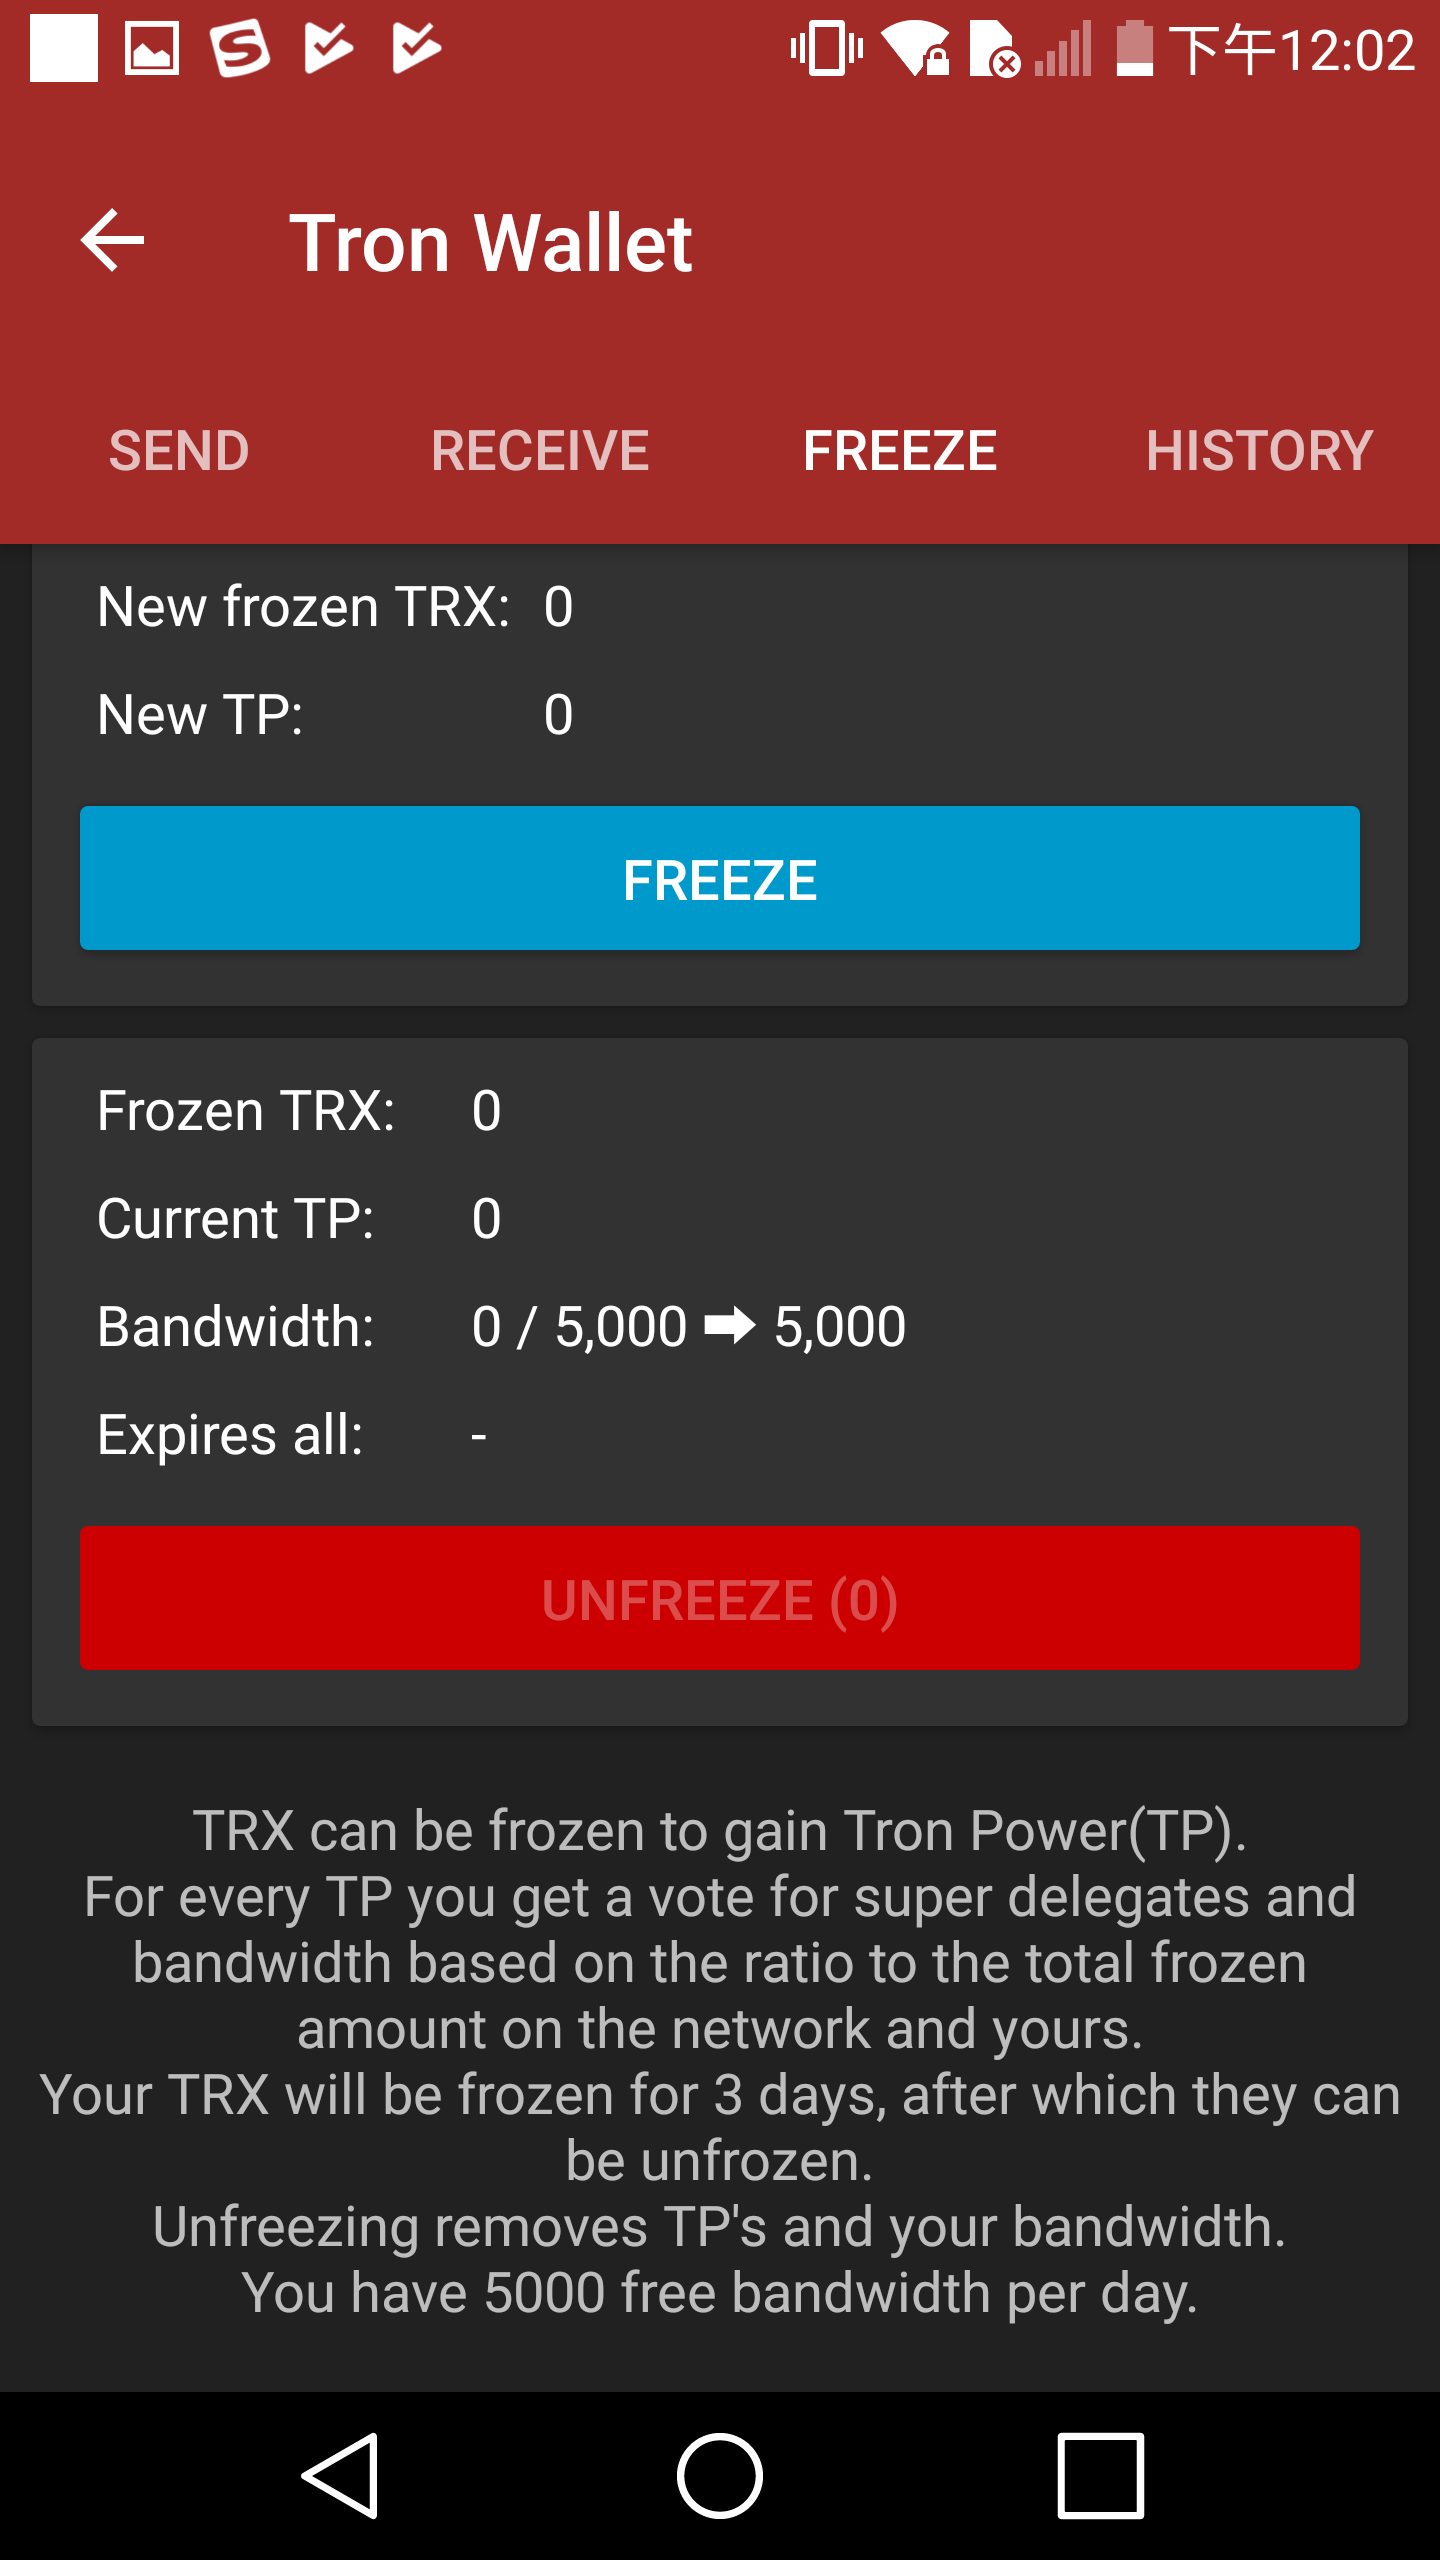
-
Type in freeze amount.

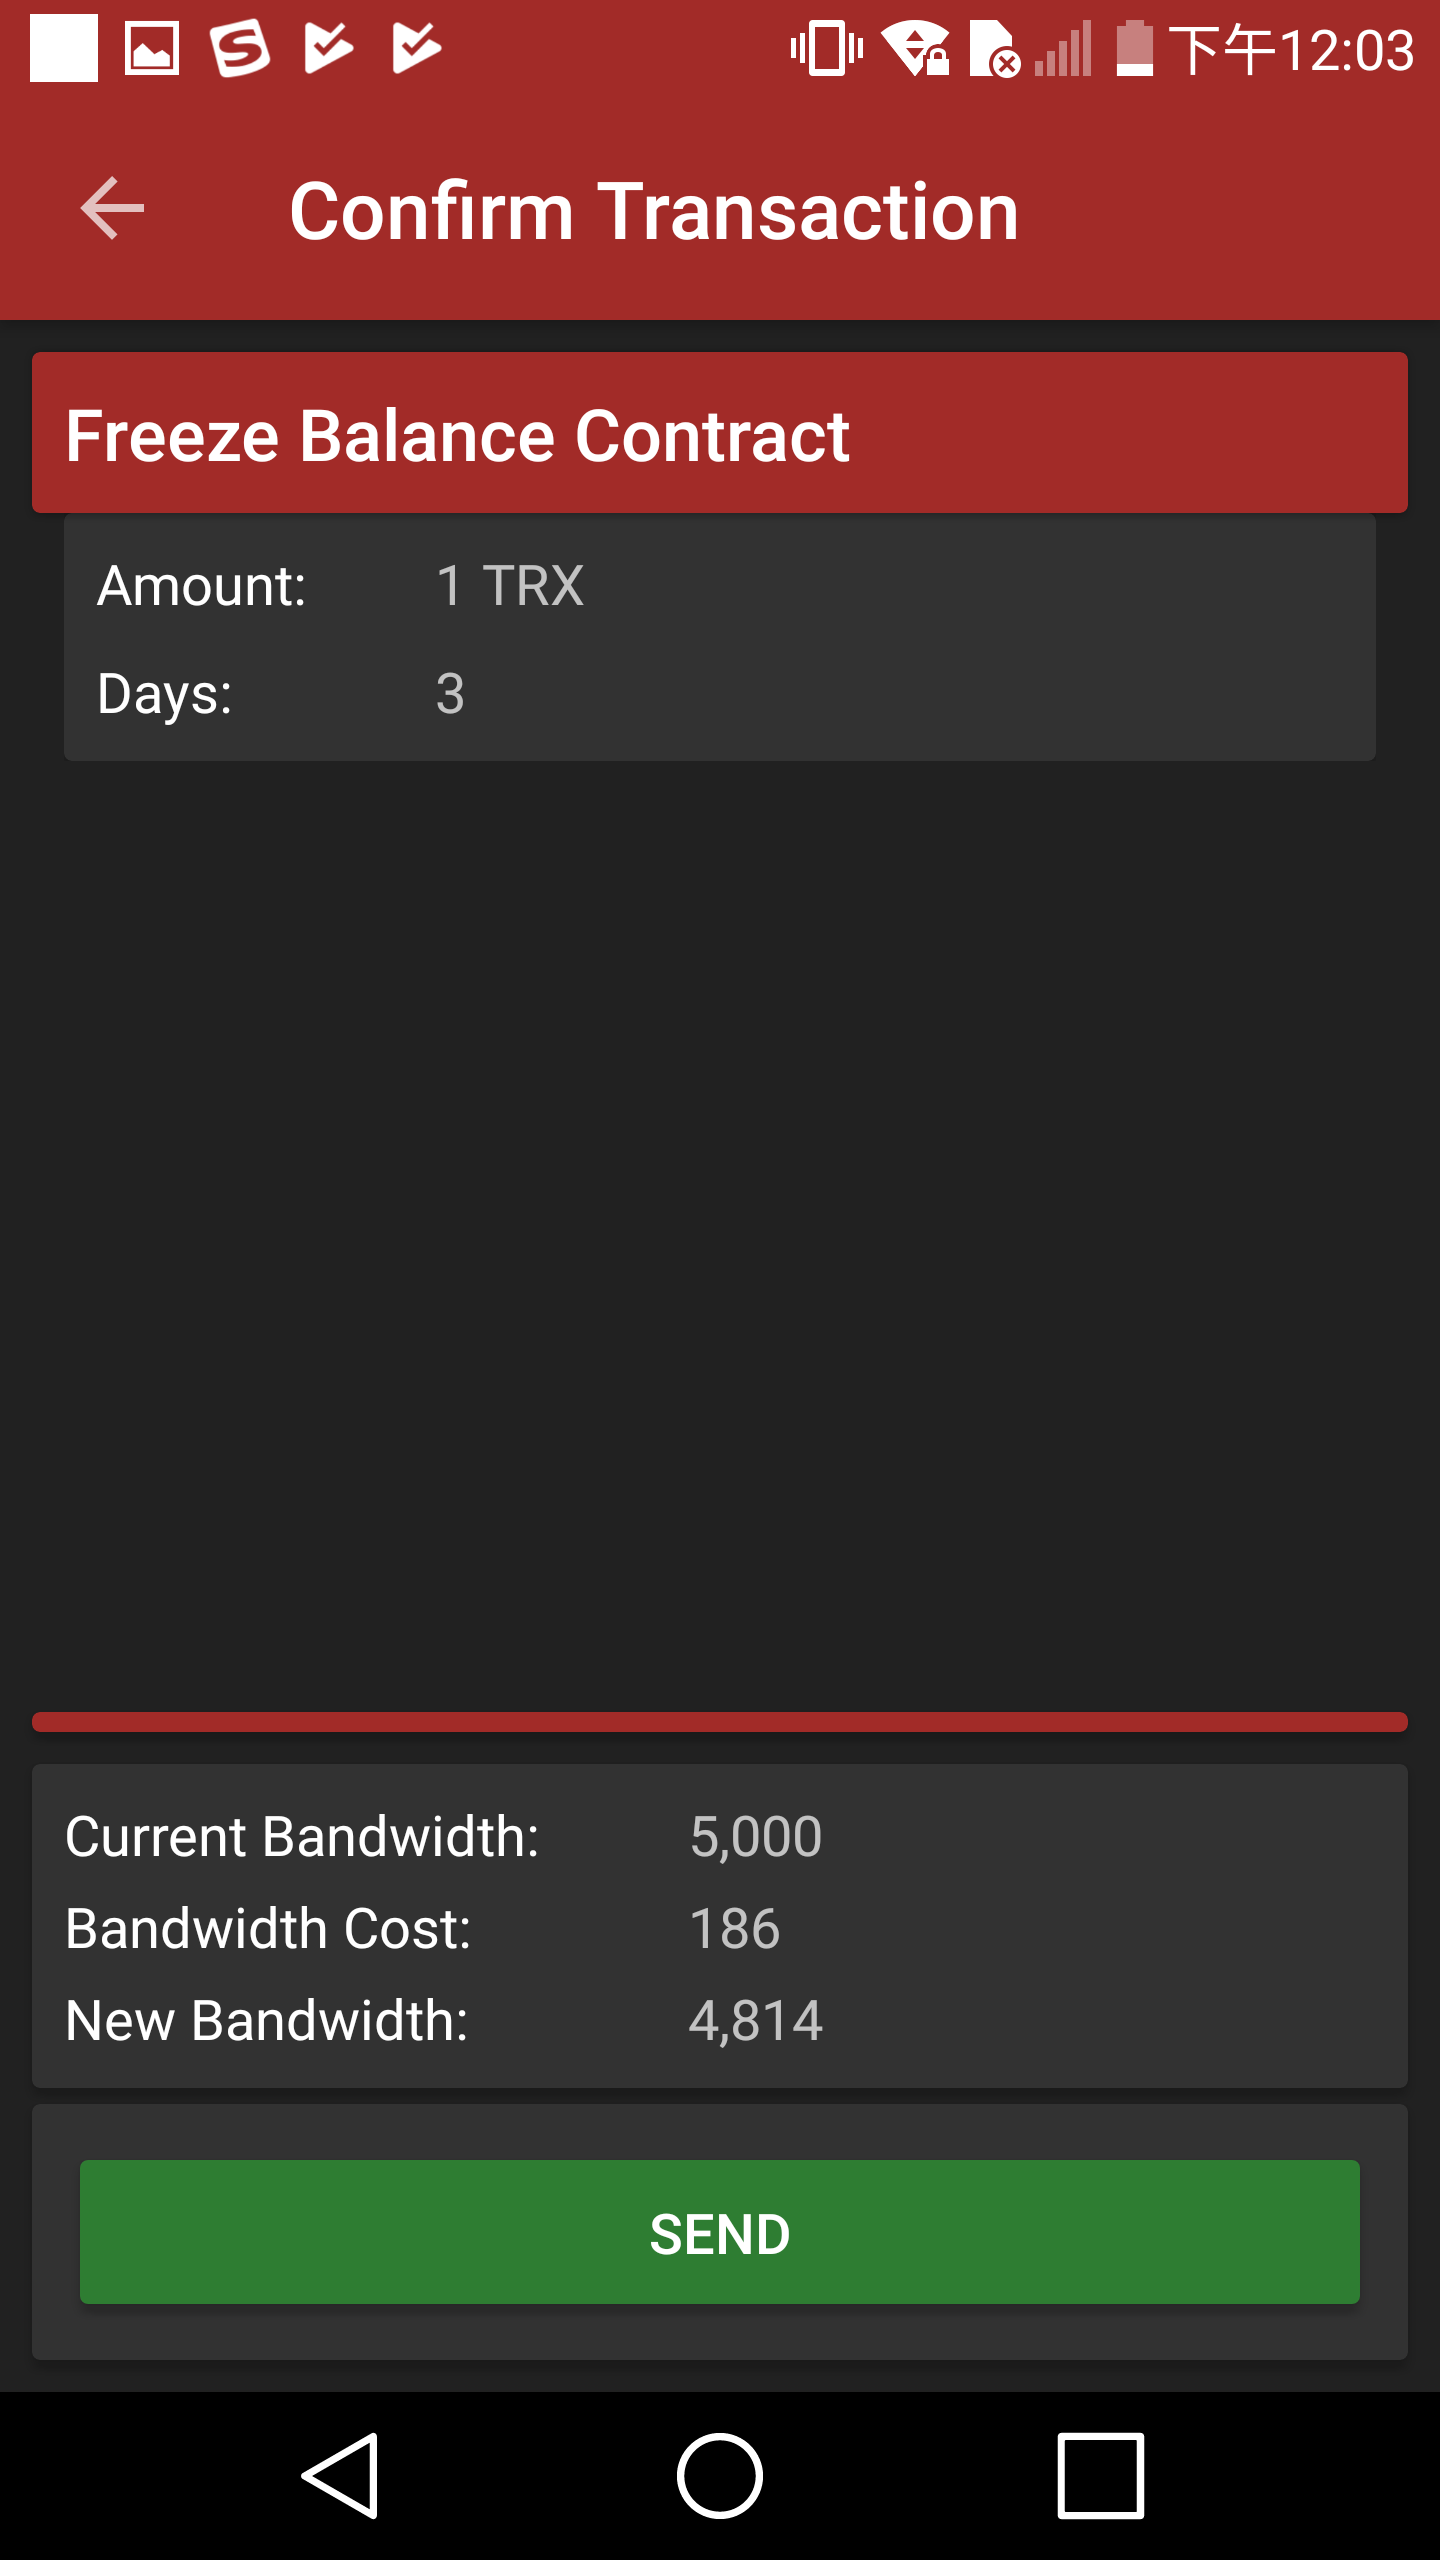
-
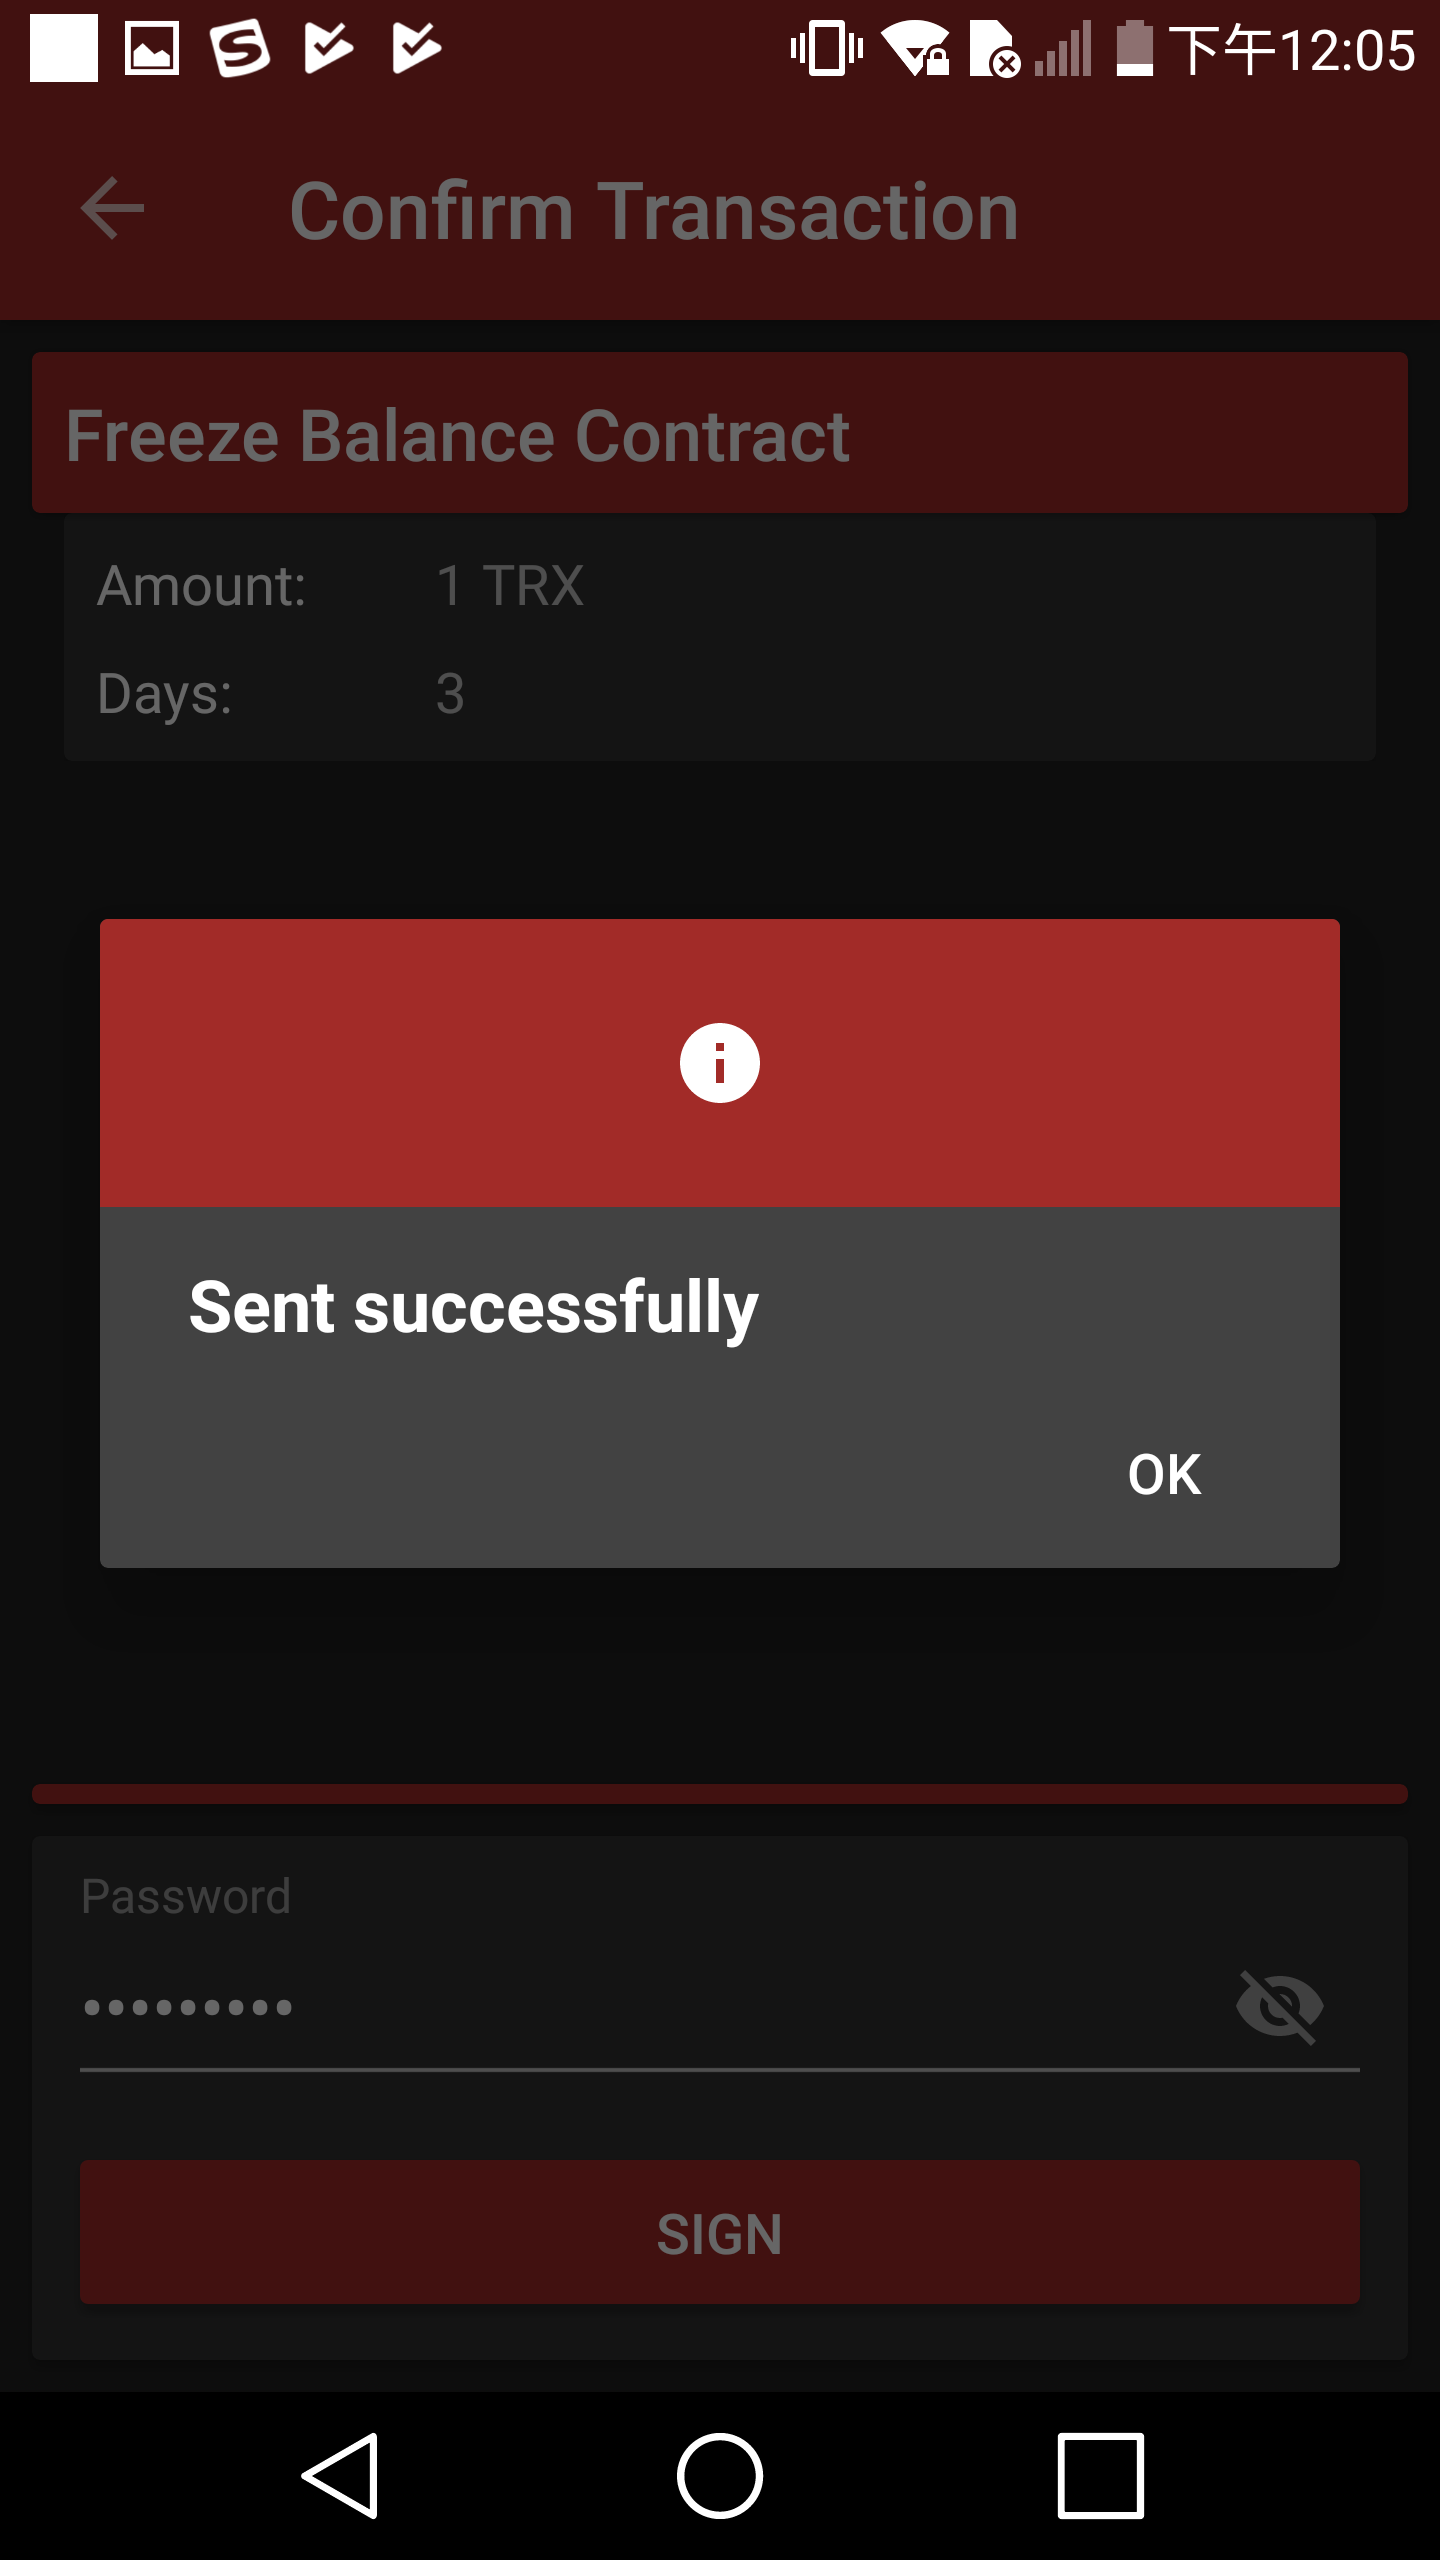
Click "SEND" button, enter your password, and confirm the freeze.
-
Return to balance page and click the vote button on the left-hand side.
-
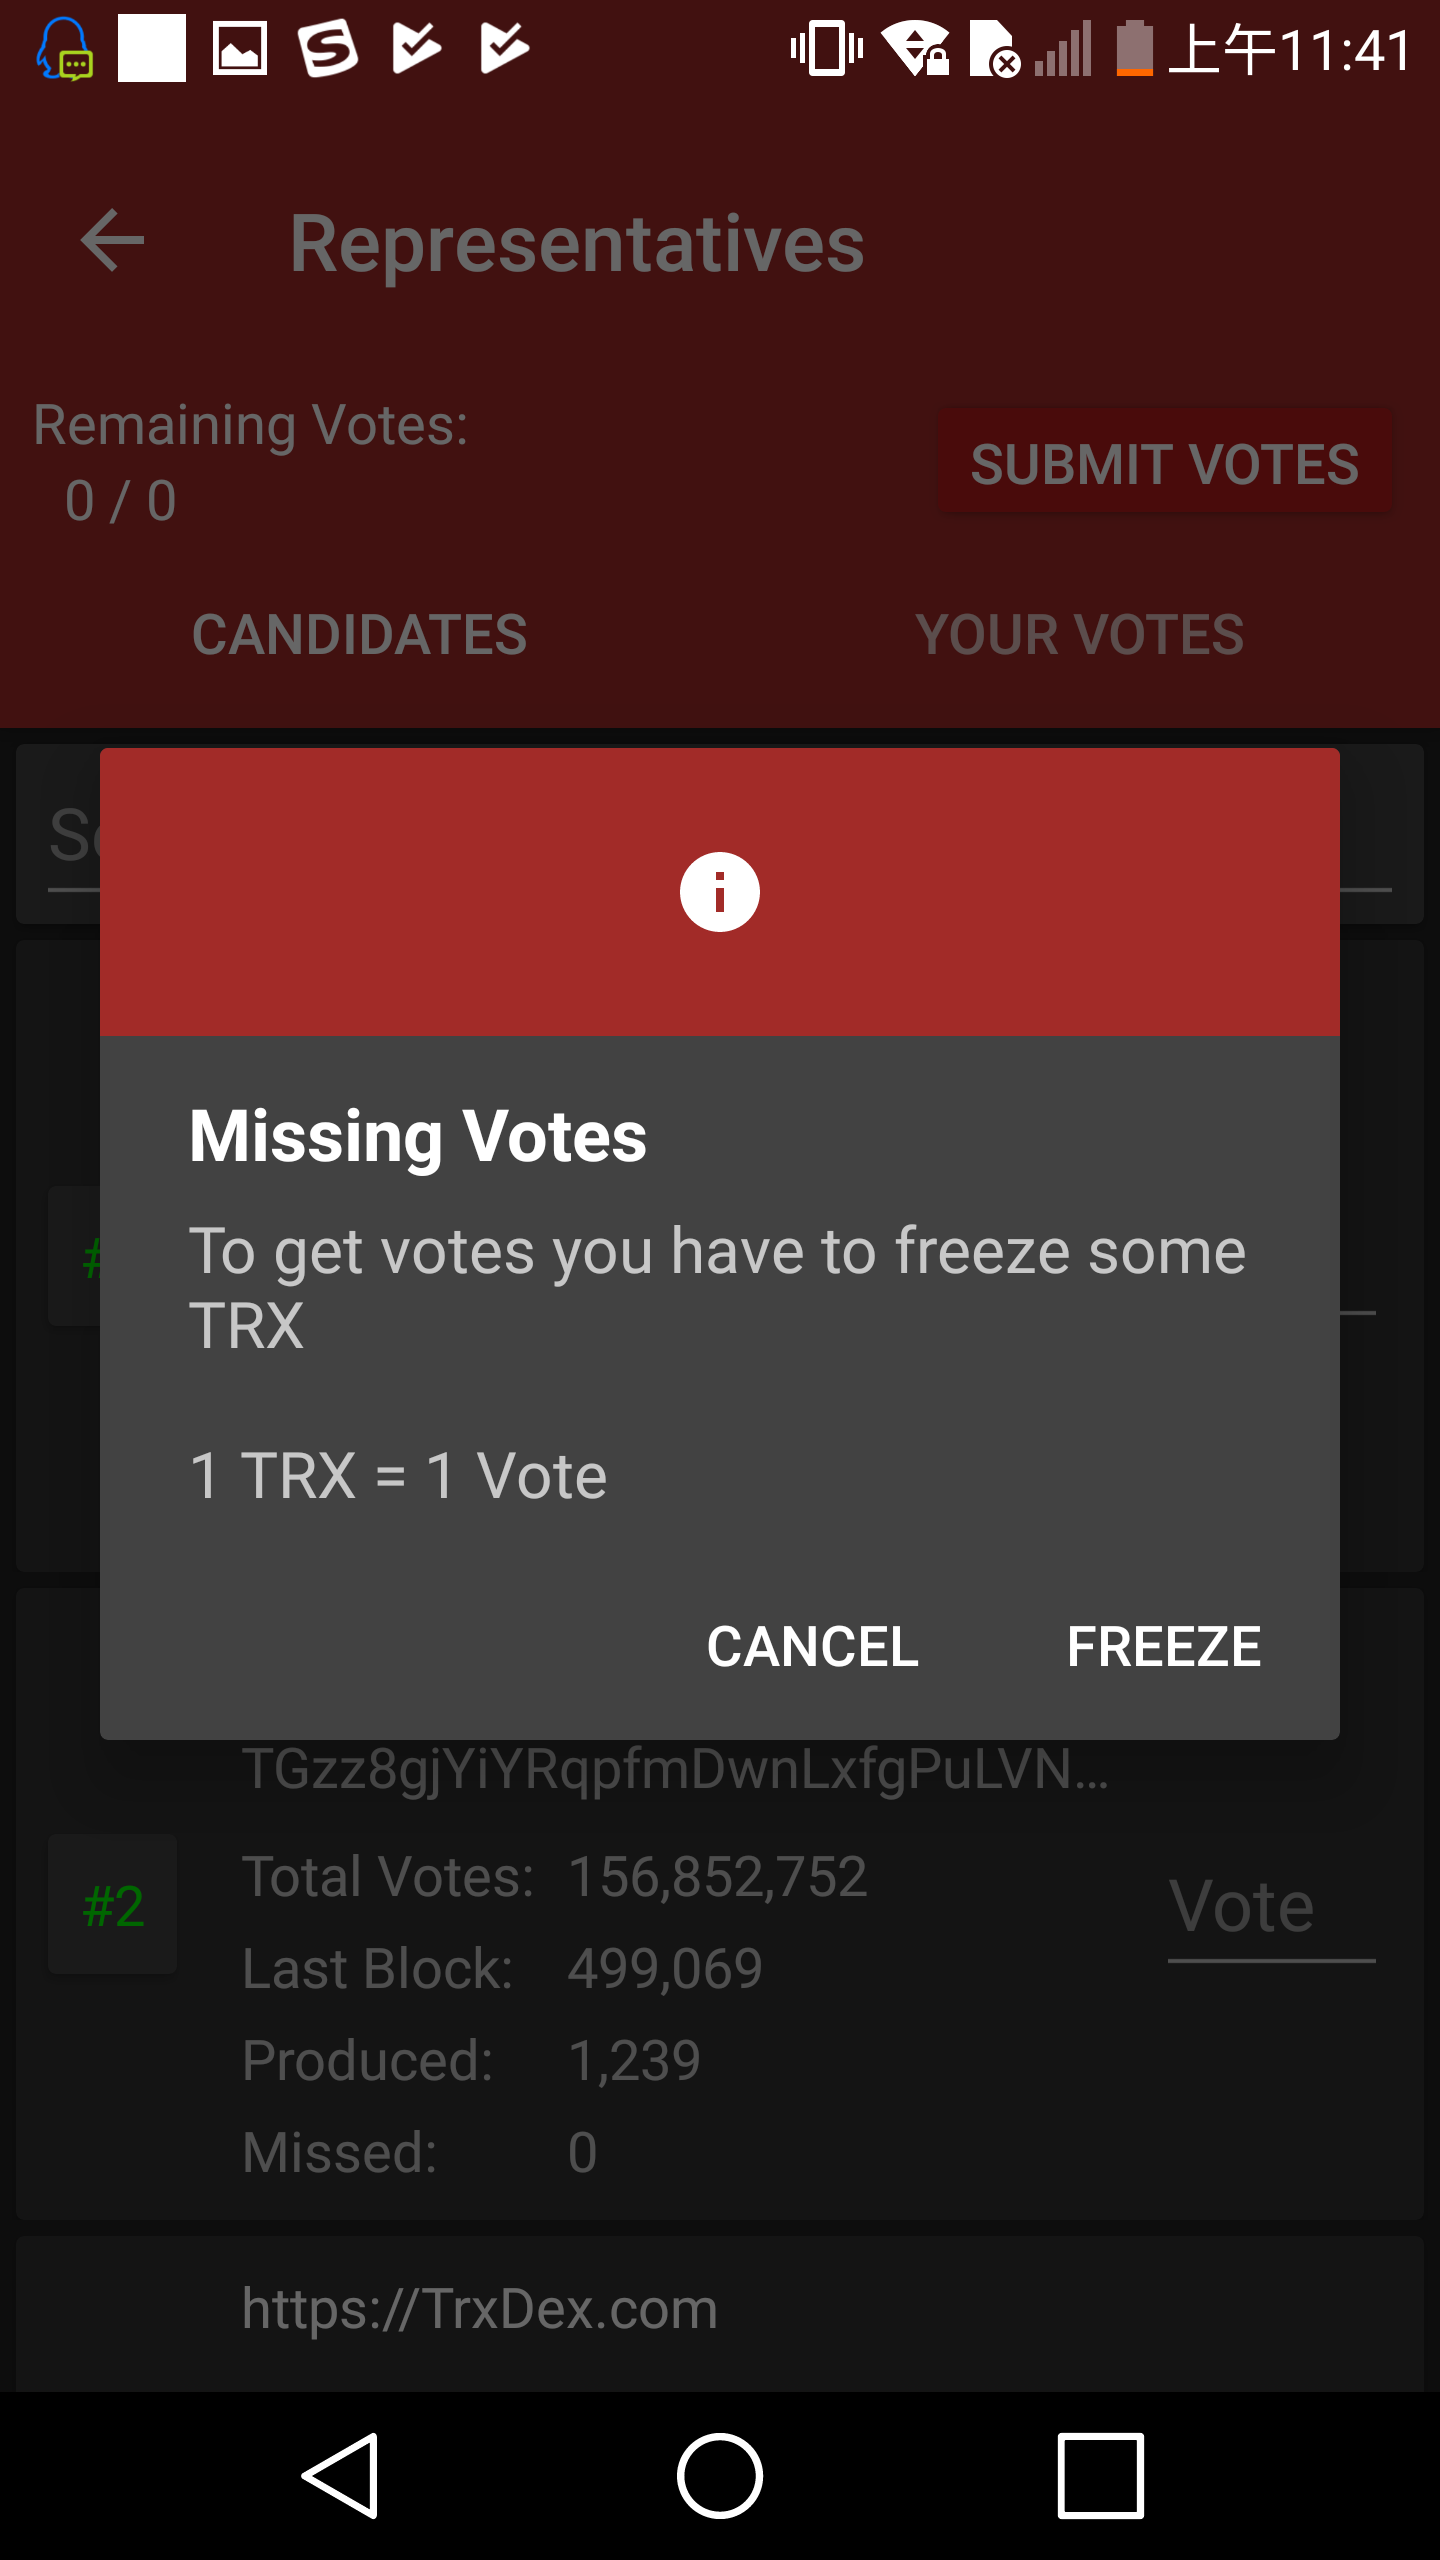
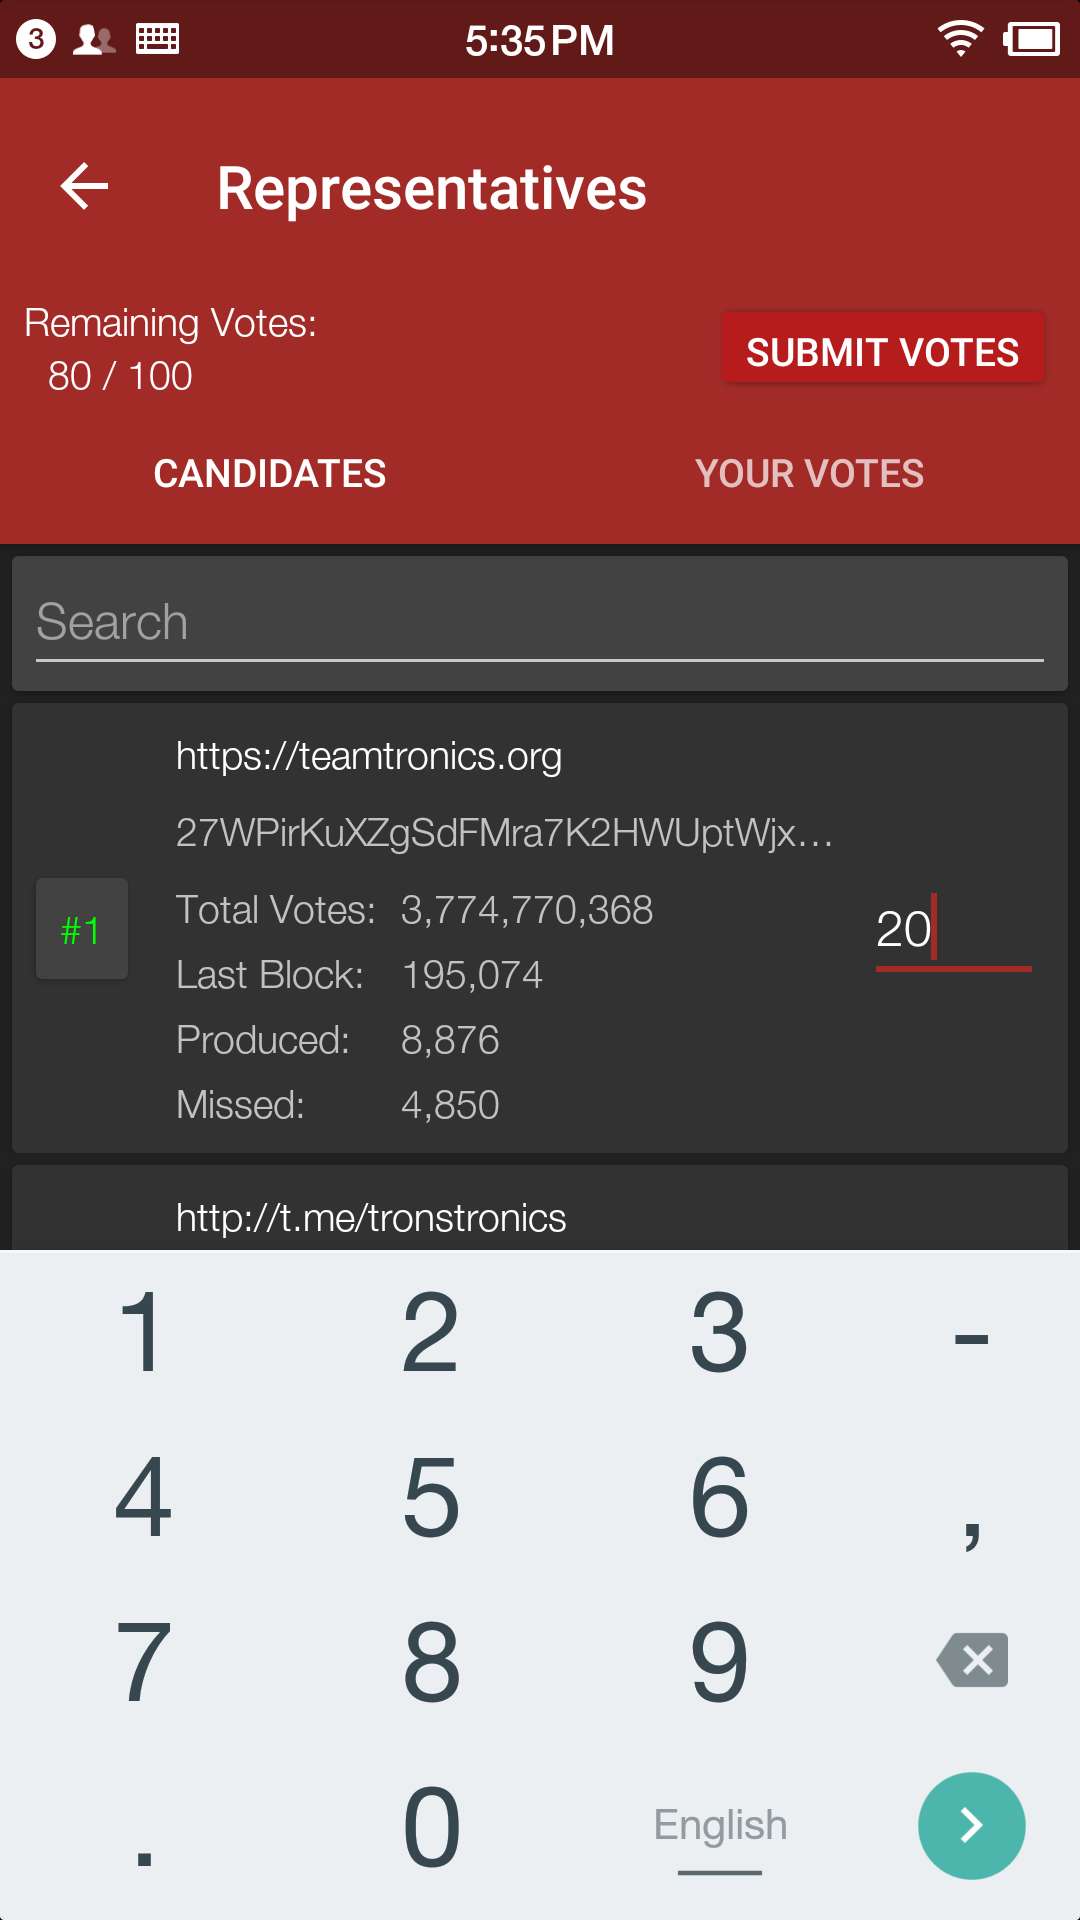
Enter SR candidate page.
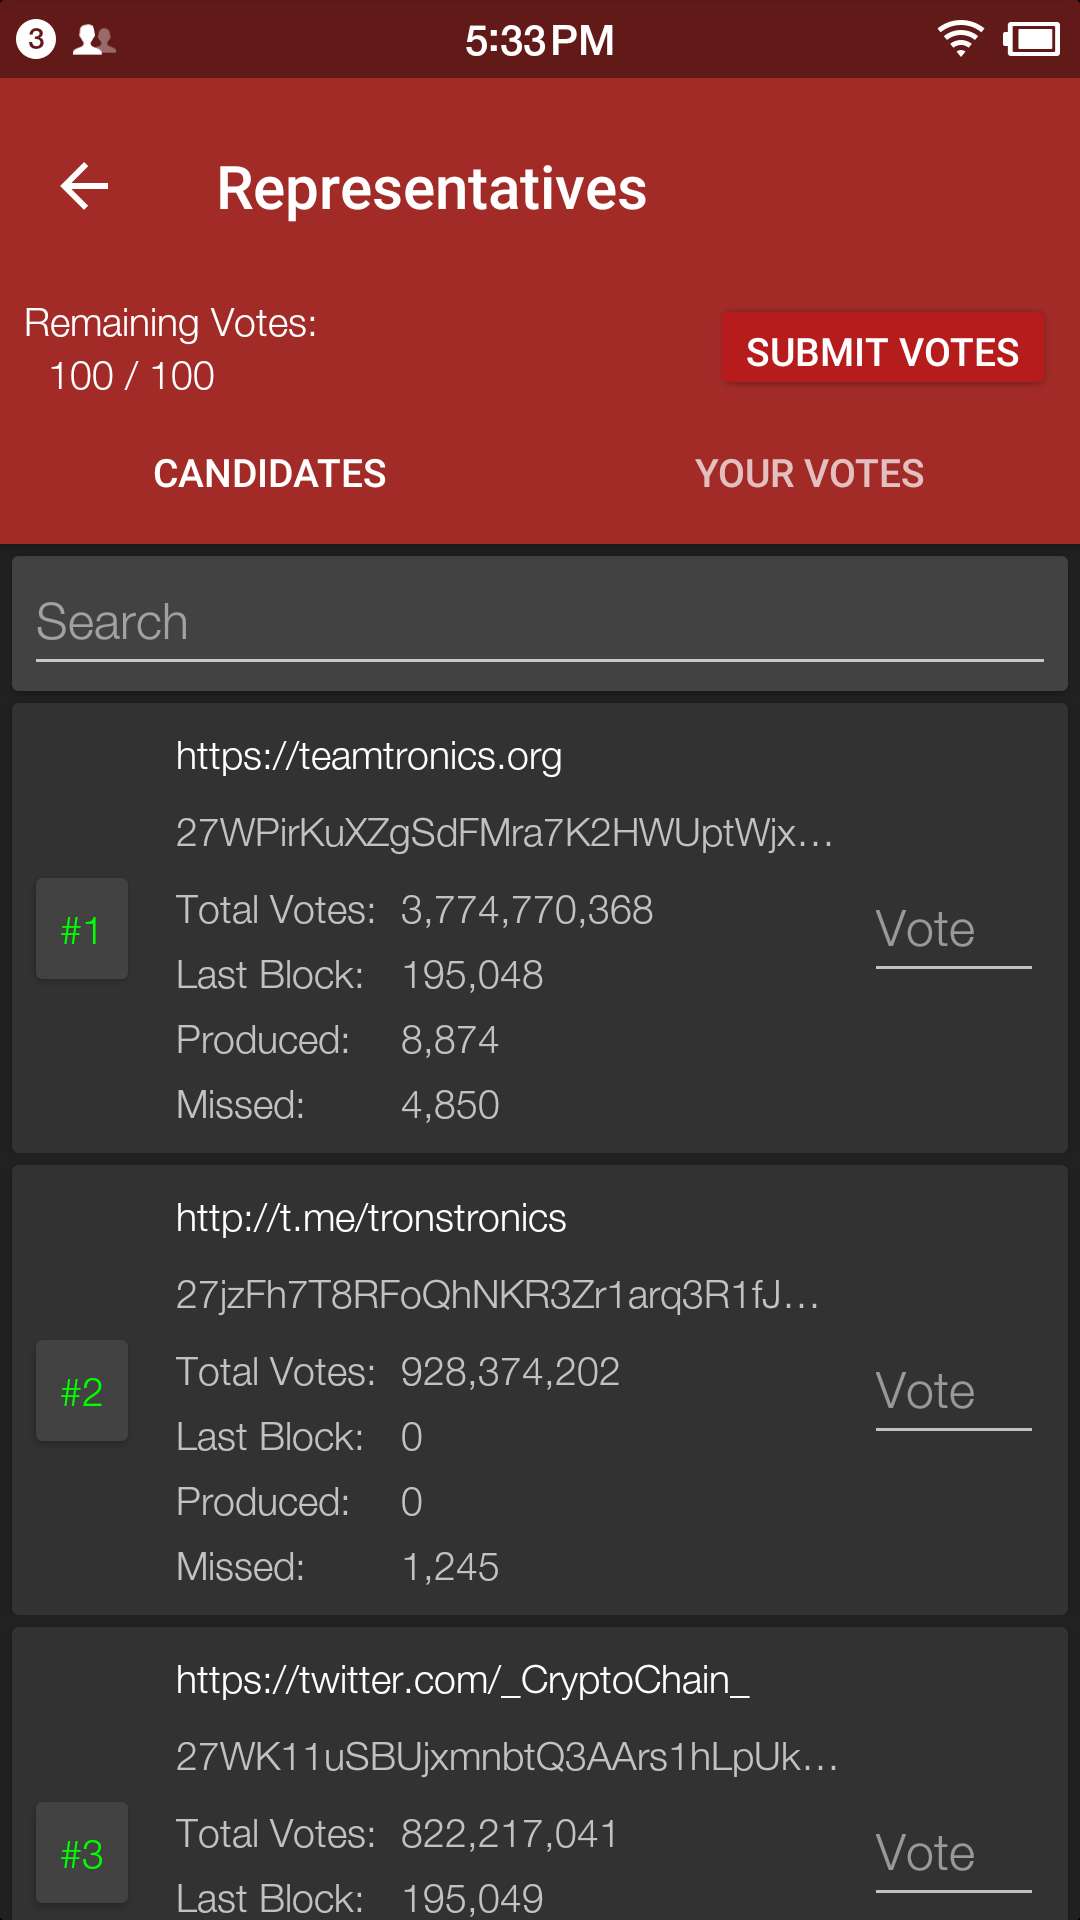
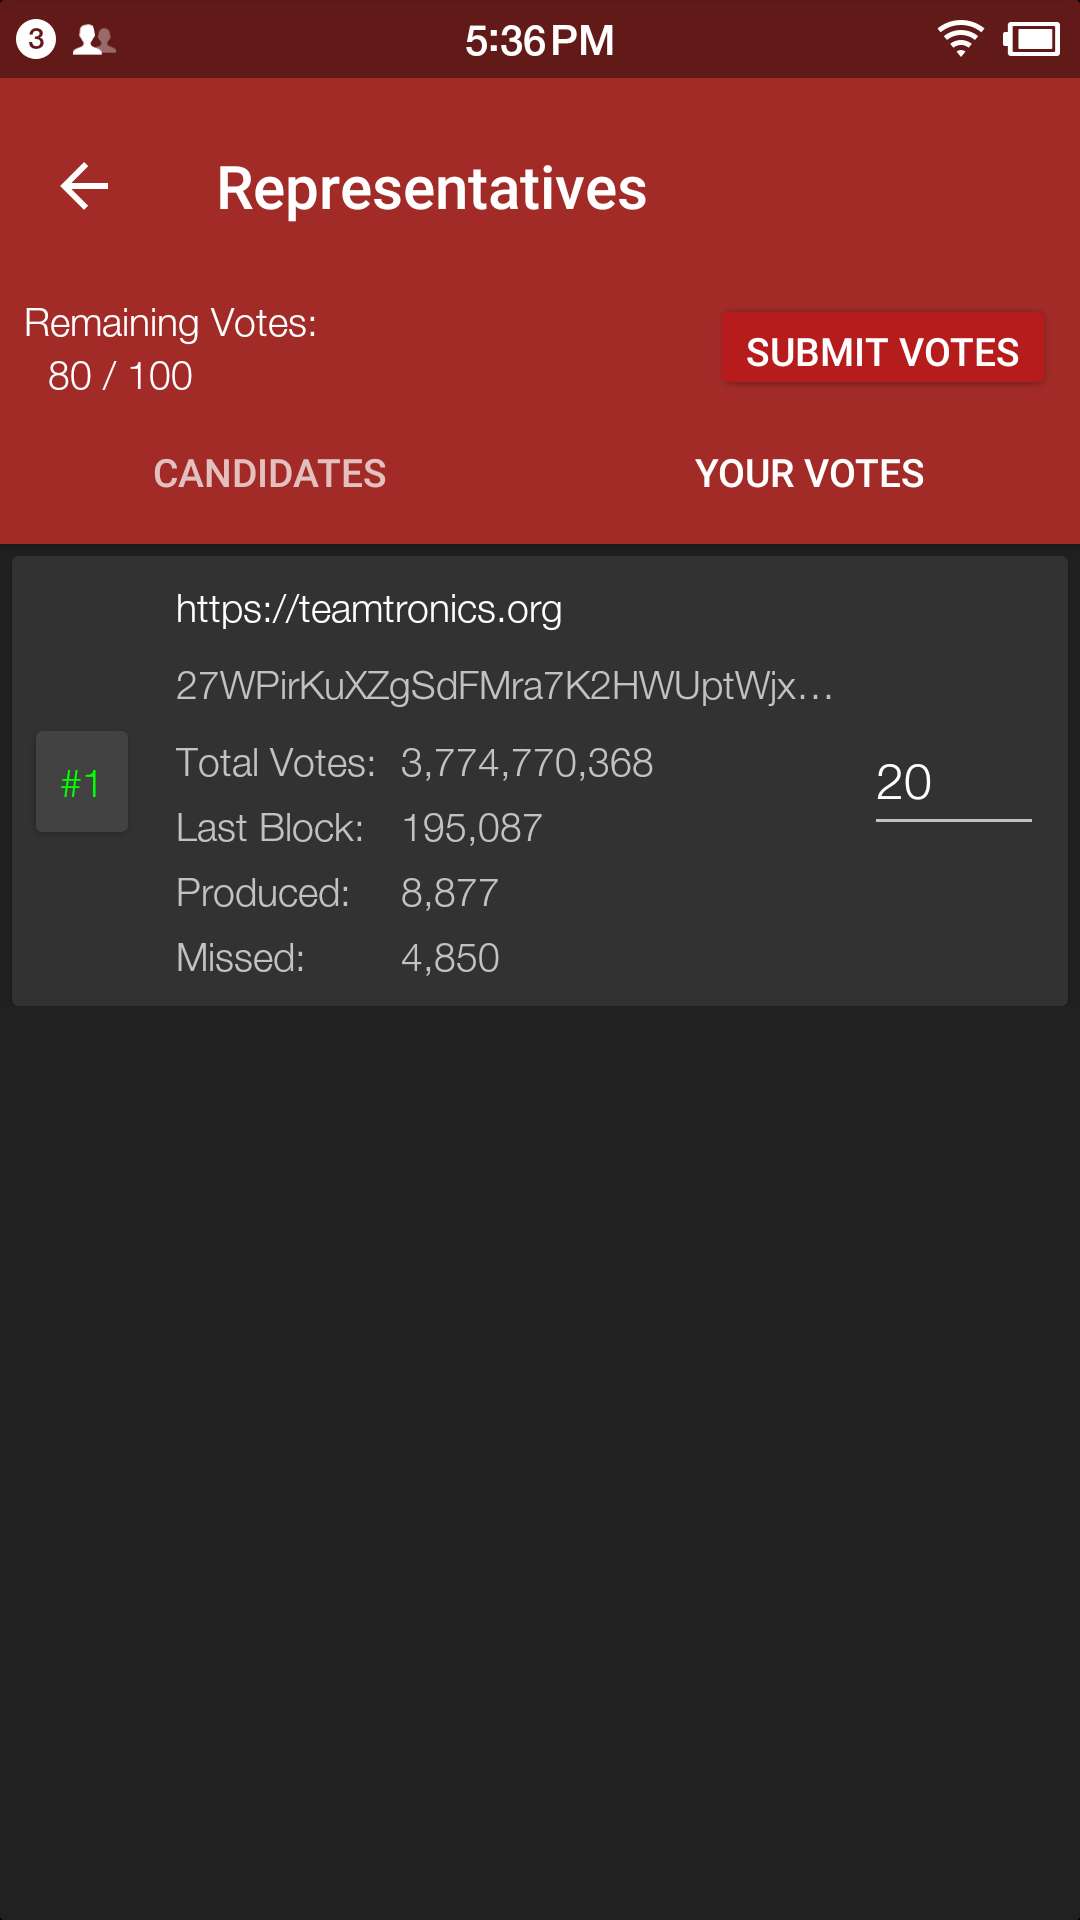
This is "YOUR VOTES" page. It will be empty if you haven't vote anyone yet.
-
Select an SR candidate and enter the number of votes.

-
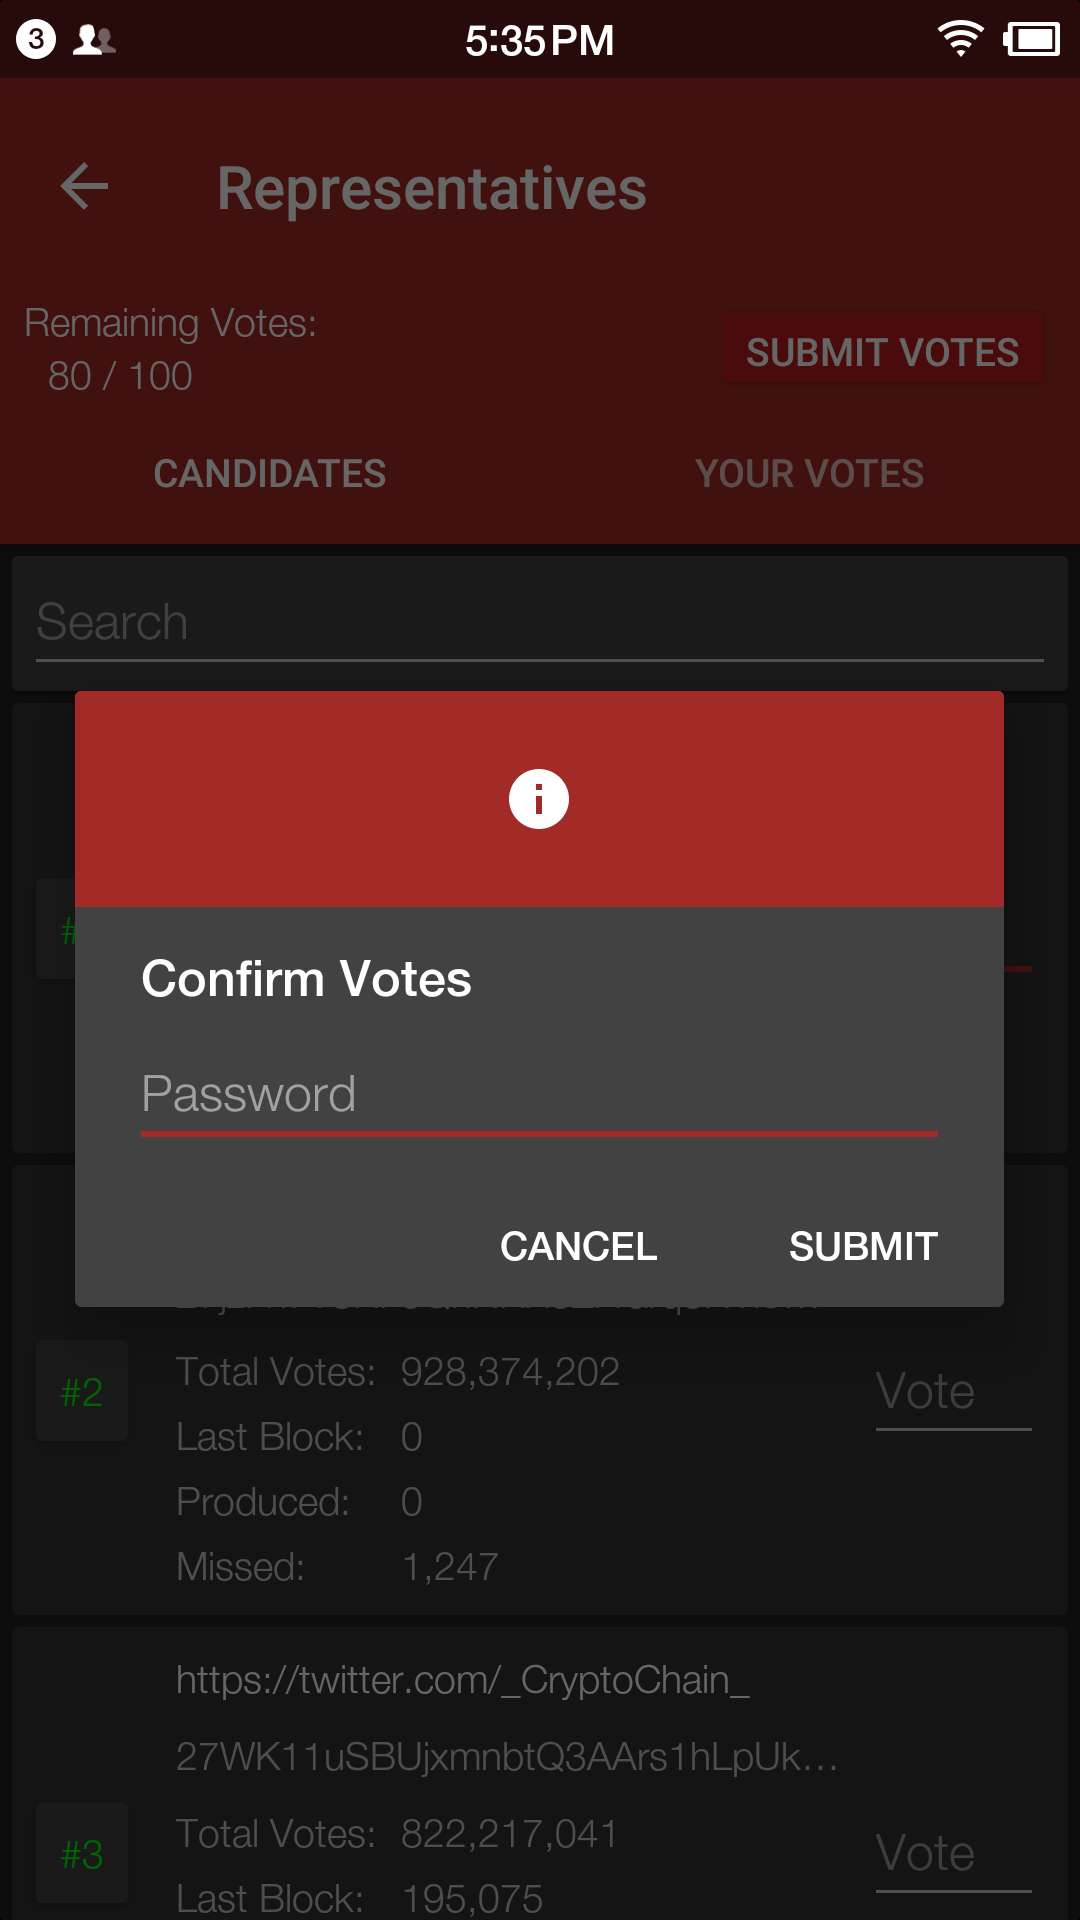
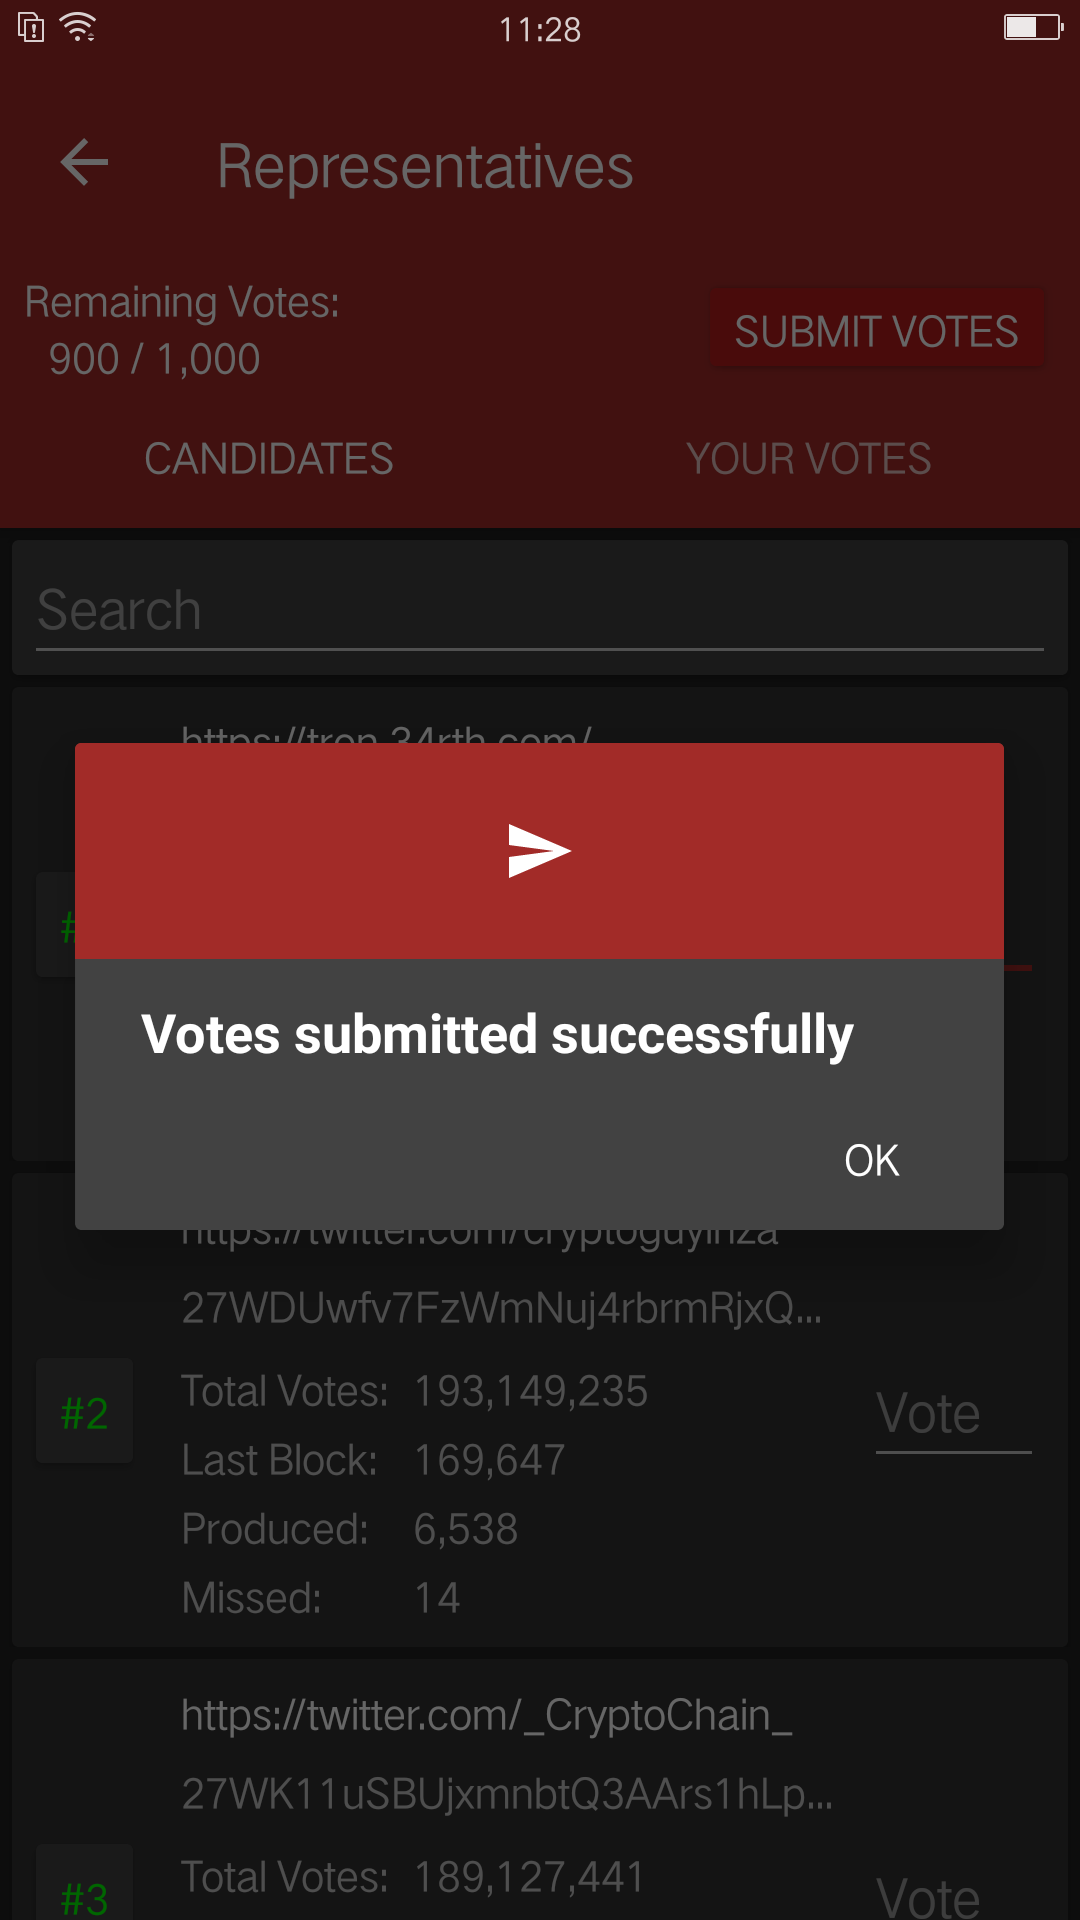
Tap "SUBMIT", enter the number of votes and your password and submit votes.
Enter your password and confirm your votes.
-
You can check your votes in the "CANDIDATES" tab and in "YOUR VOTES" tab.

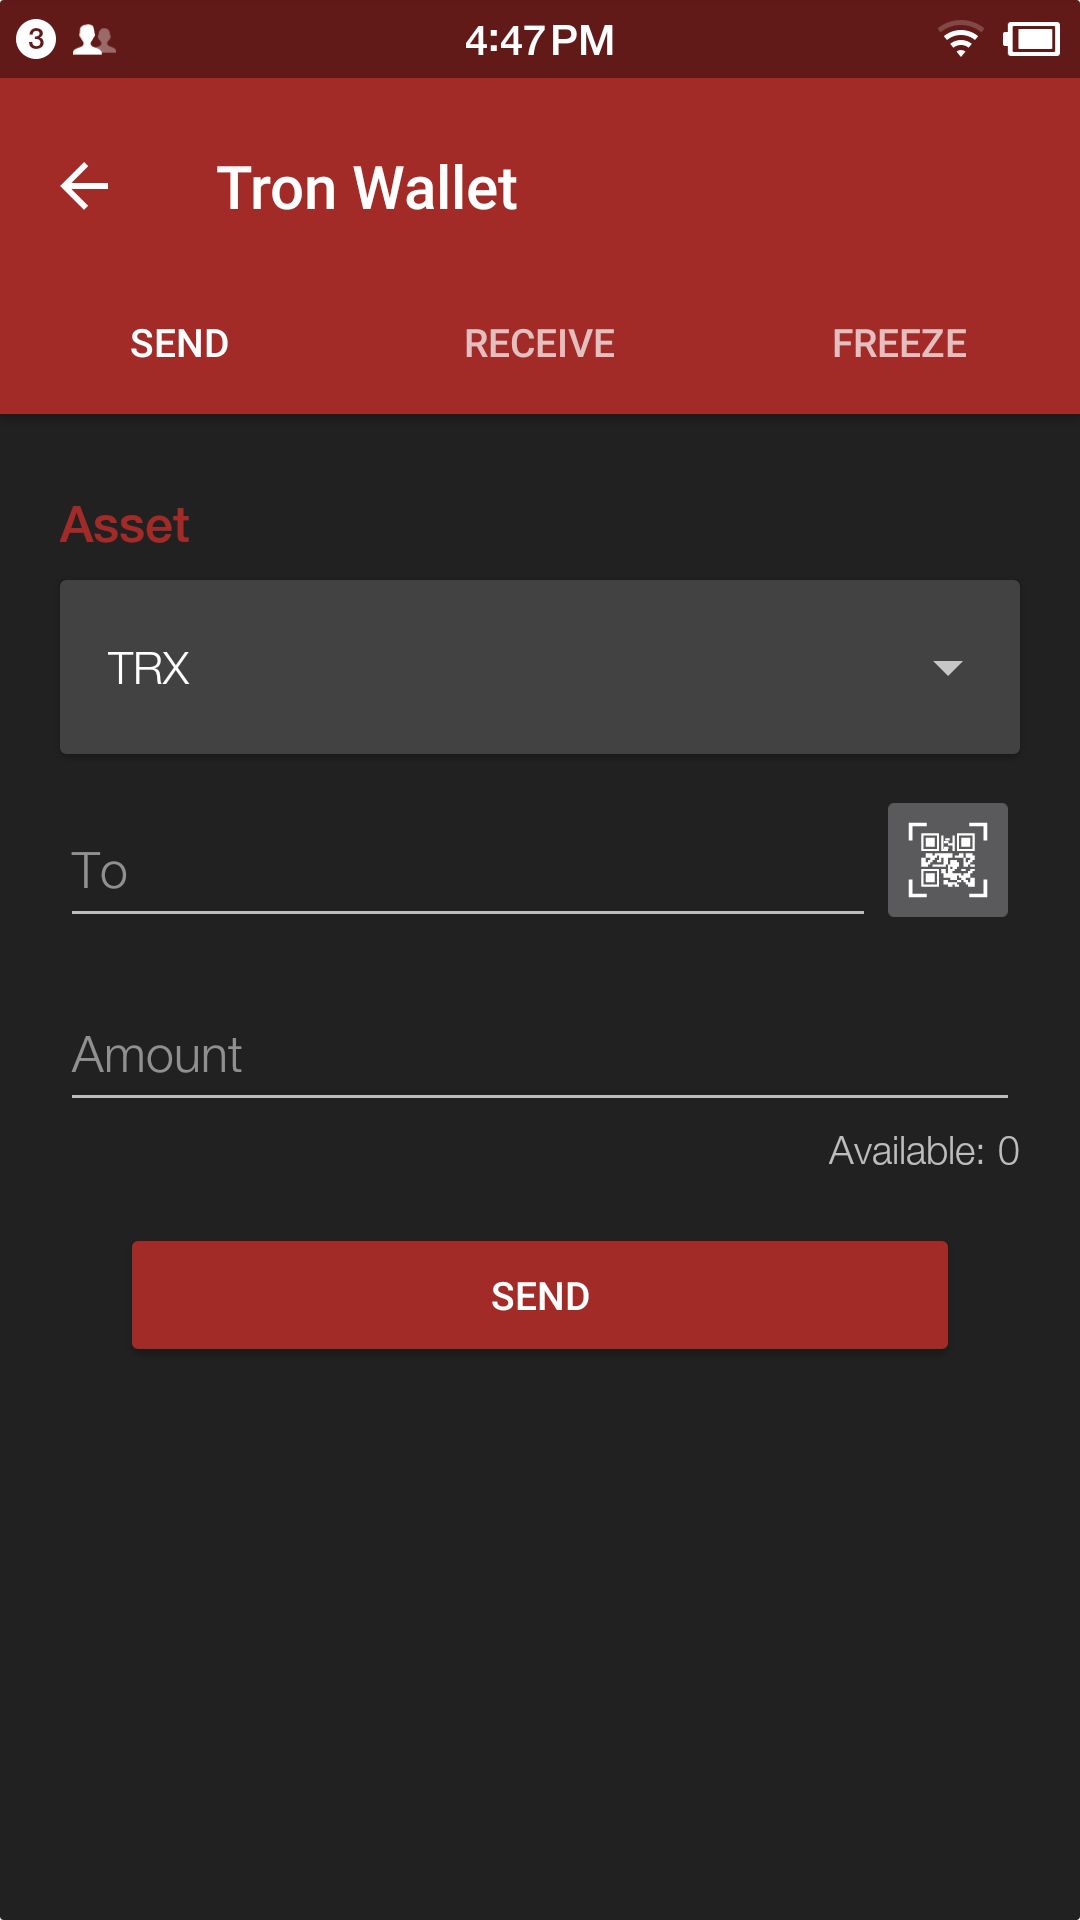
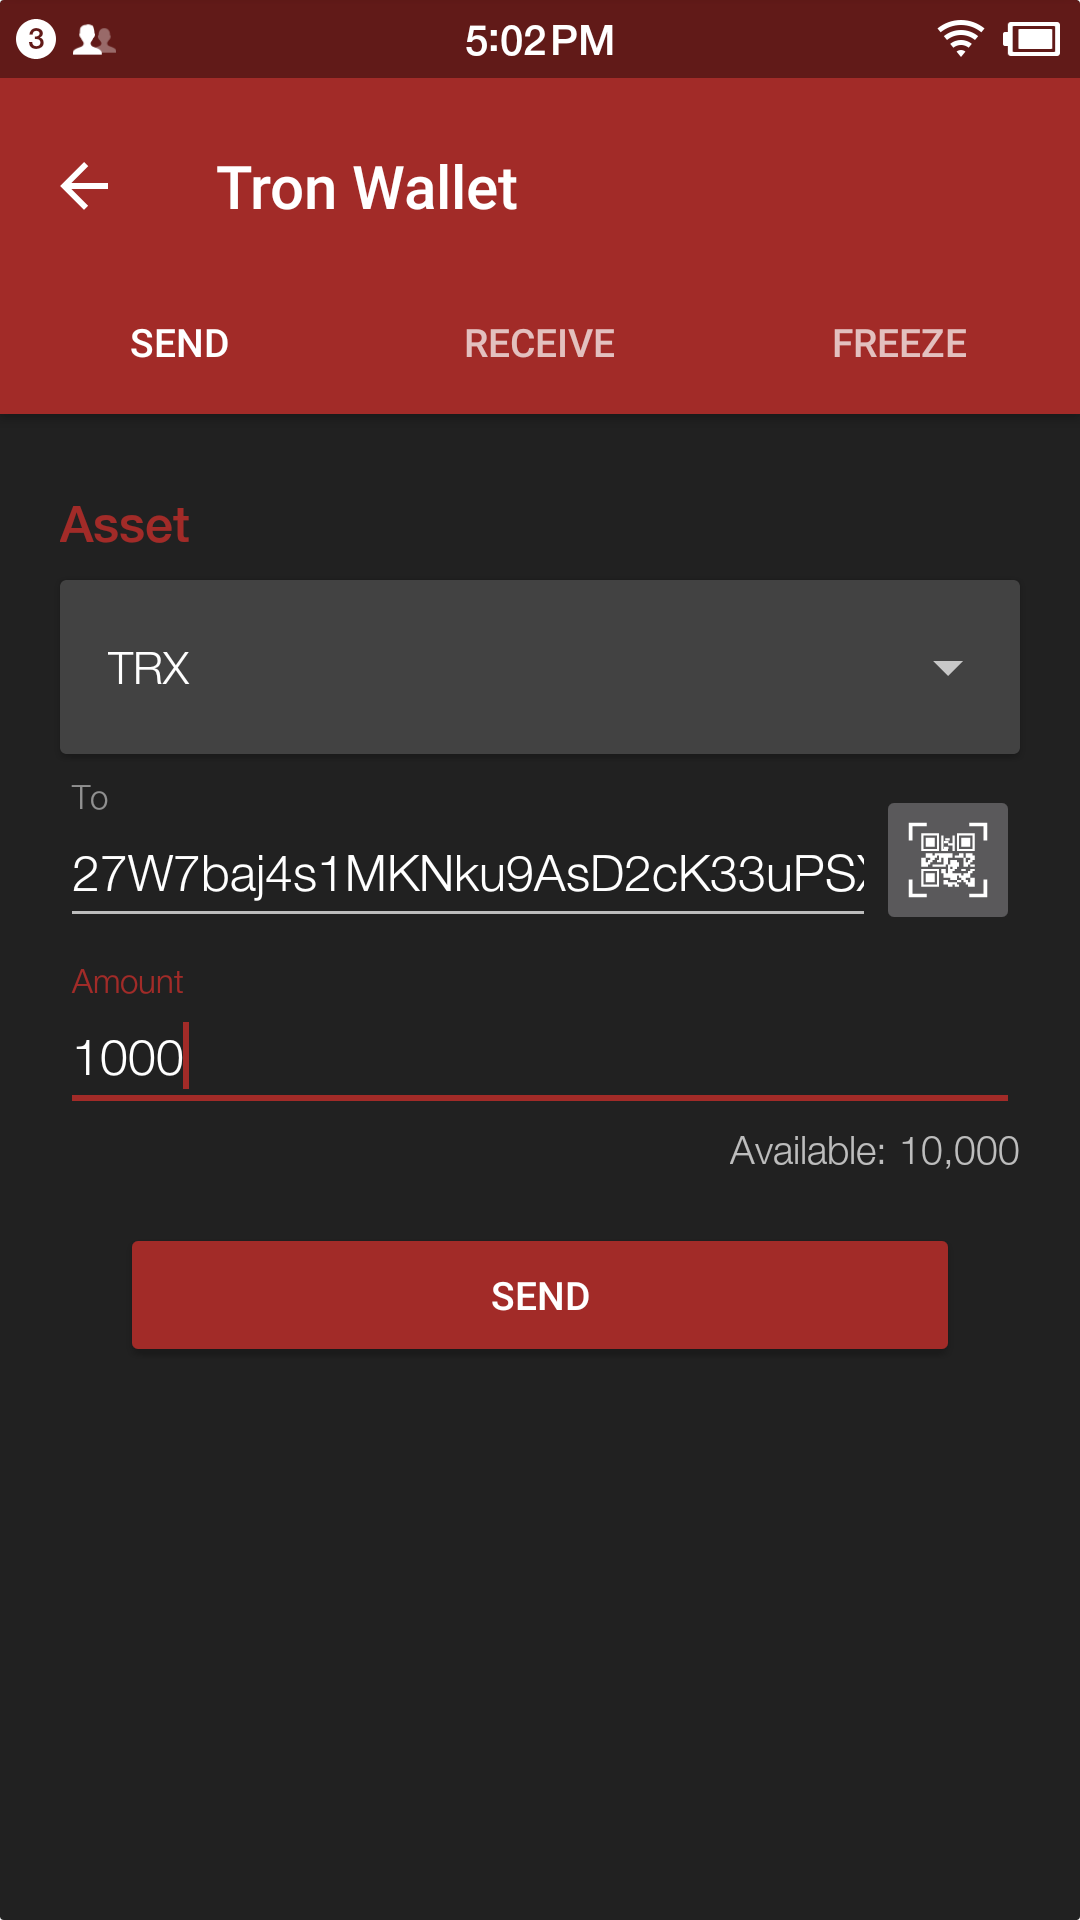
Token Transfer
-
Enter account page.
-
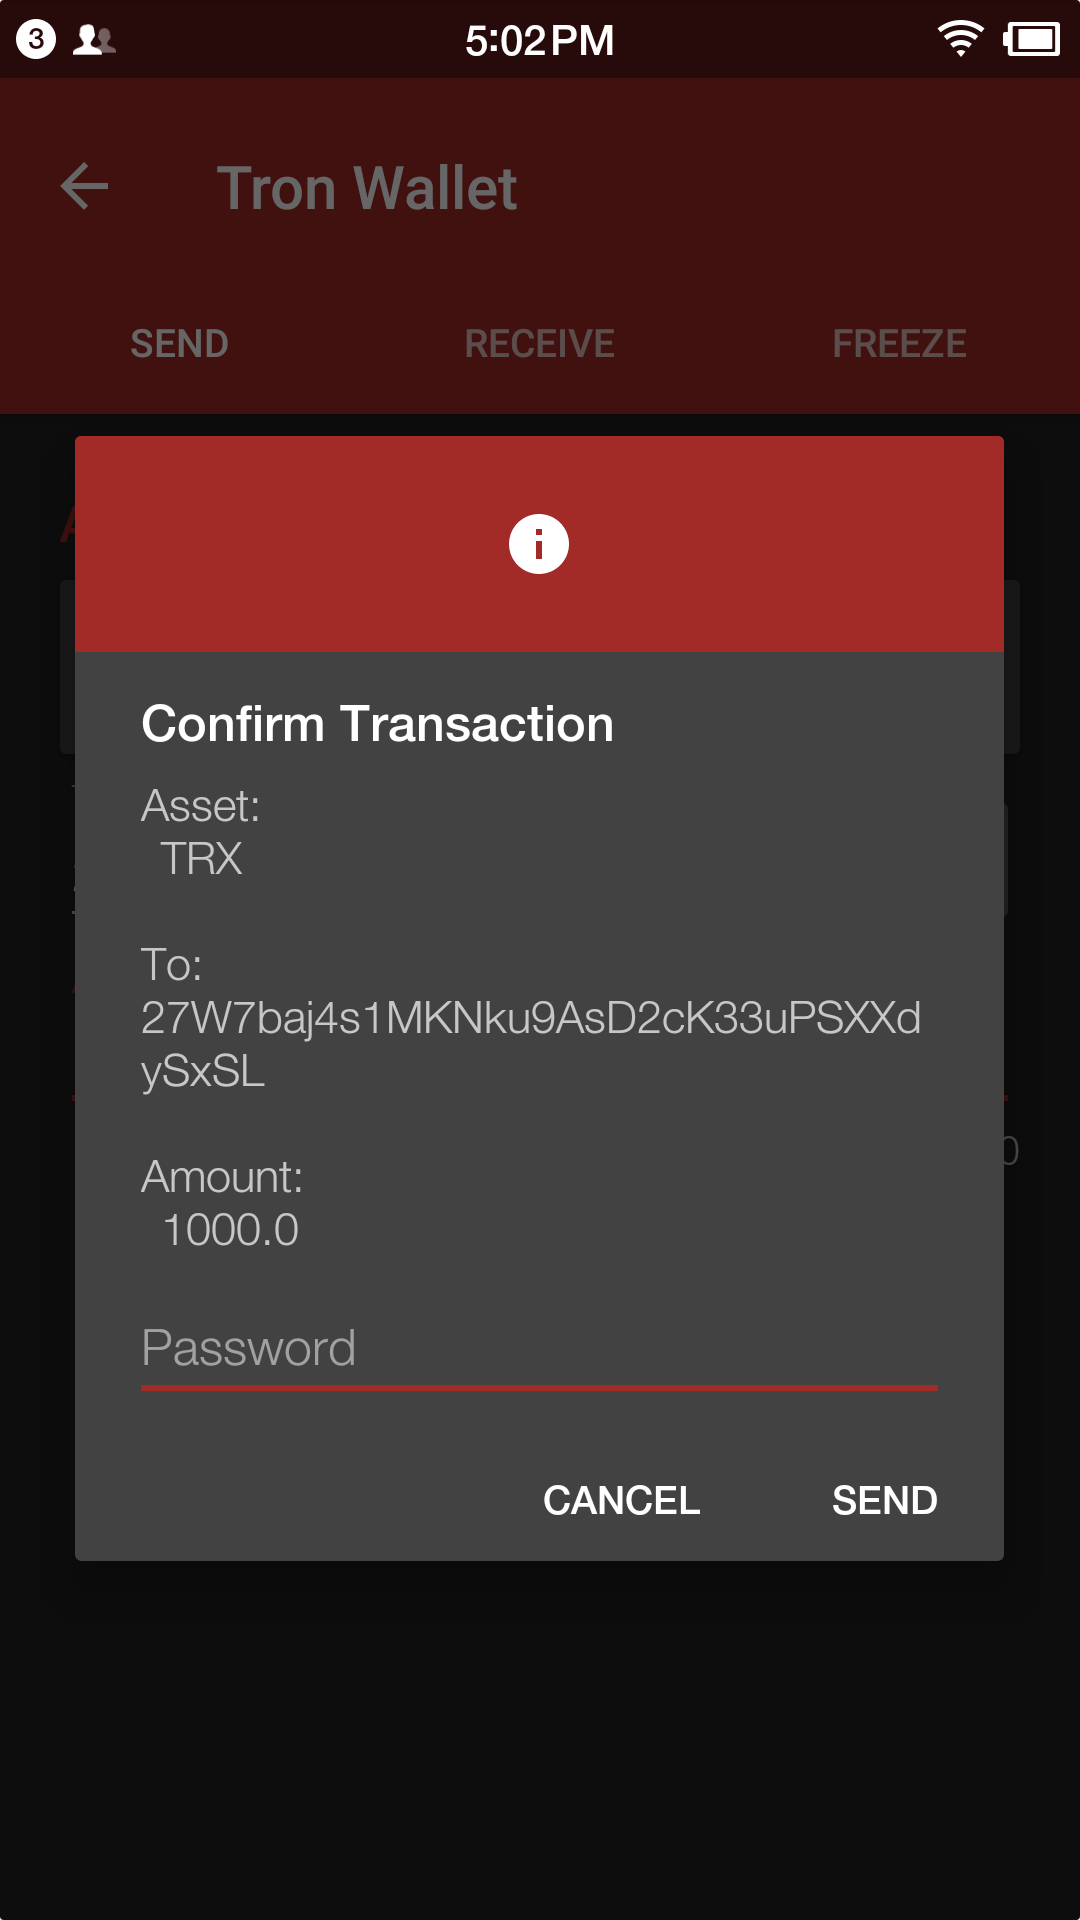
Enter your address or scan QR-code to extract address. Enter the amount of TRX for transfer and tap "SEND".
Tap "RECEIVE" and you may display your wallet public address and also it's QR code for token transfer.
-
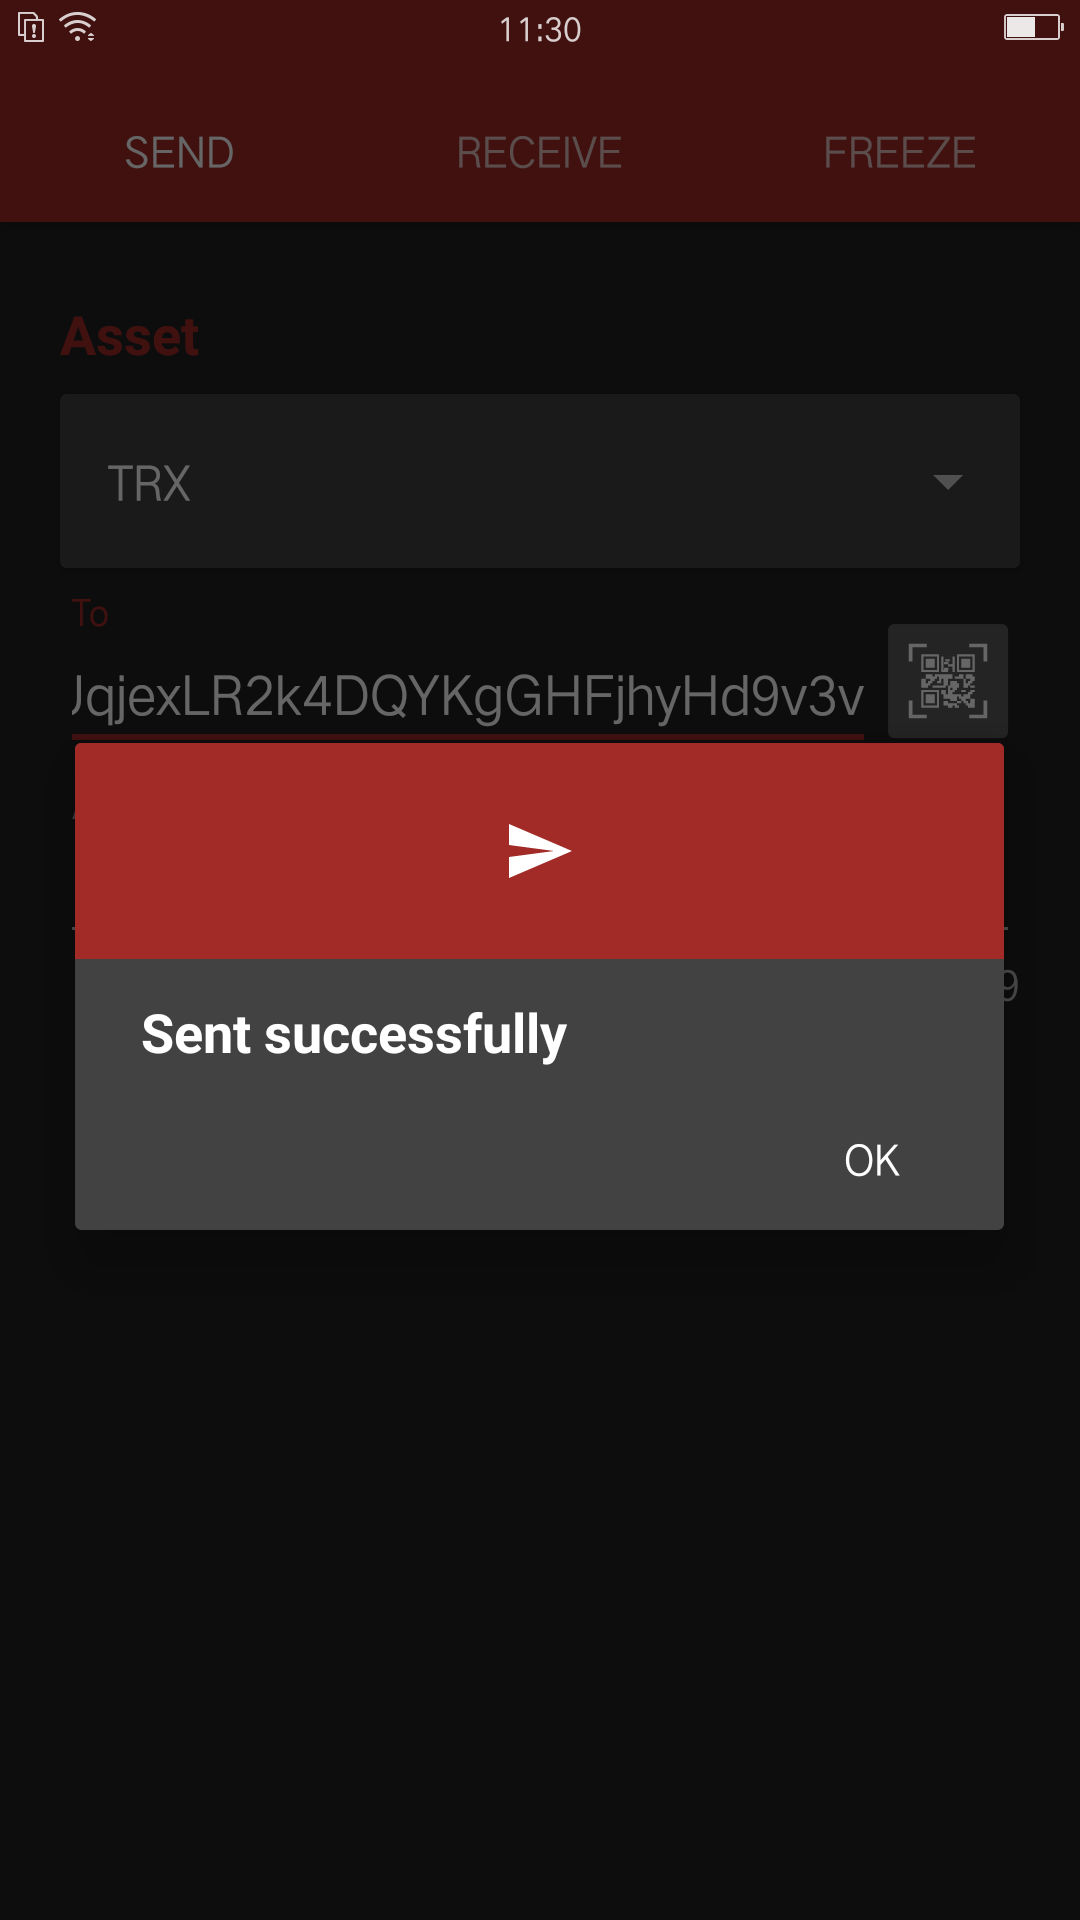
Enter account password and tap "SEND", and you will see the message of SENT SUCCESSFULLY.
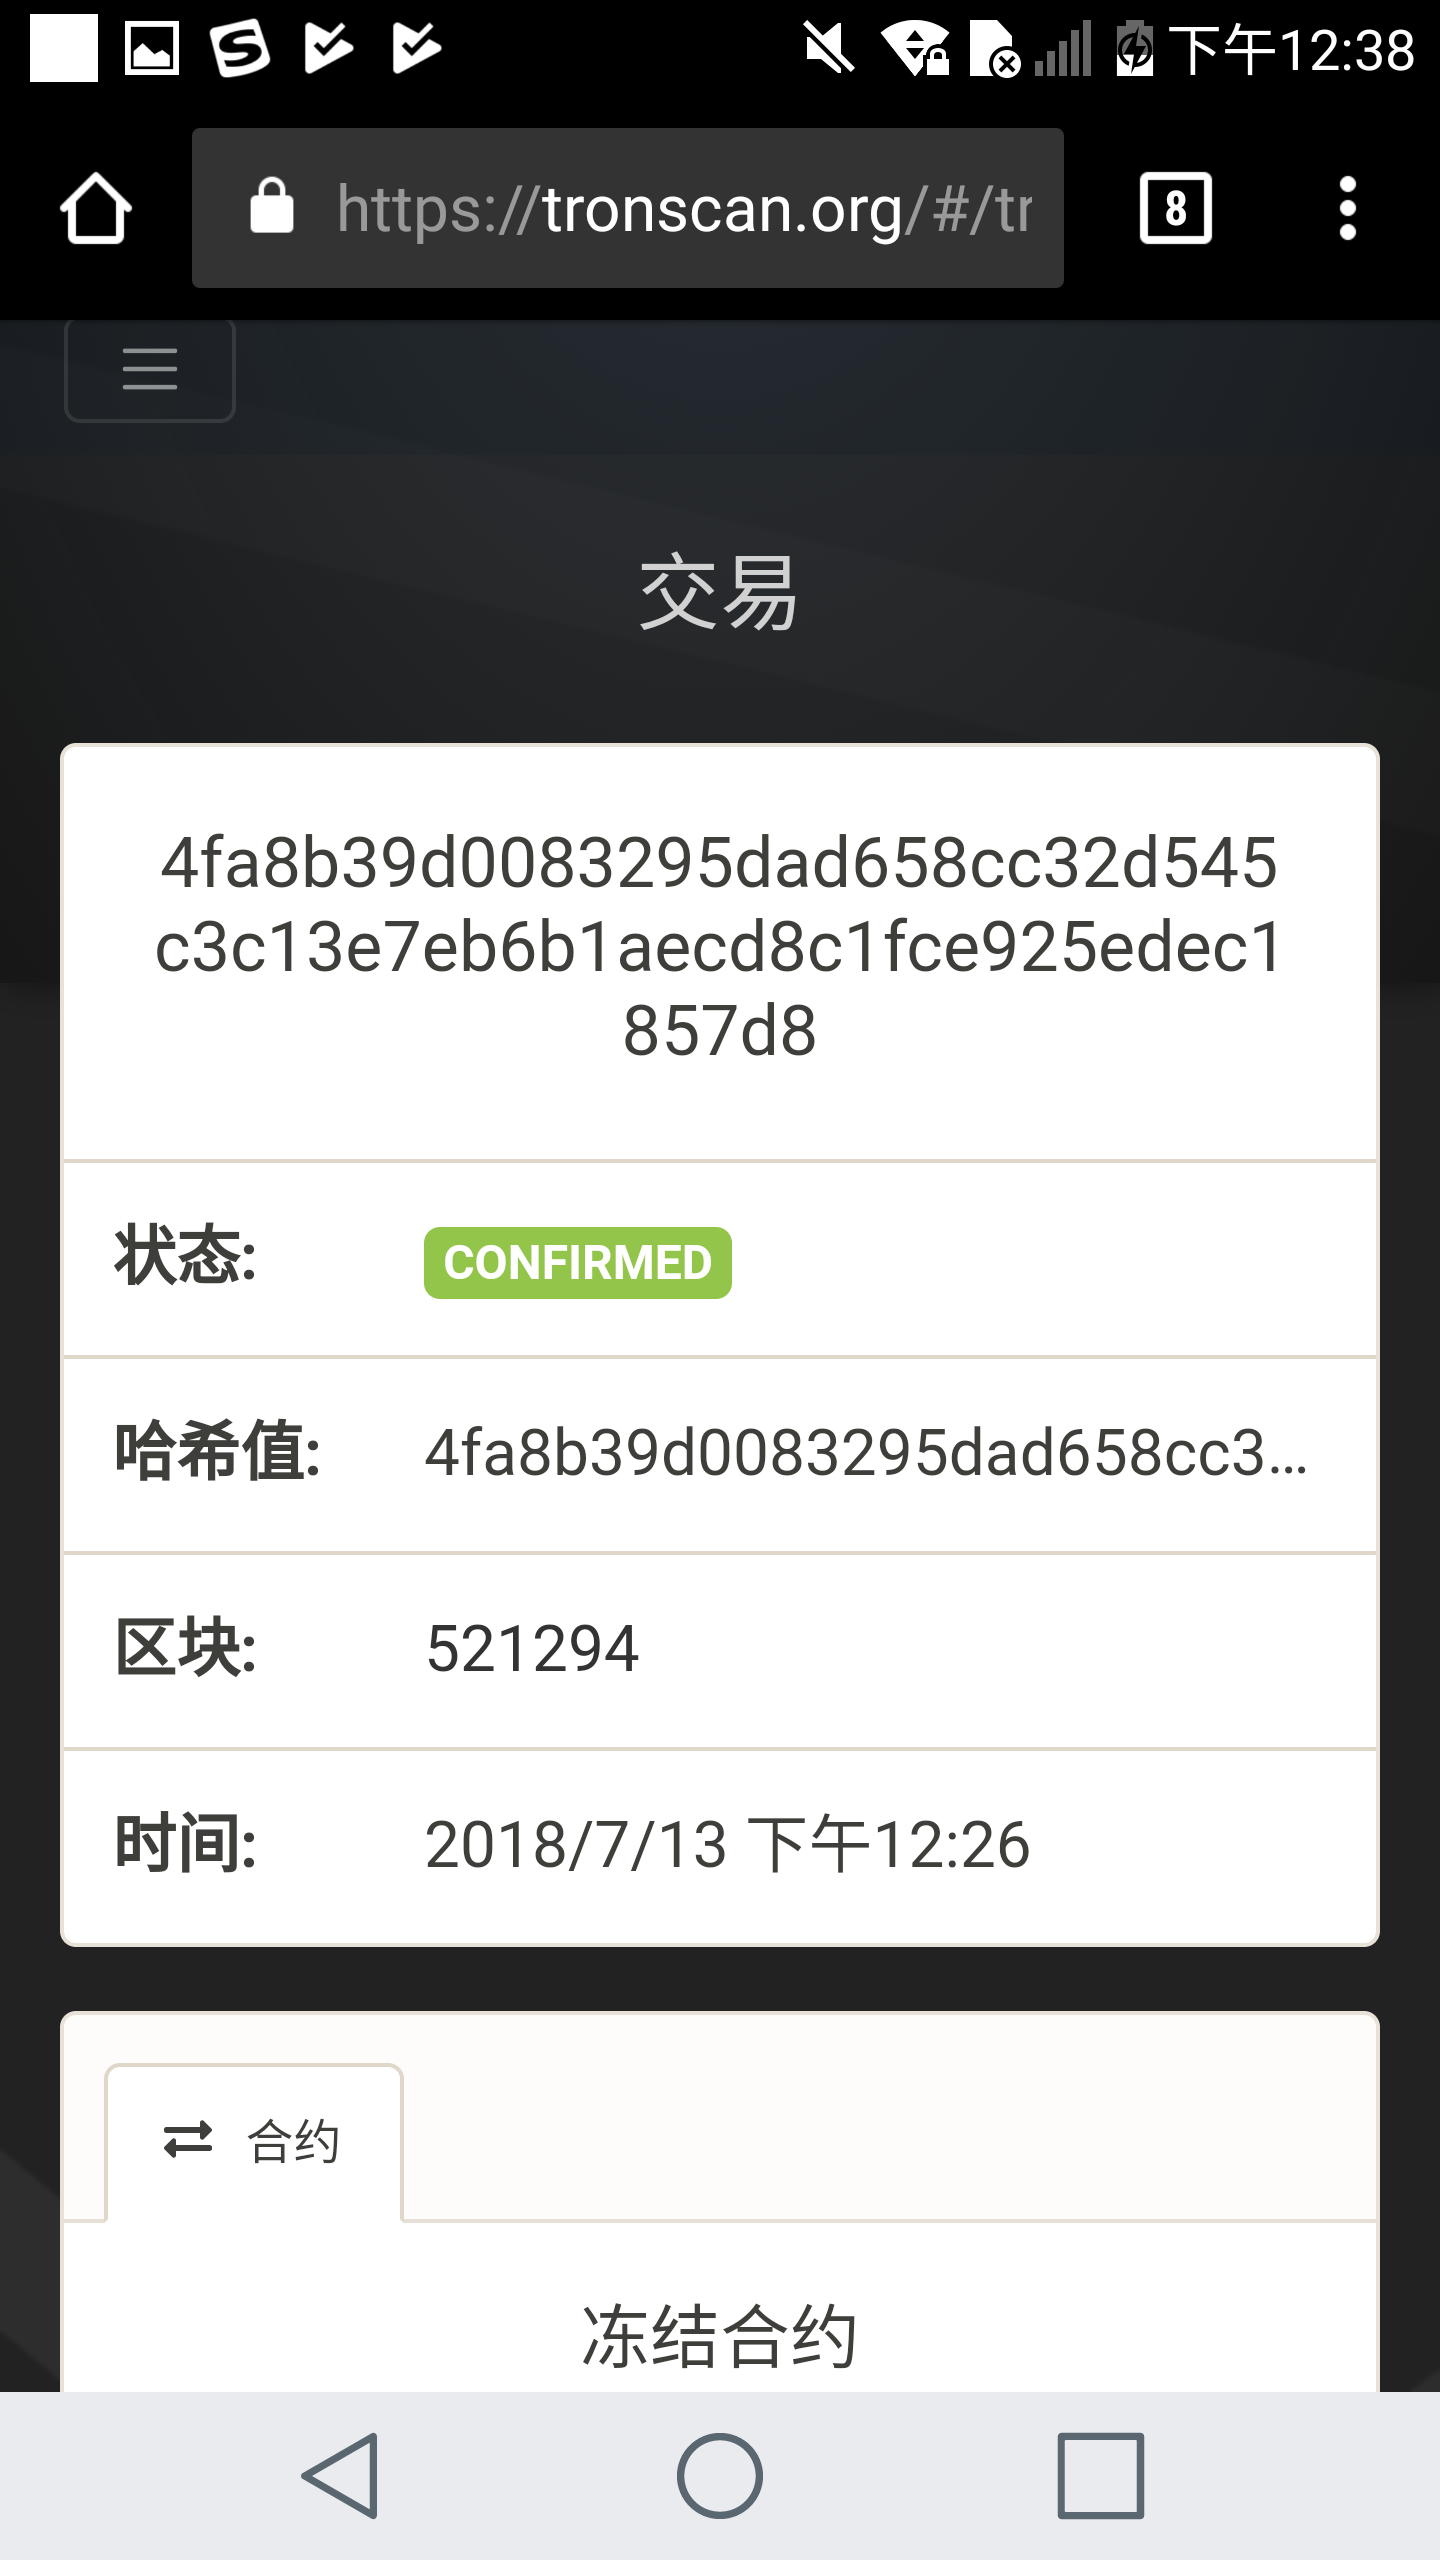
Check History
-
Enter history page.
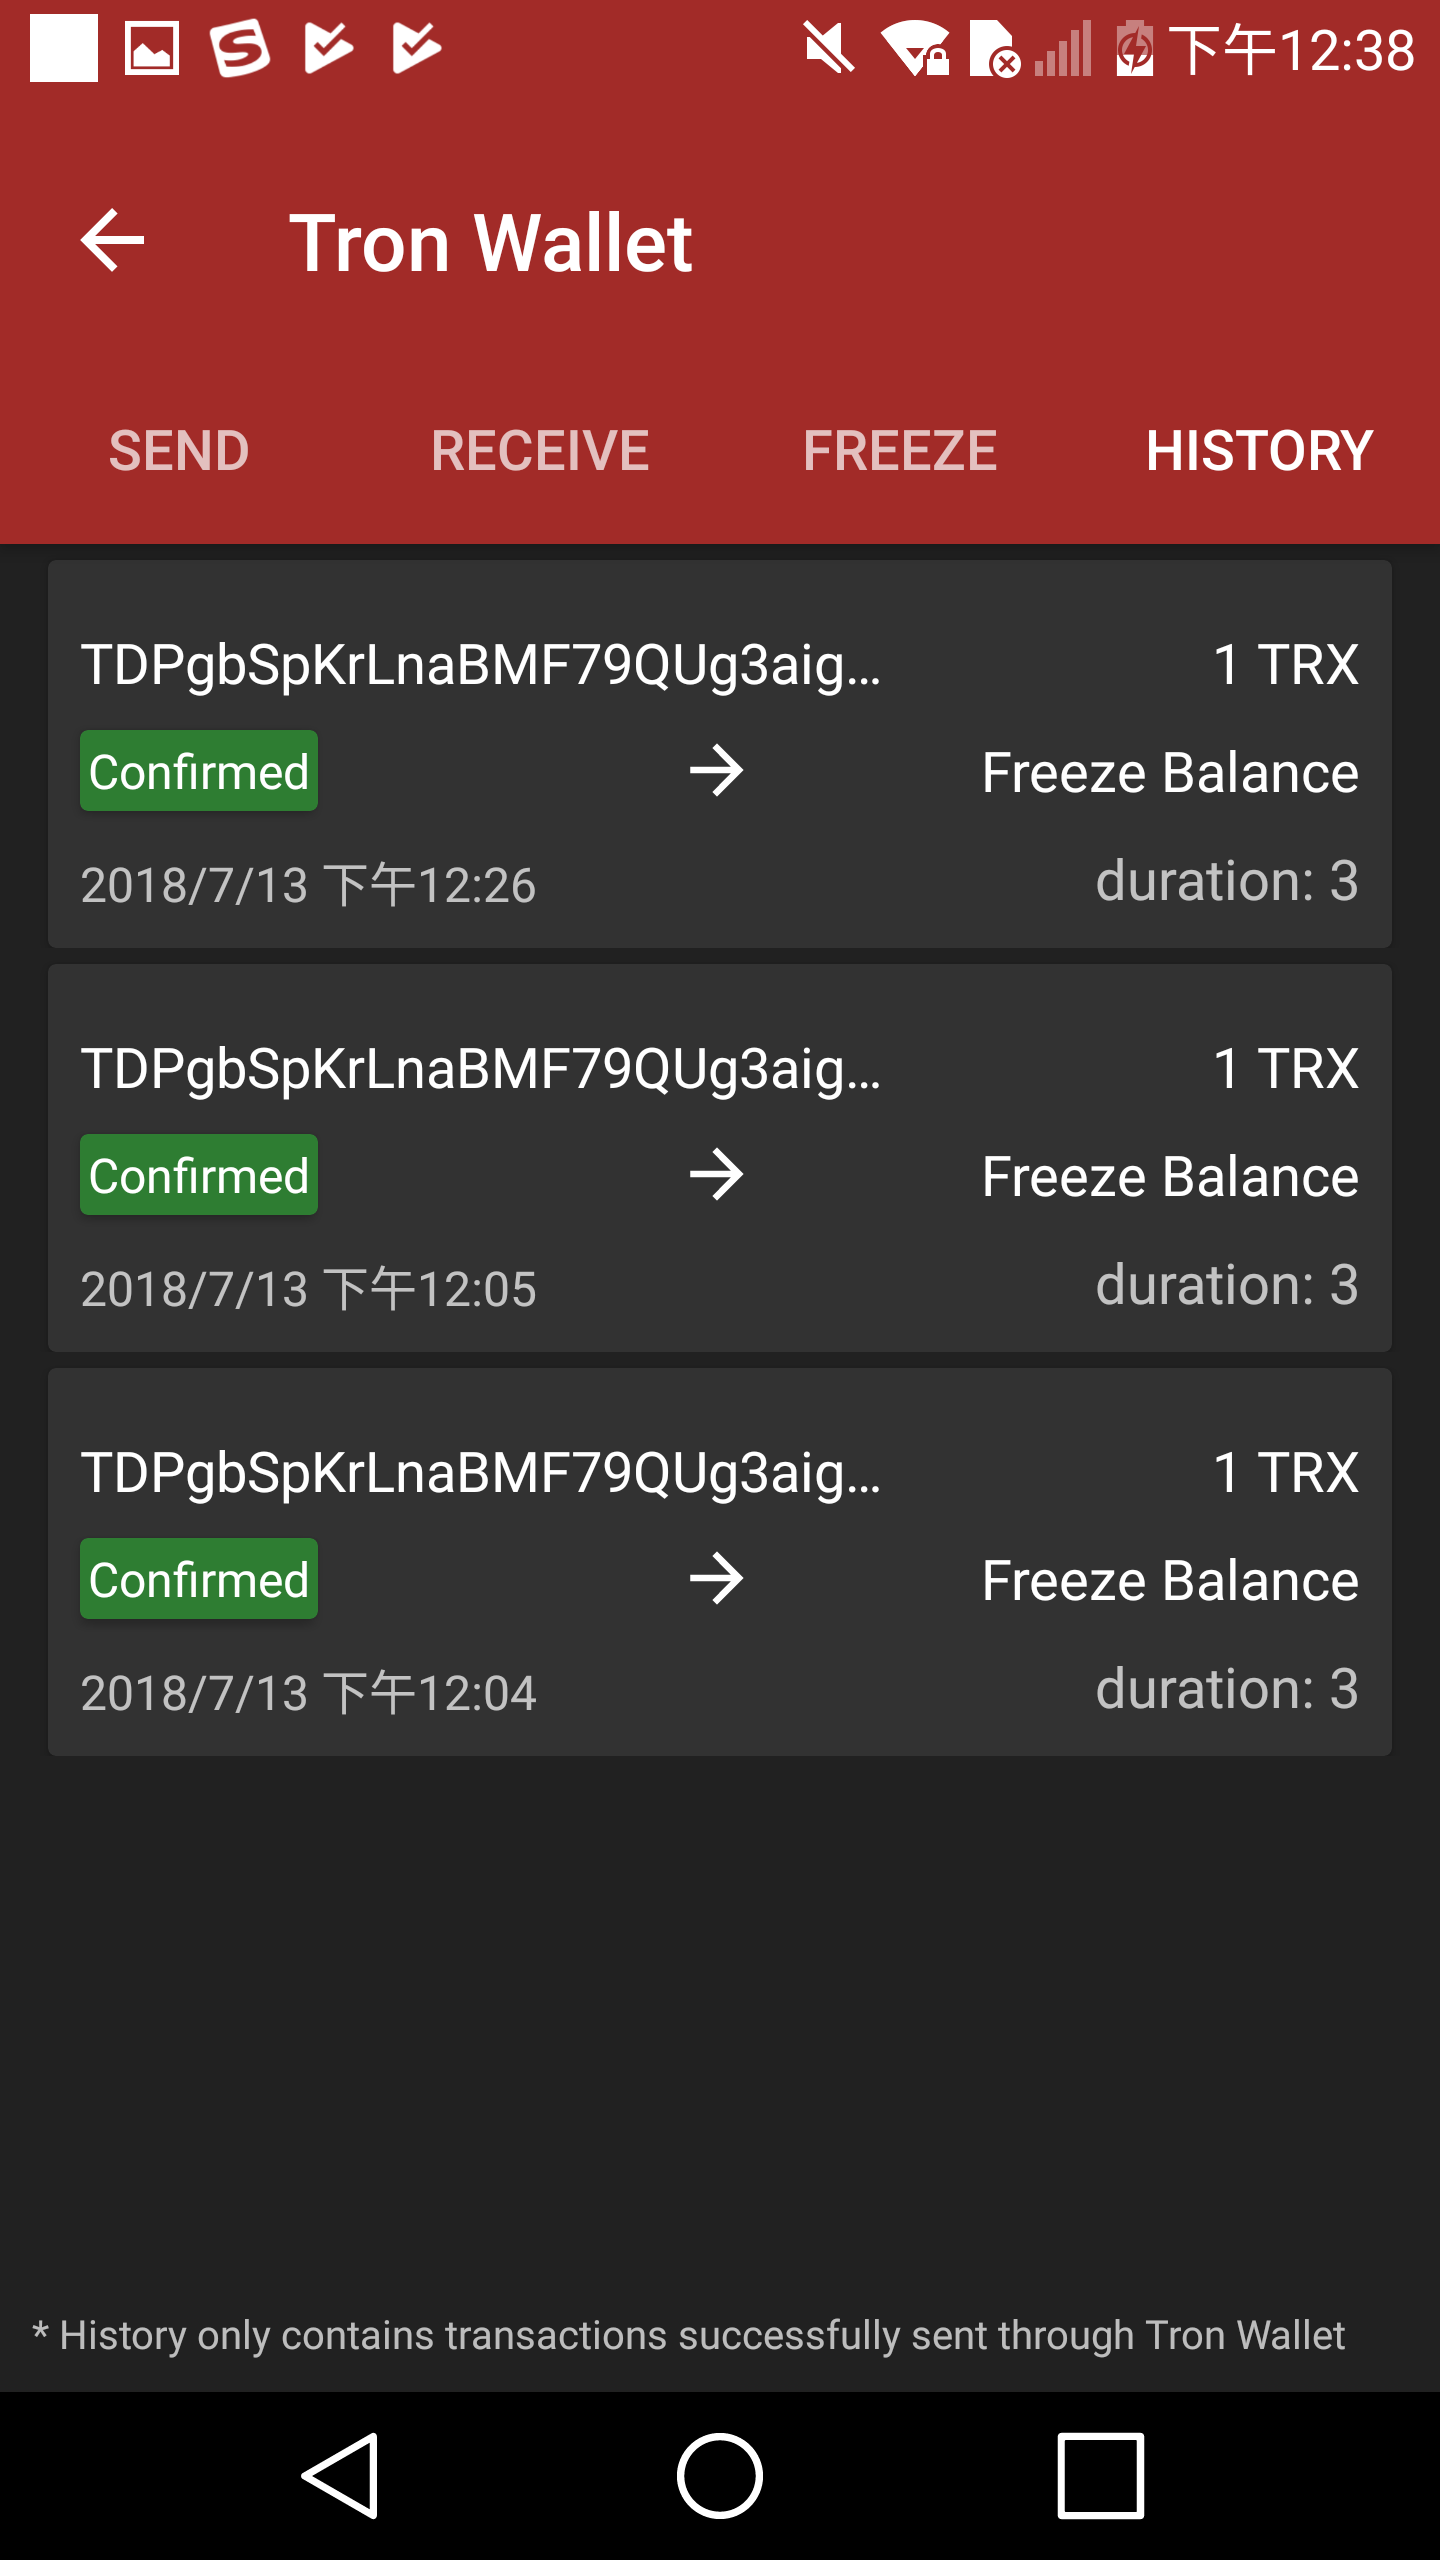
-
Check each transaction information.
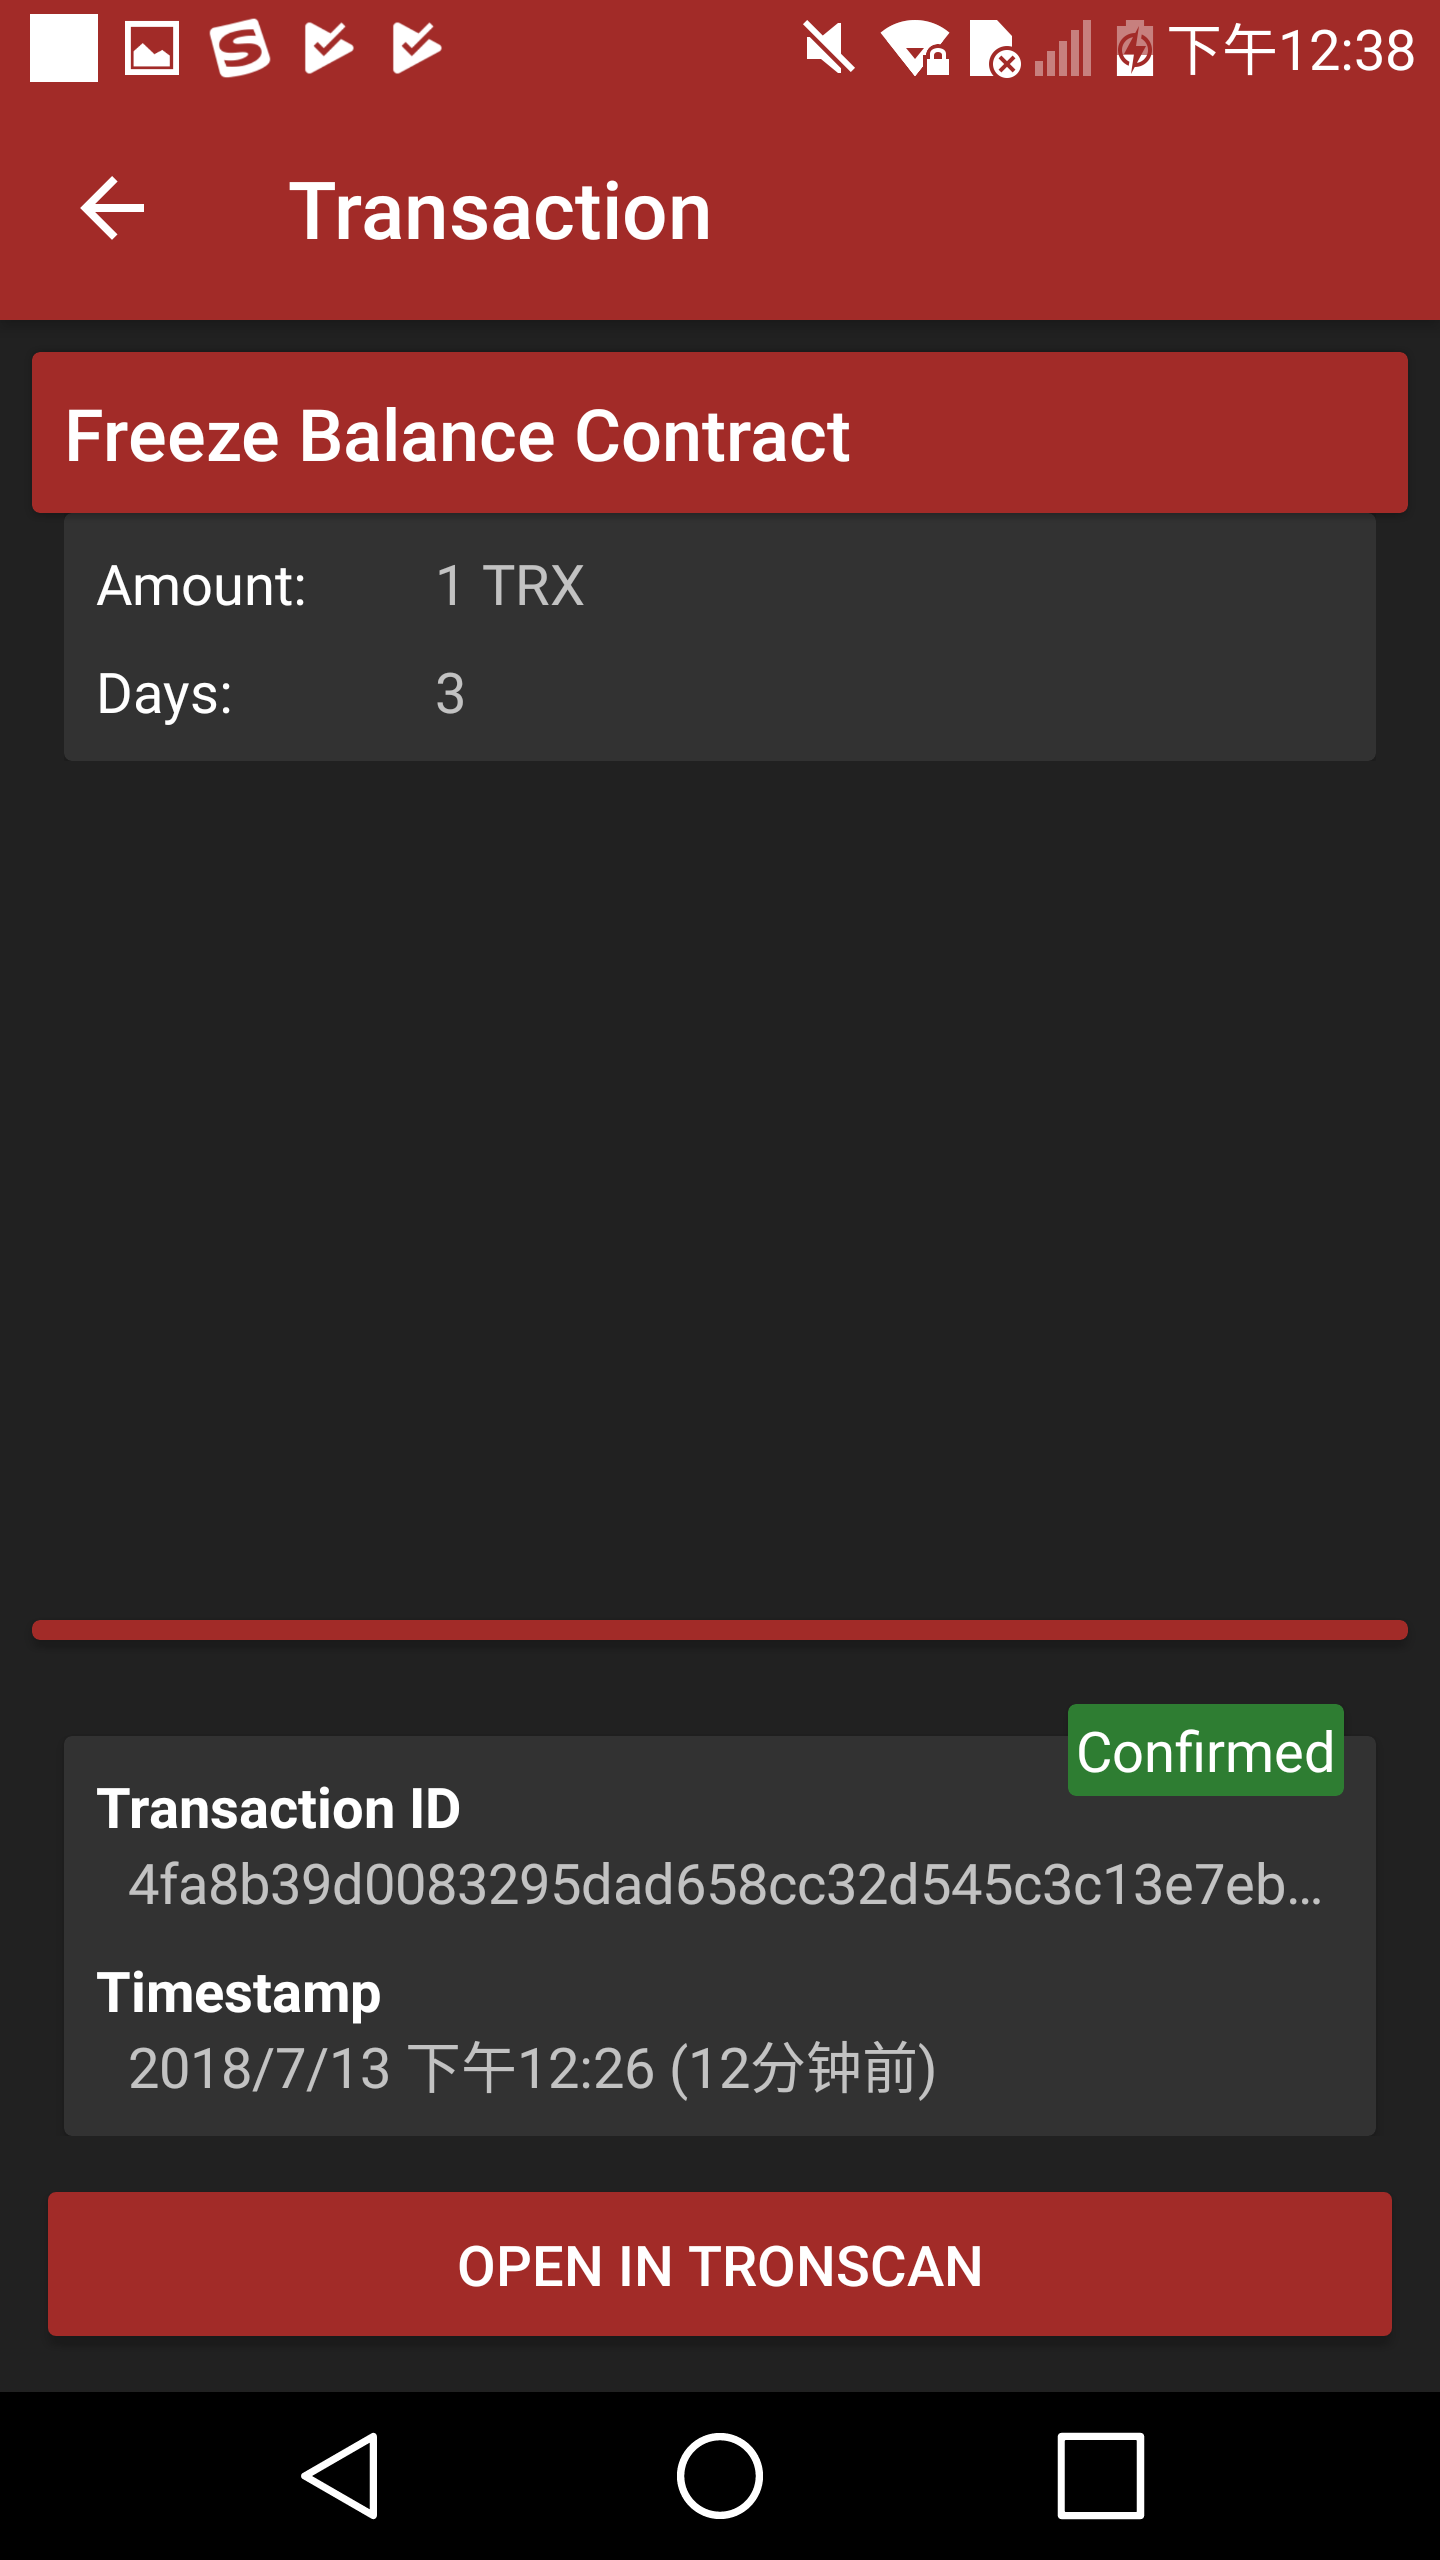
-
Check transaction information on Tronscan.
Updated 4 months ago